
A few days ago we had dismantled the Surface Pro 4. We already had some understanding of the internal structure of the new generation of Sophie 4, although the Surface Pro 4 has already represented Microsoft's latest technology, but it is more concerned or is equipped with a discrete graphics card. The Surface Book, in this compact body plug a discrete graphics card. The machine uses a graphics card integrated in the keyboard, and the motherboard and processor part of the integrated design in the screen, can be described as full of new ideas, quite innovative. At the same time, Microsoft also announced that its performance is more powerful than that of Apple's Macbook Pro, which has aroused widespread concern among digital enthusiasts. Today, let's take a look at what kind of black technology Microsoft has hidden in this compact notebook.

Let's first look at the Surface Book configuration parameters:
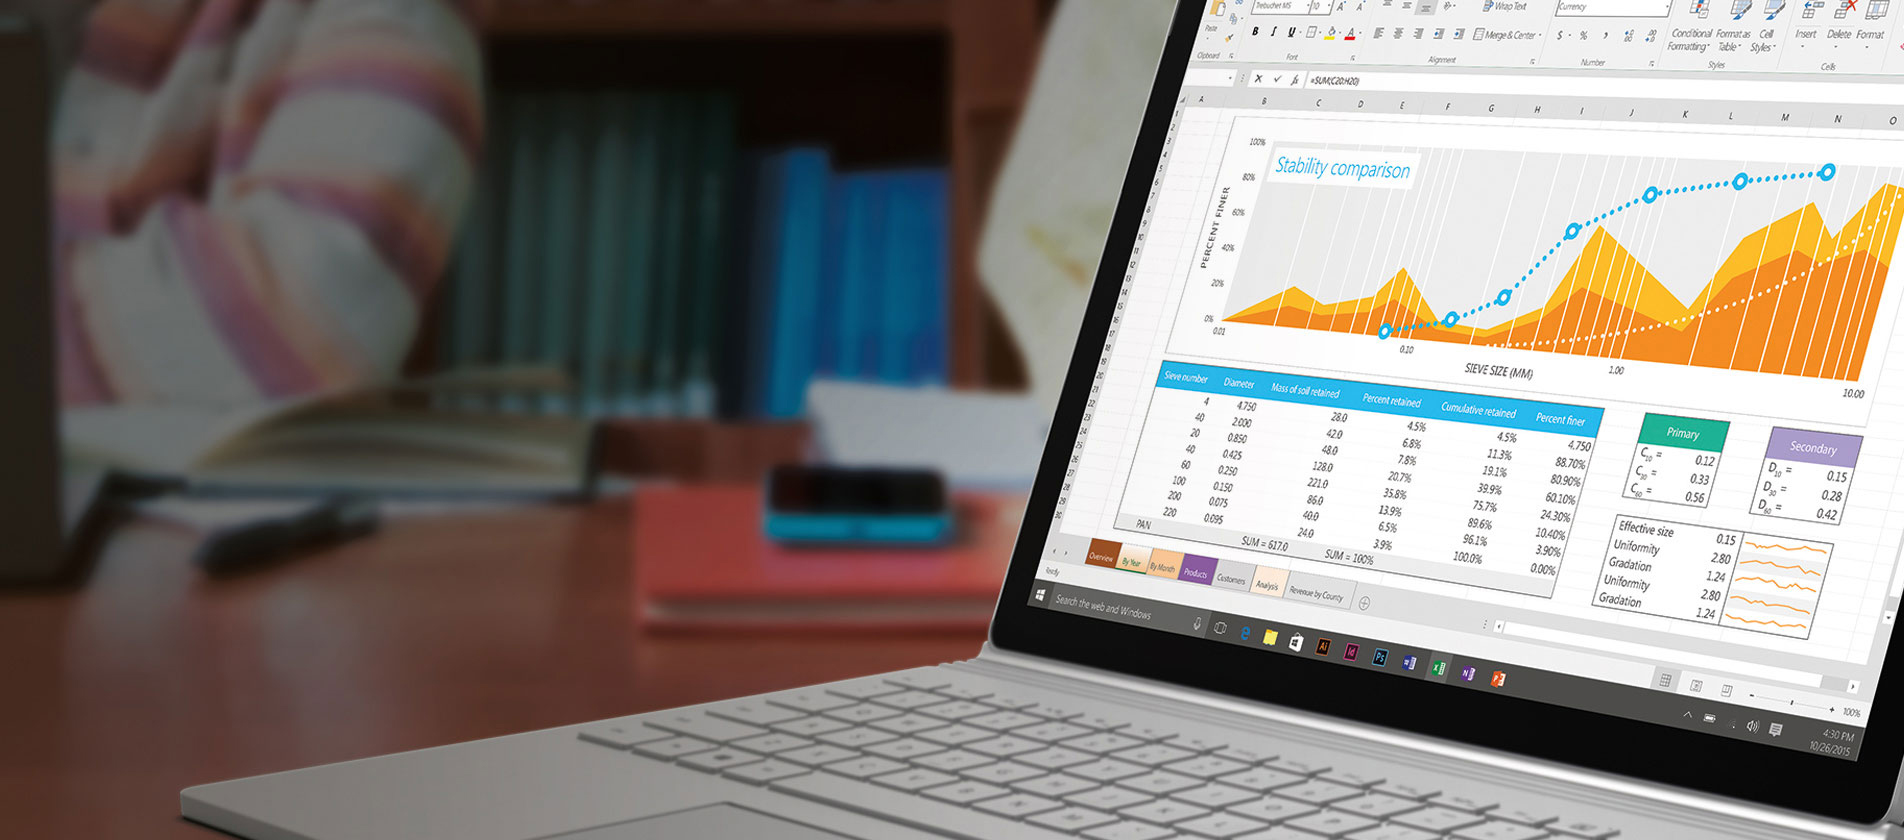
13.5-inch PixelSense multi-touch display with 3000 x 2000 resolution (267 PPI)
6th Generation Intel Core i5 + Custom NVIDIA GeForce GPU
8 GB of memory
128 GB Solid State Drive
802.11ac Standard Wi-Fi Wireless + Bluetooth 4.0
8 Megapixel rear camera with 1080p video capture + 5 megapixel front camera
Equipped with a pressure-sensitive pen, the screen has 1024 levels of pressure sensitivity
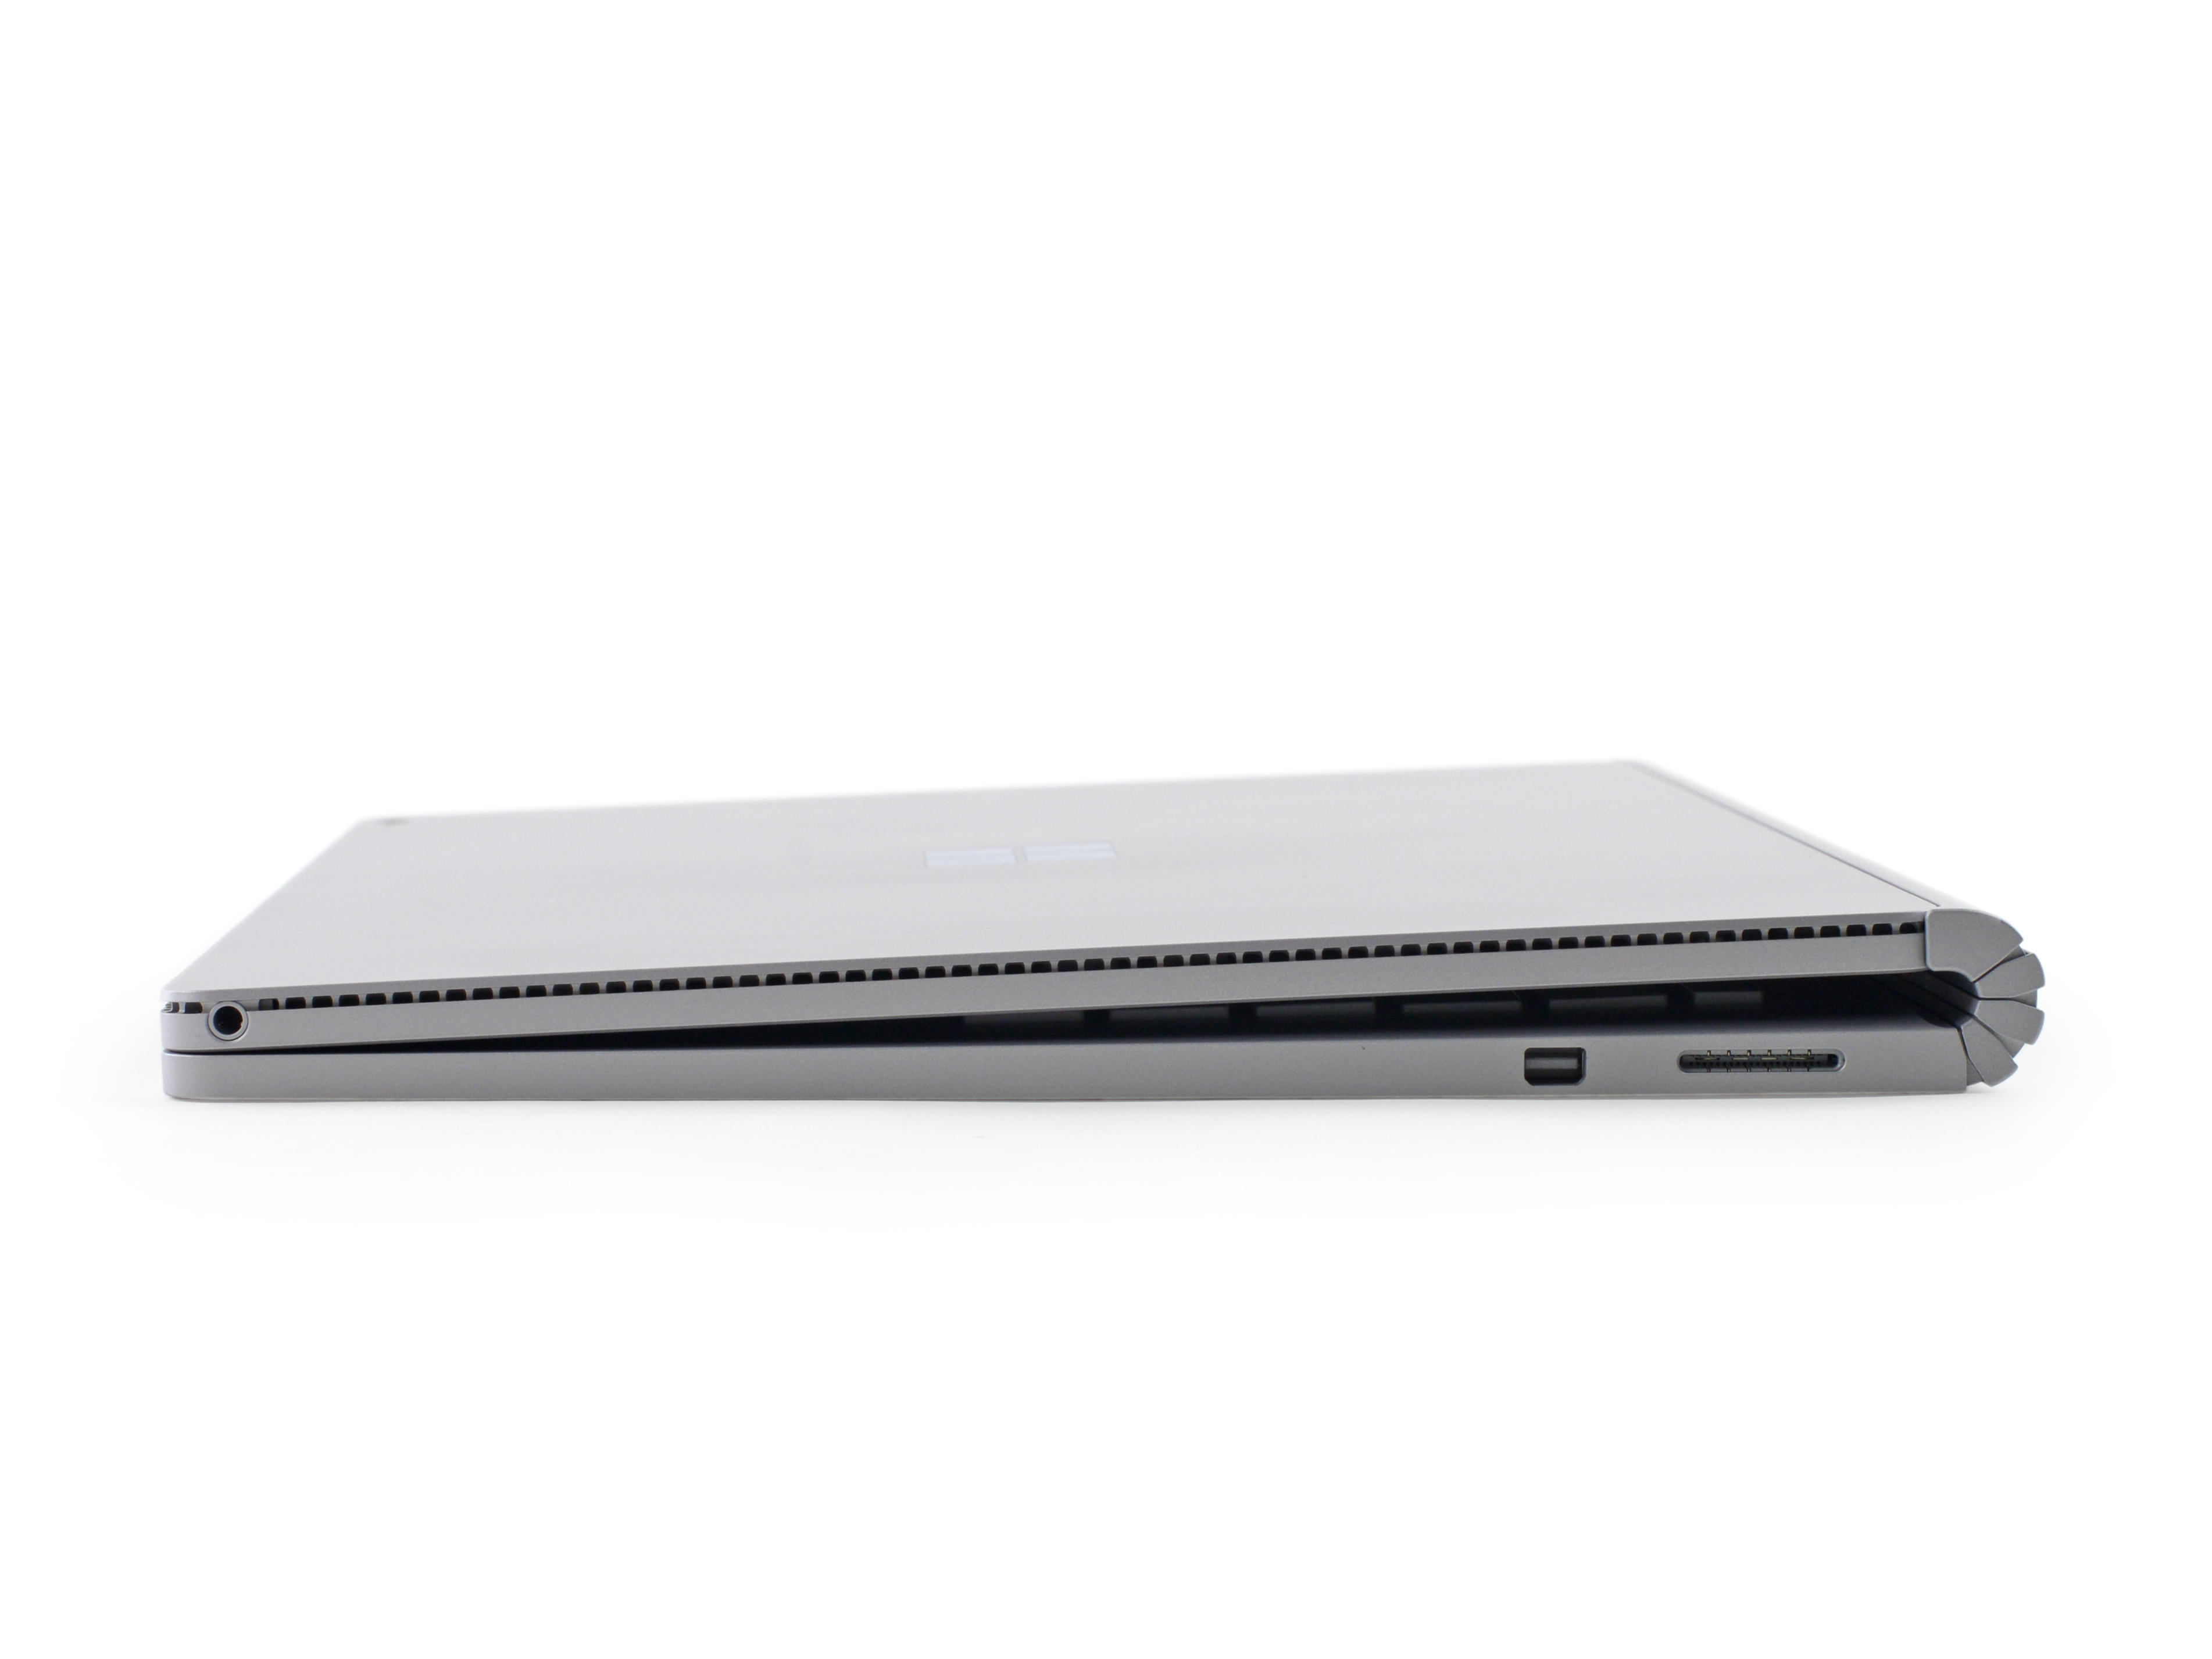
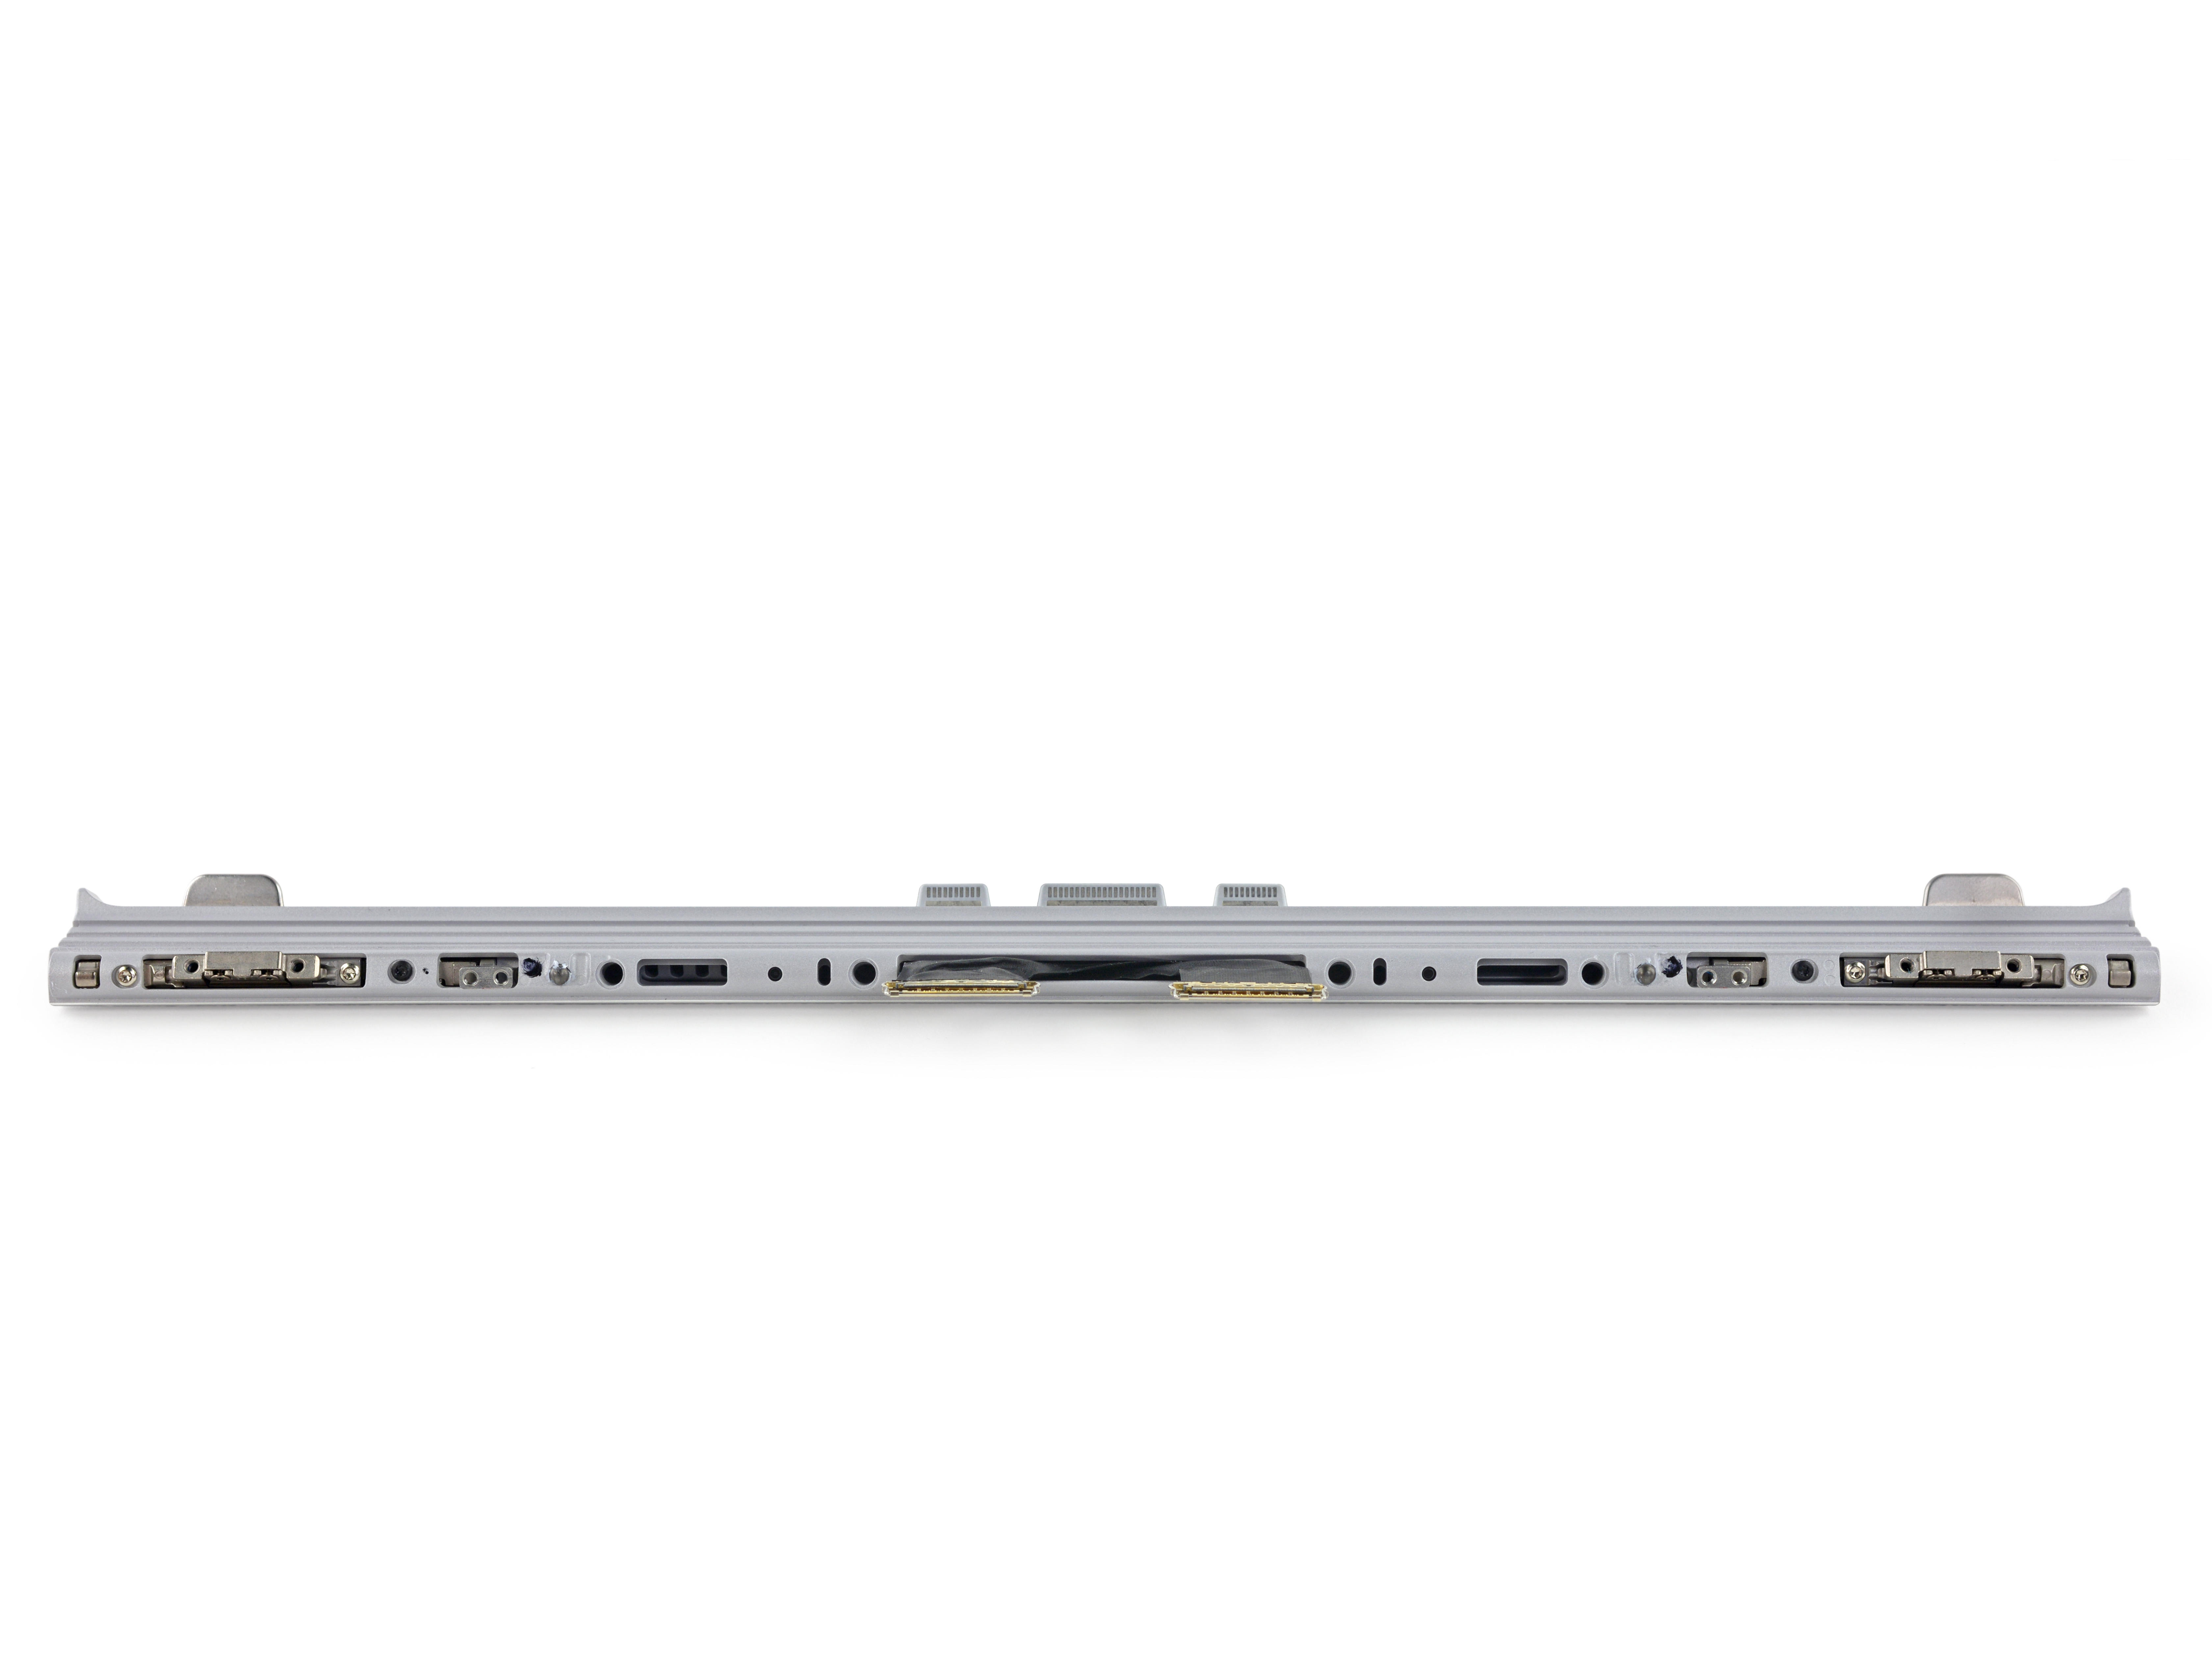
Let's take a look at what interfaces the whole machine has. The Mini DisplayPort interface and the Microsoft-specific SurfaceConnect port are on the right side.

There are two full-size USB 3.0 interfaces and an SD card reader on the left side.

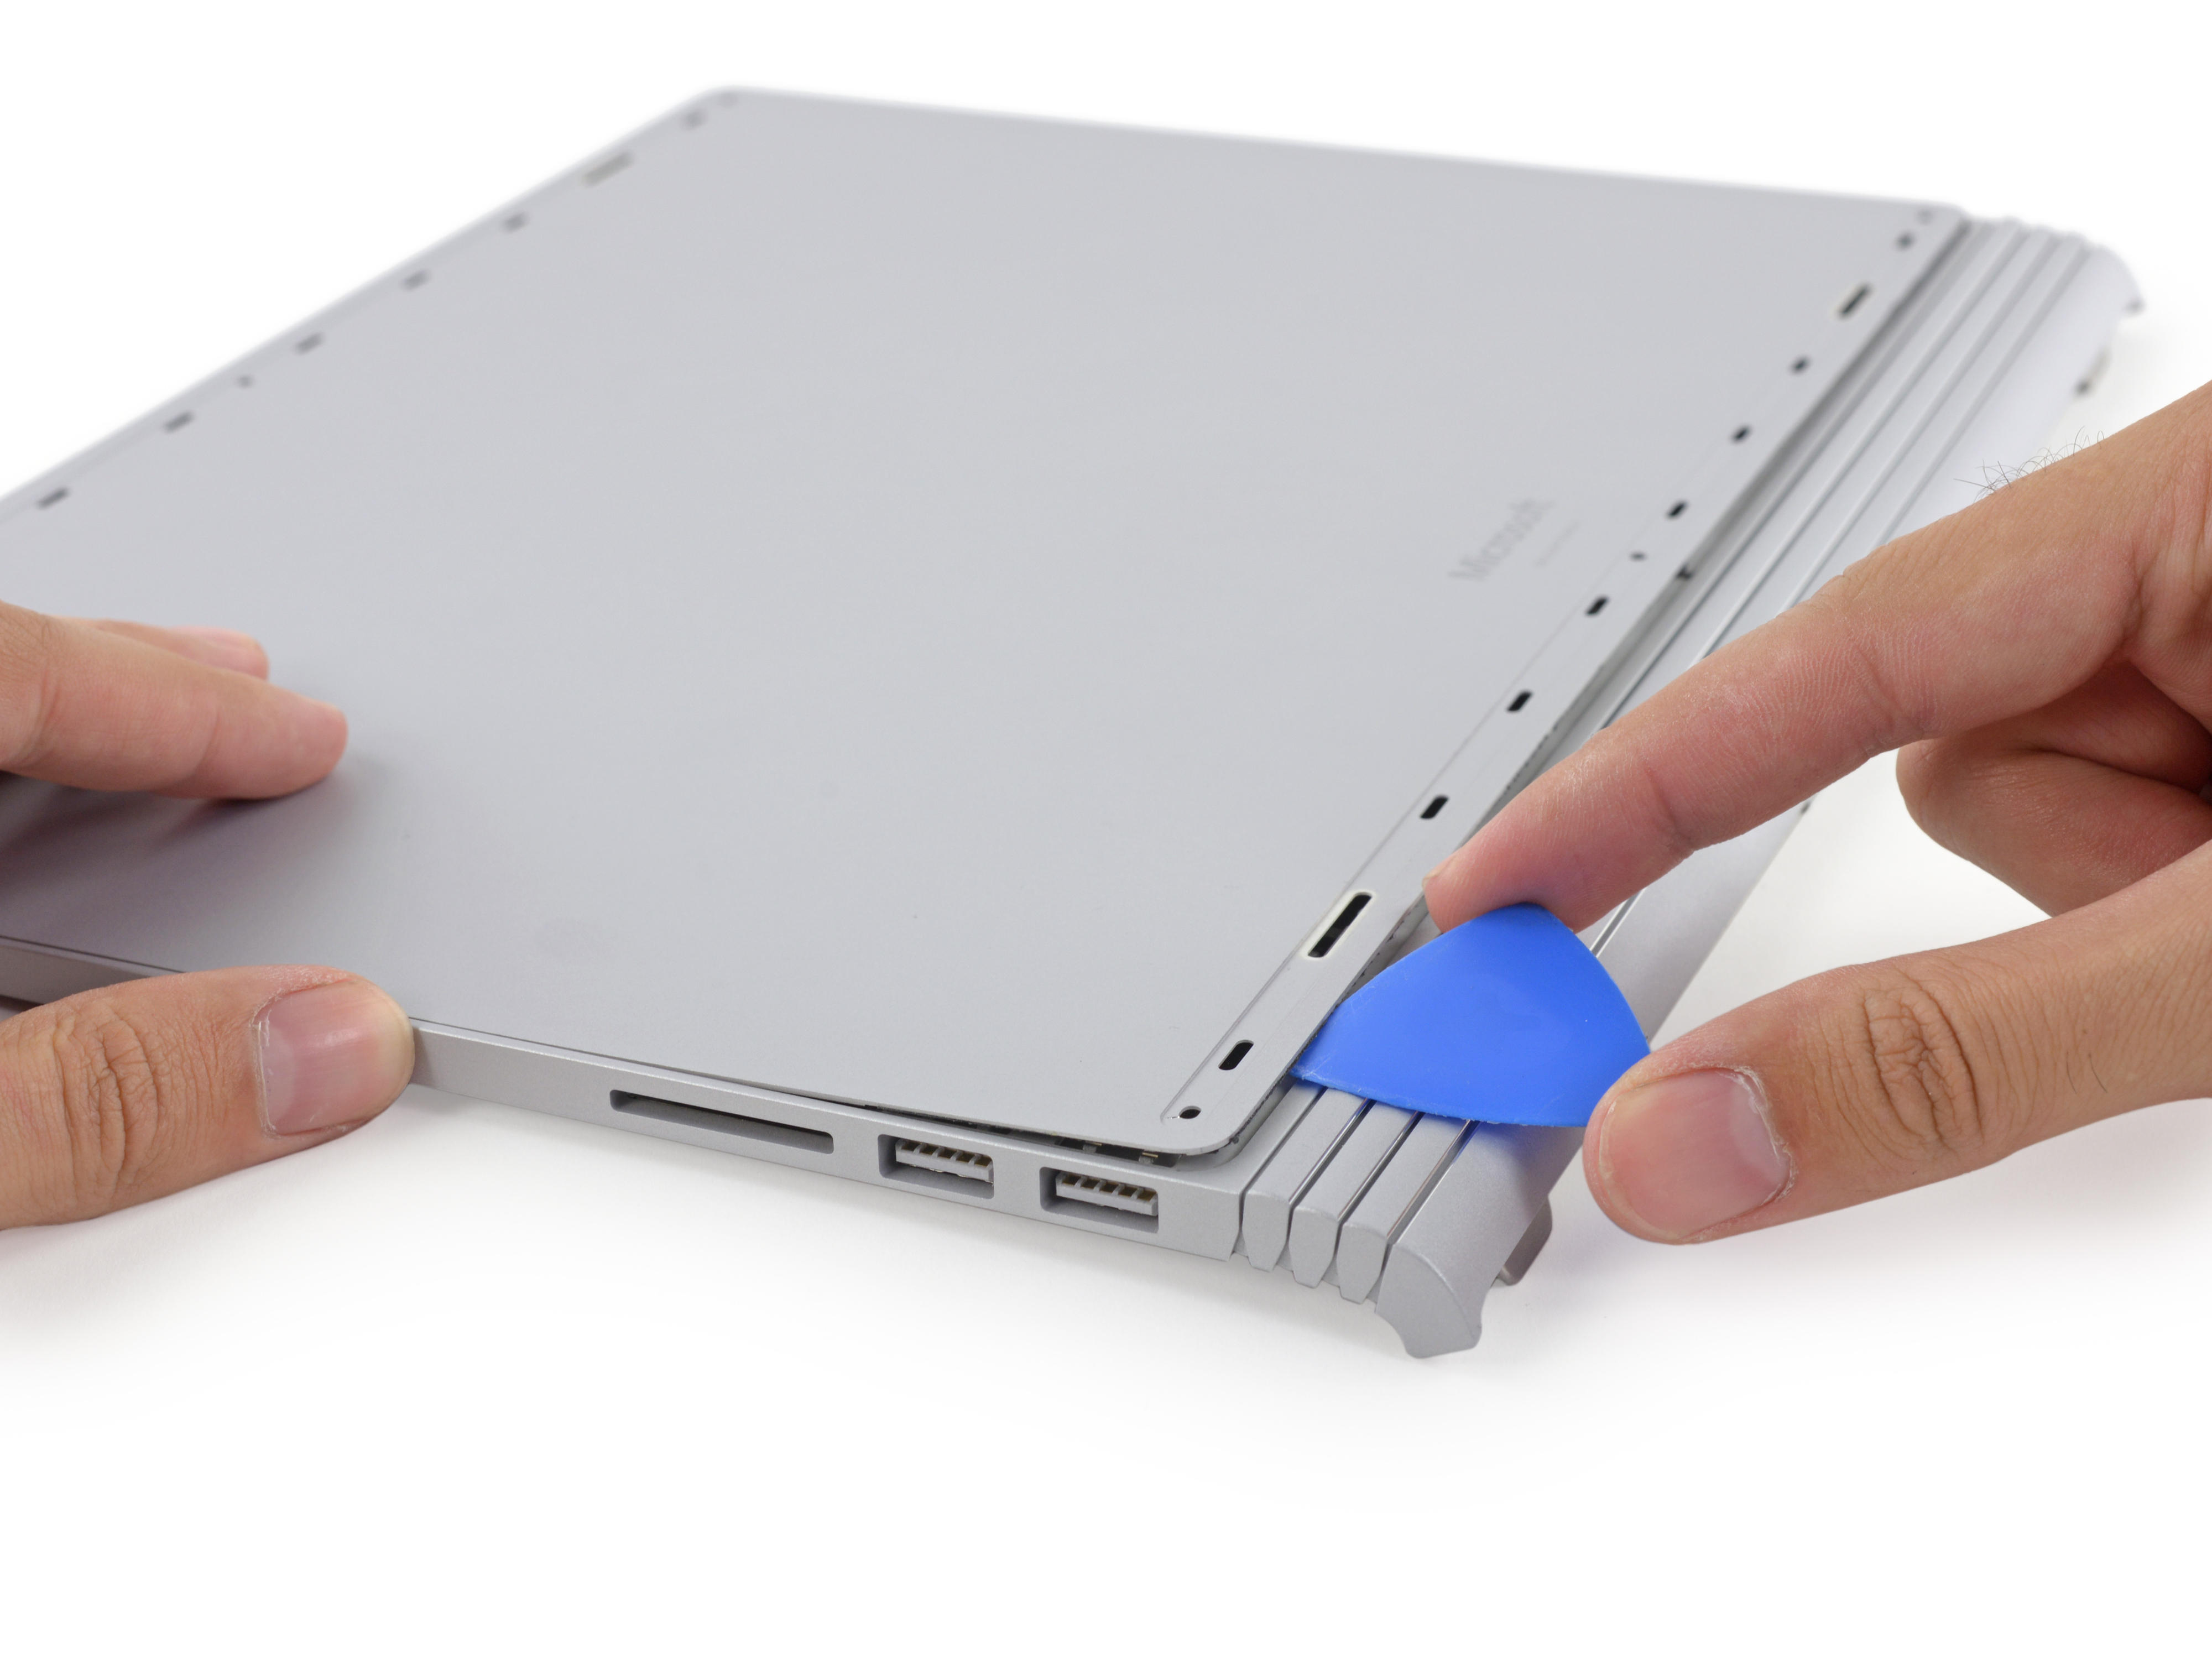
The Surface Book's screen and keyboard are not connected through a magnetic interface, but through a mechanism called “Muscle Wireâ€. We can separate the screen and keyboard by clicking the separate button on the keyboard before separating the screen.
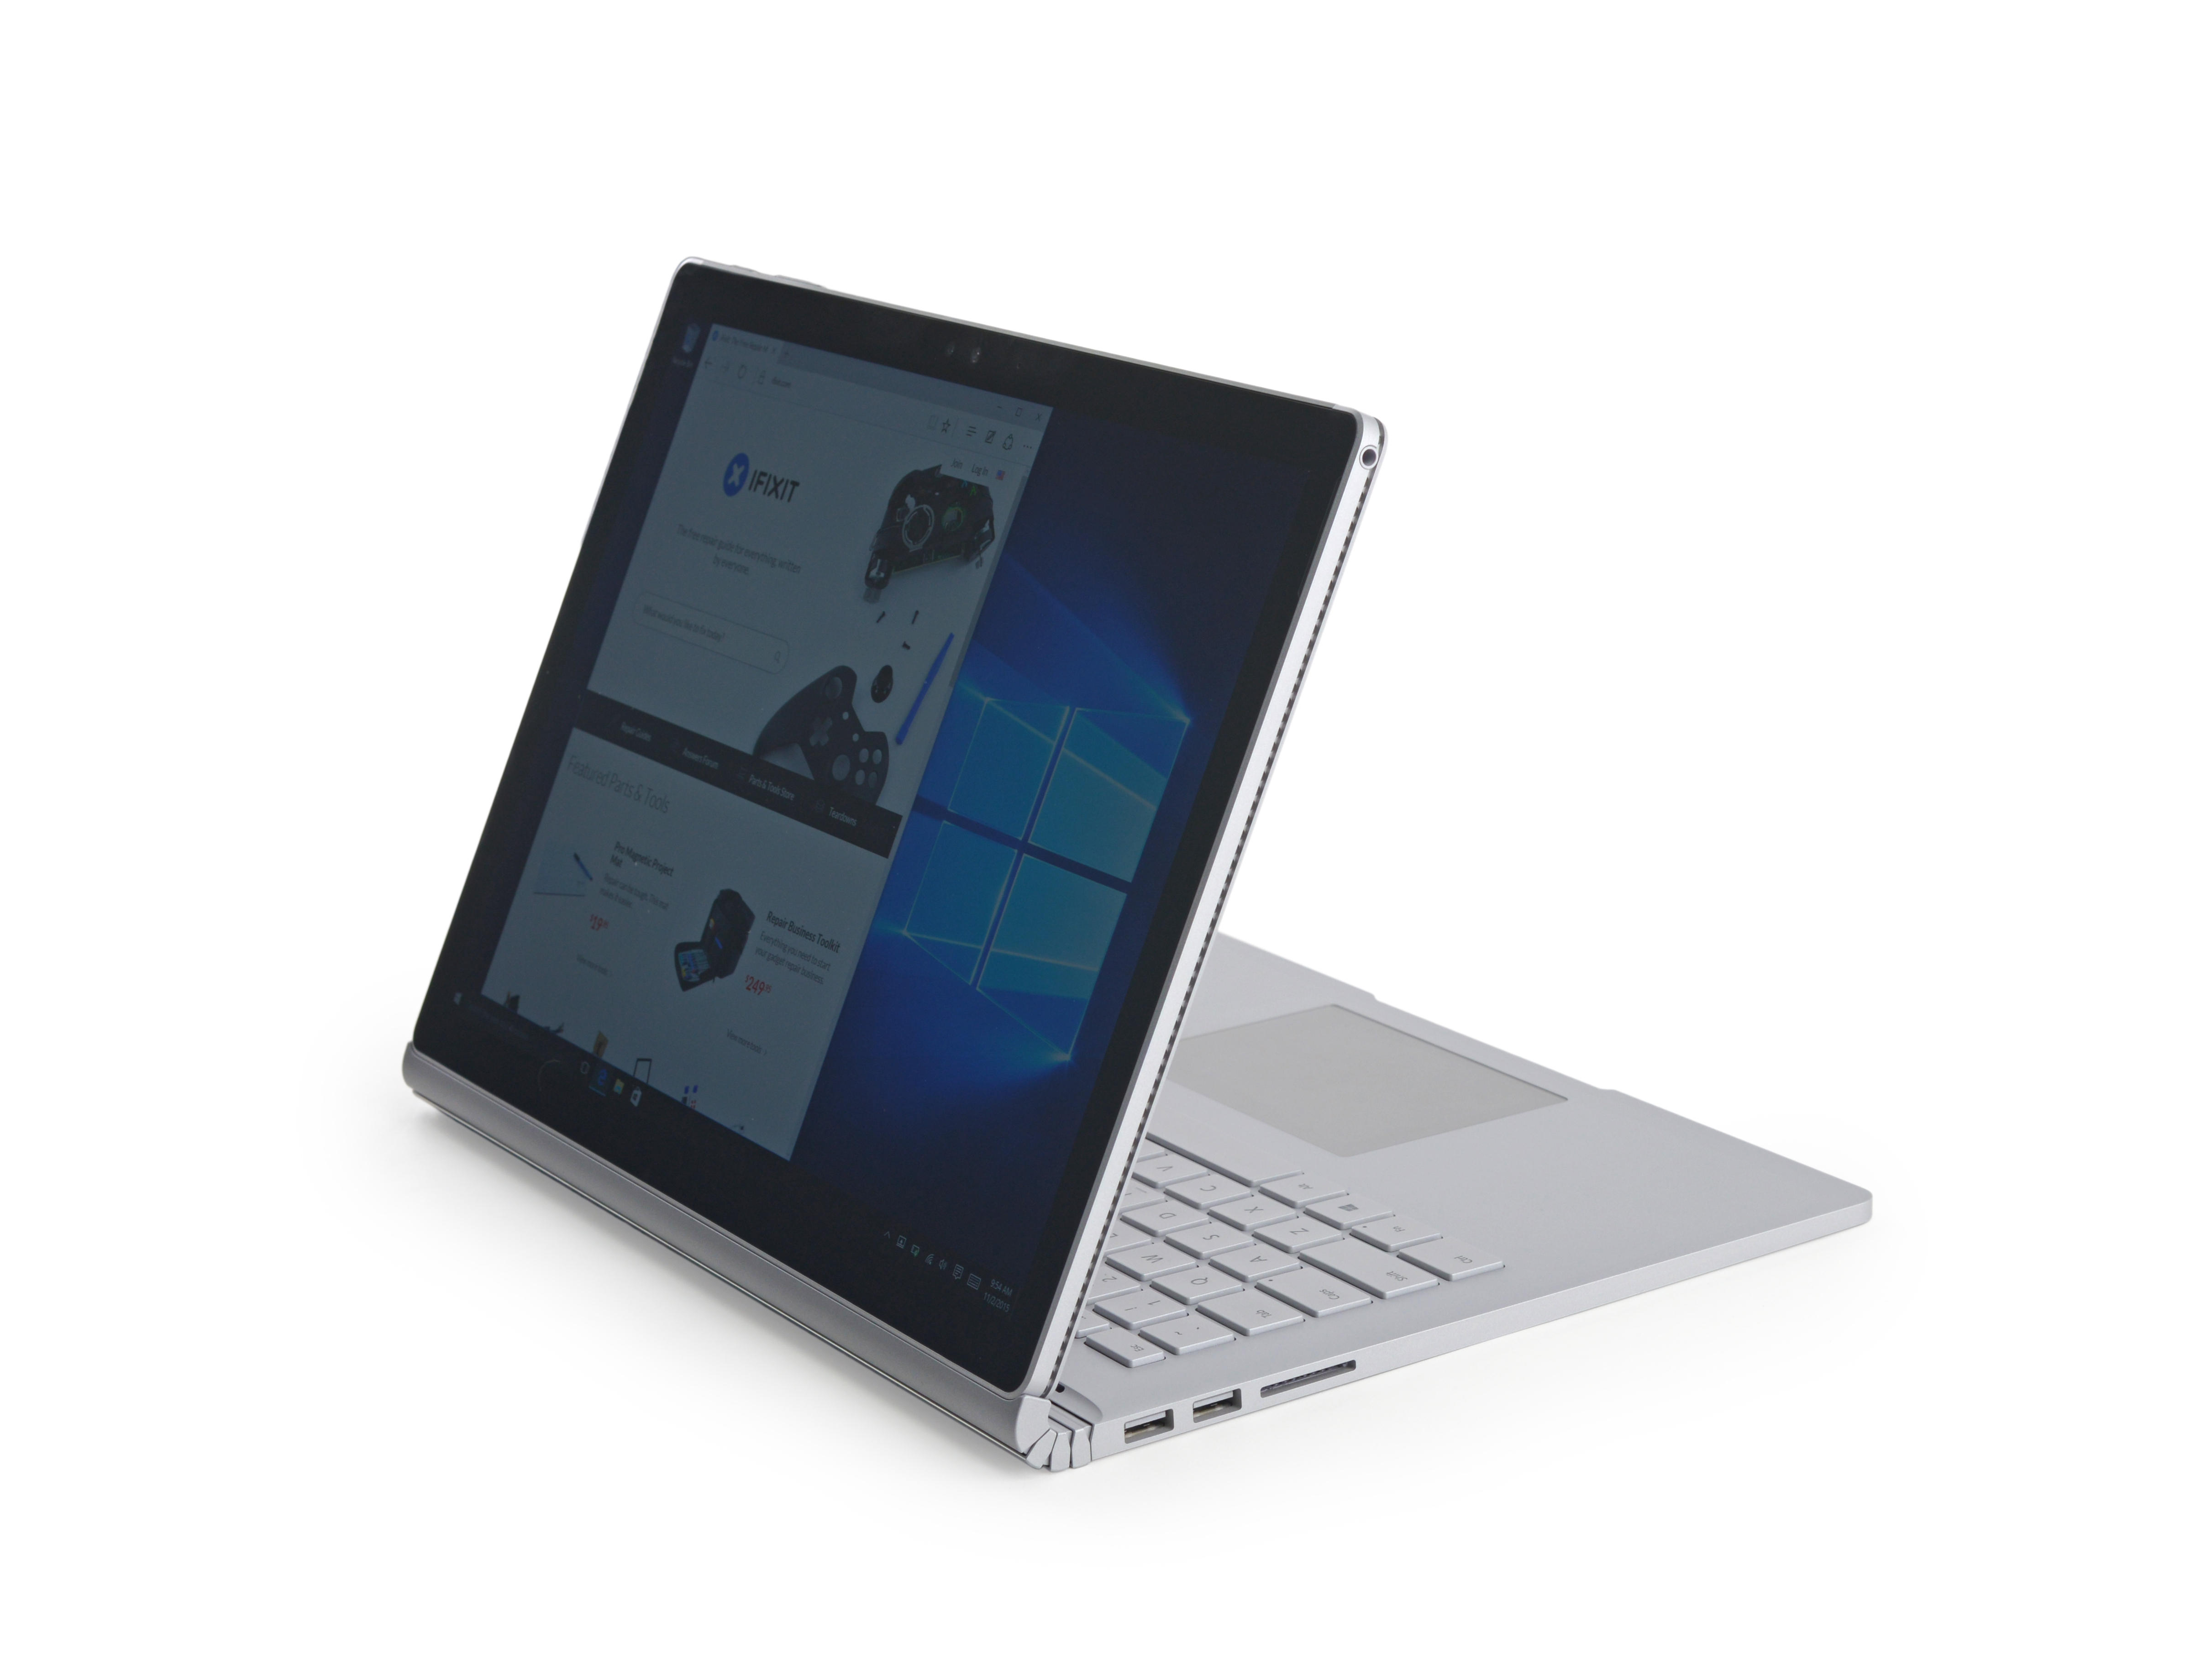
We can connect the screen back to the keyboard. This is where the keyboard acts as a stand, allowing us to use the brush.

After separating the screen and keyboard, we can see the connection interface between the screen and the keyboard. The screen is connected to the keyboard through the Surface Connect interface. In addition to the data transmission, the interface has a power supply function.
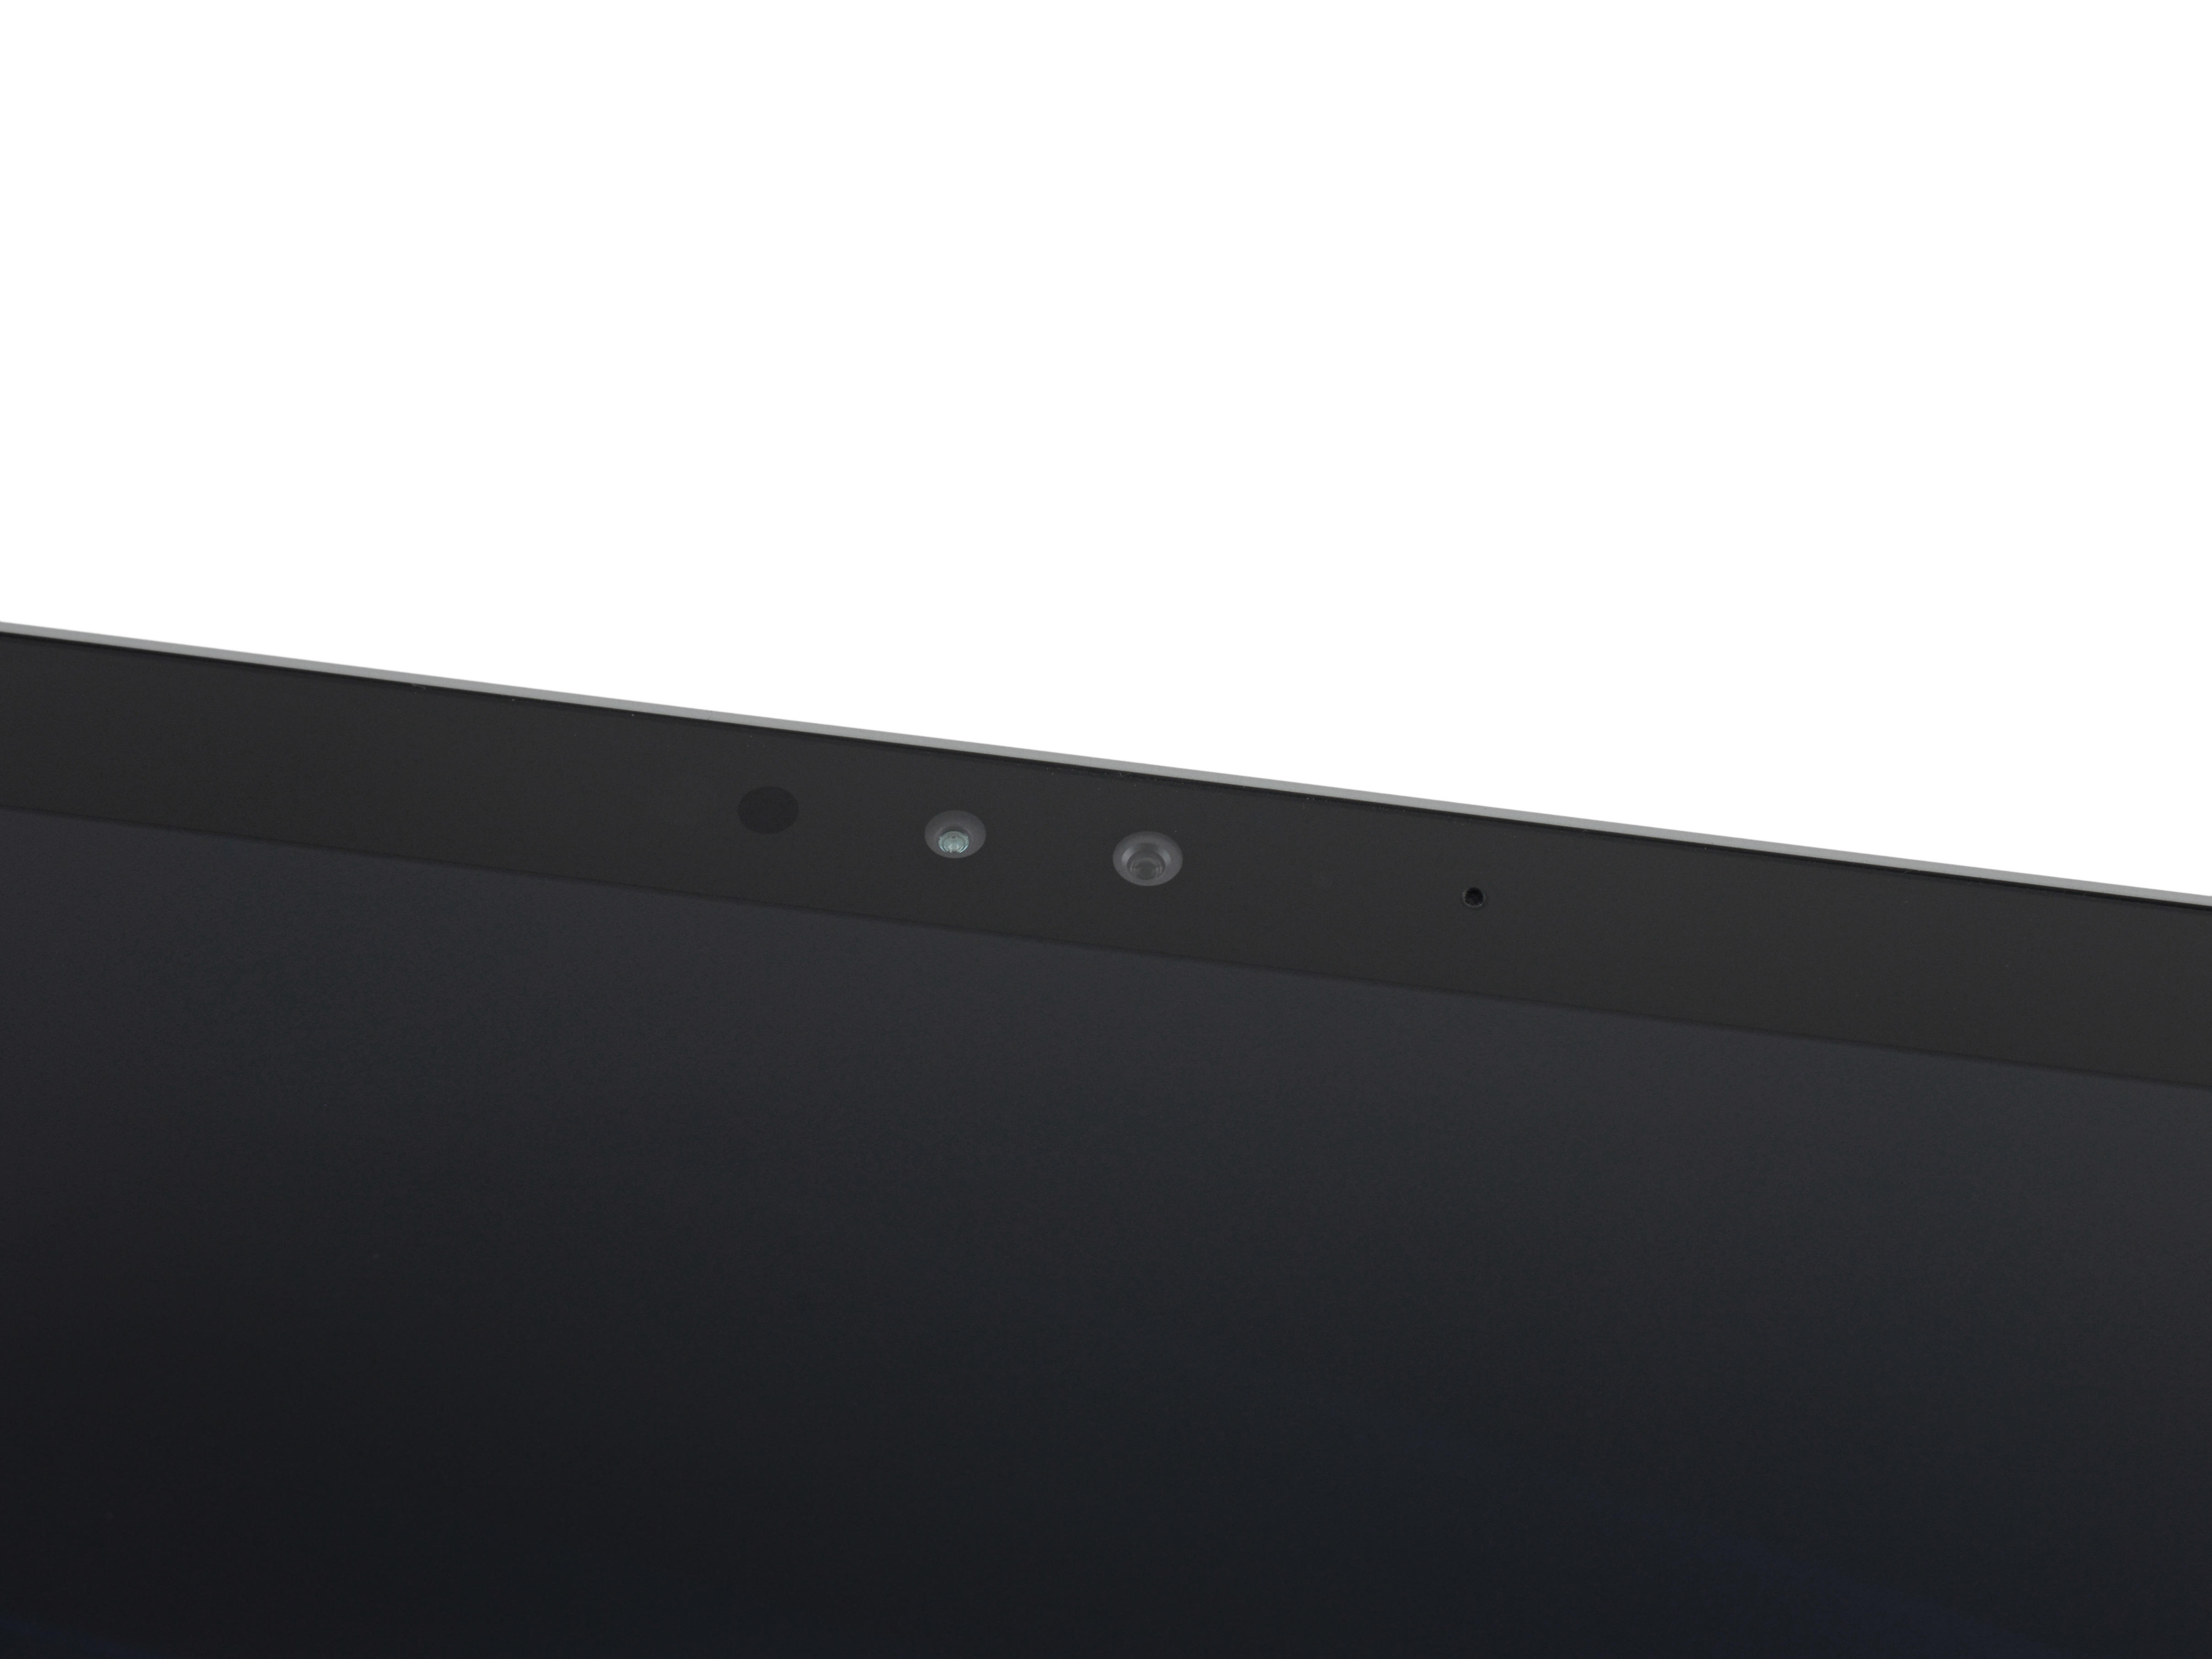
Let's take a look at the front panel. The front camera array is very similar to the Surface Pro 4. It has a 5 megapixel camera, infrared sensors, a microphone, and a light sensor.
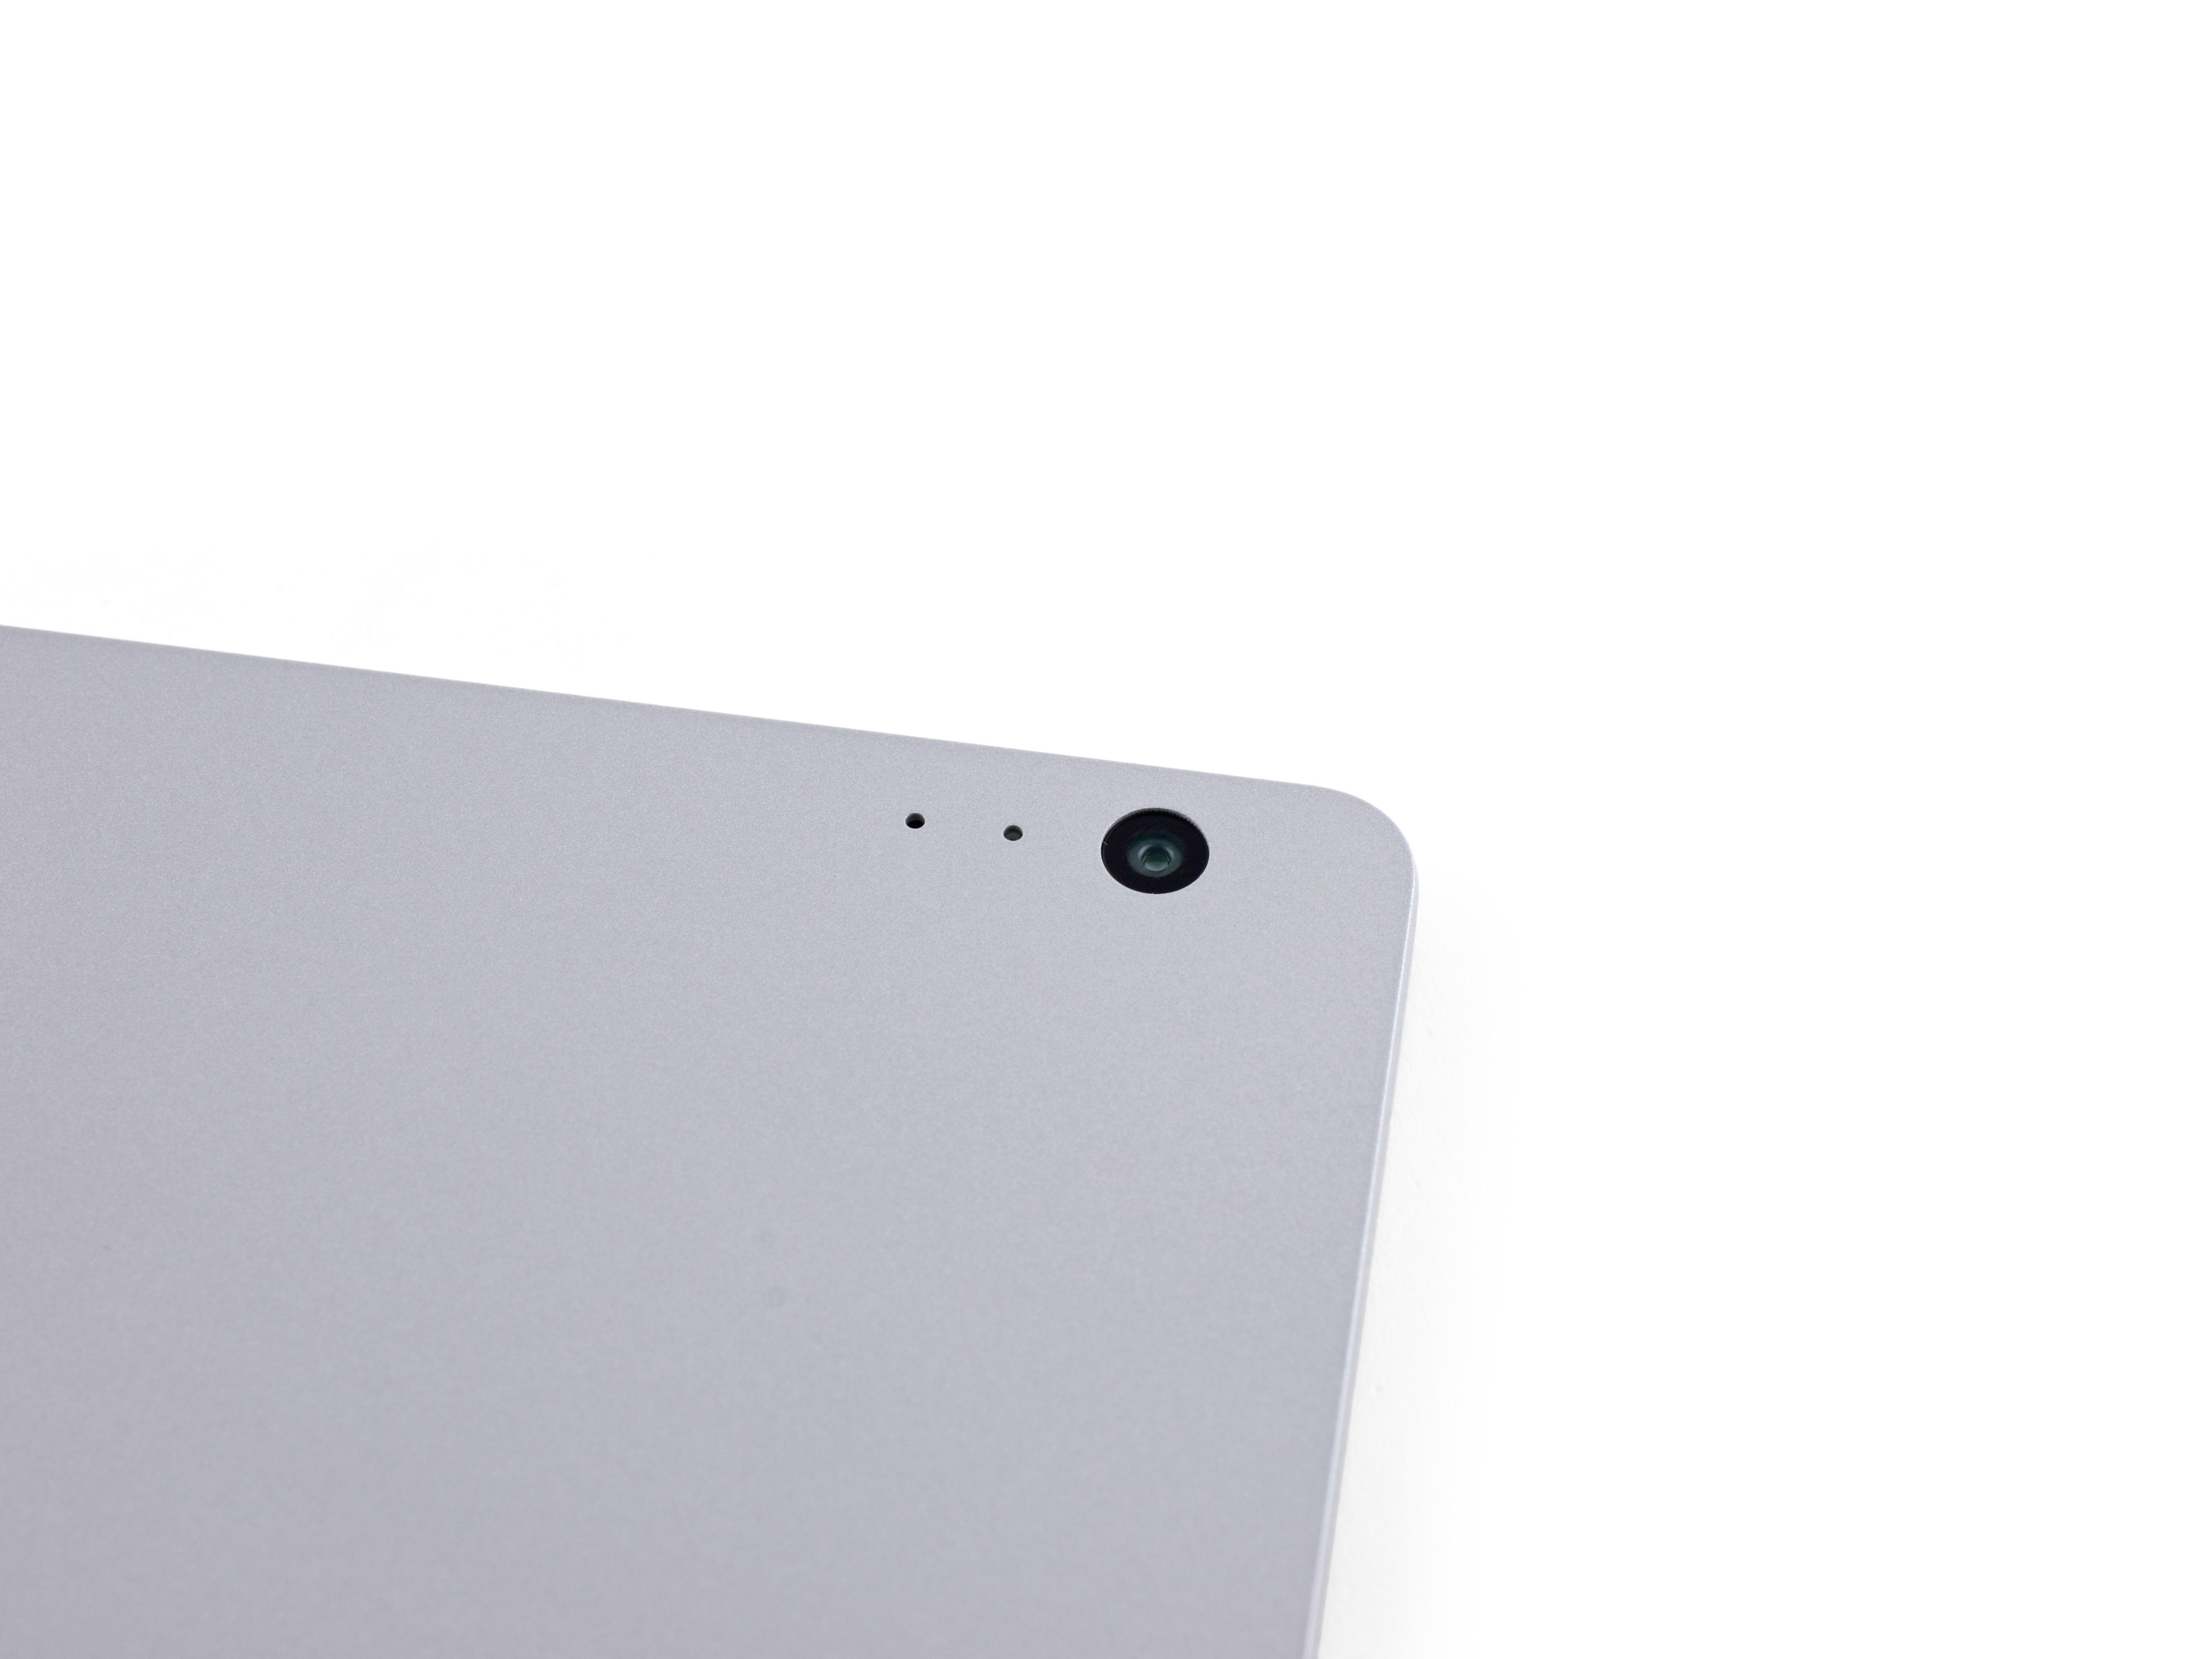
The rear camera is also similar to the Surface Pro 4, an 8-megapixel camera and microphone combination.
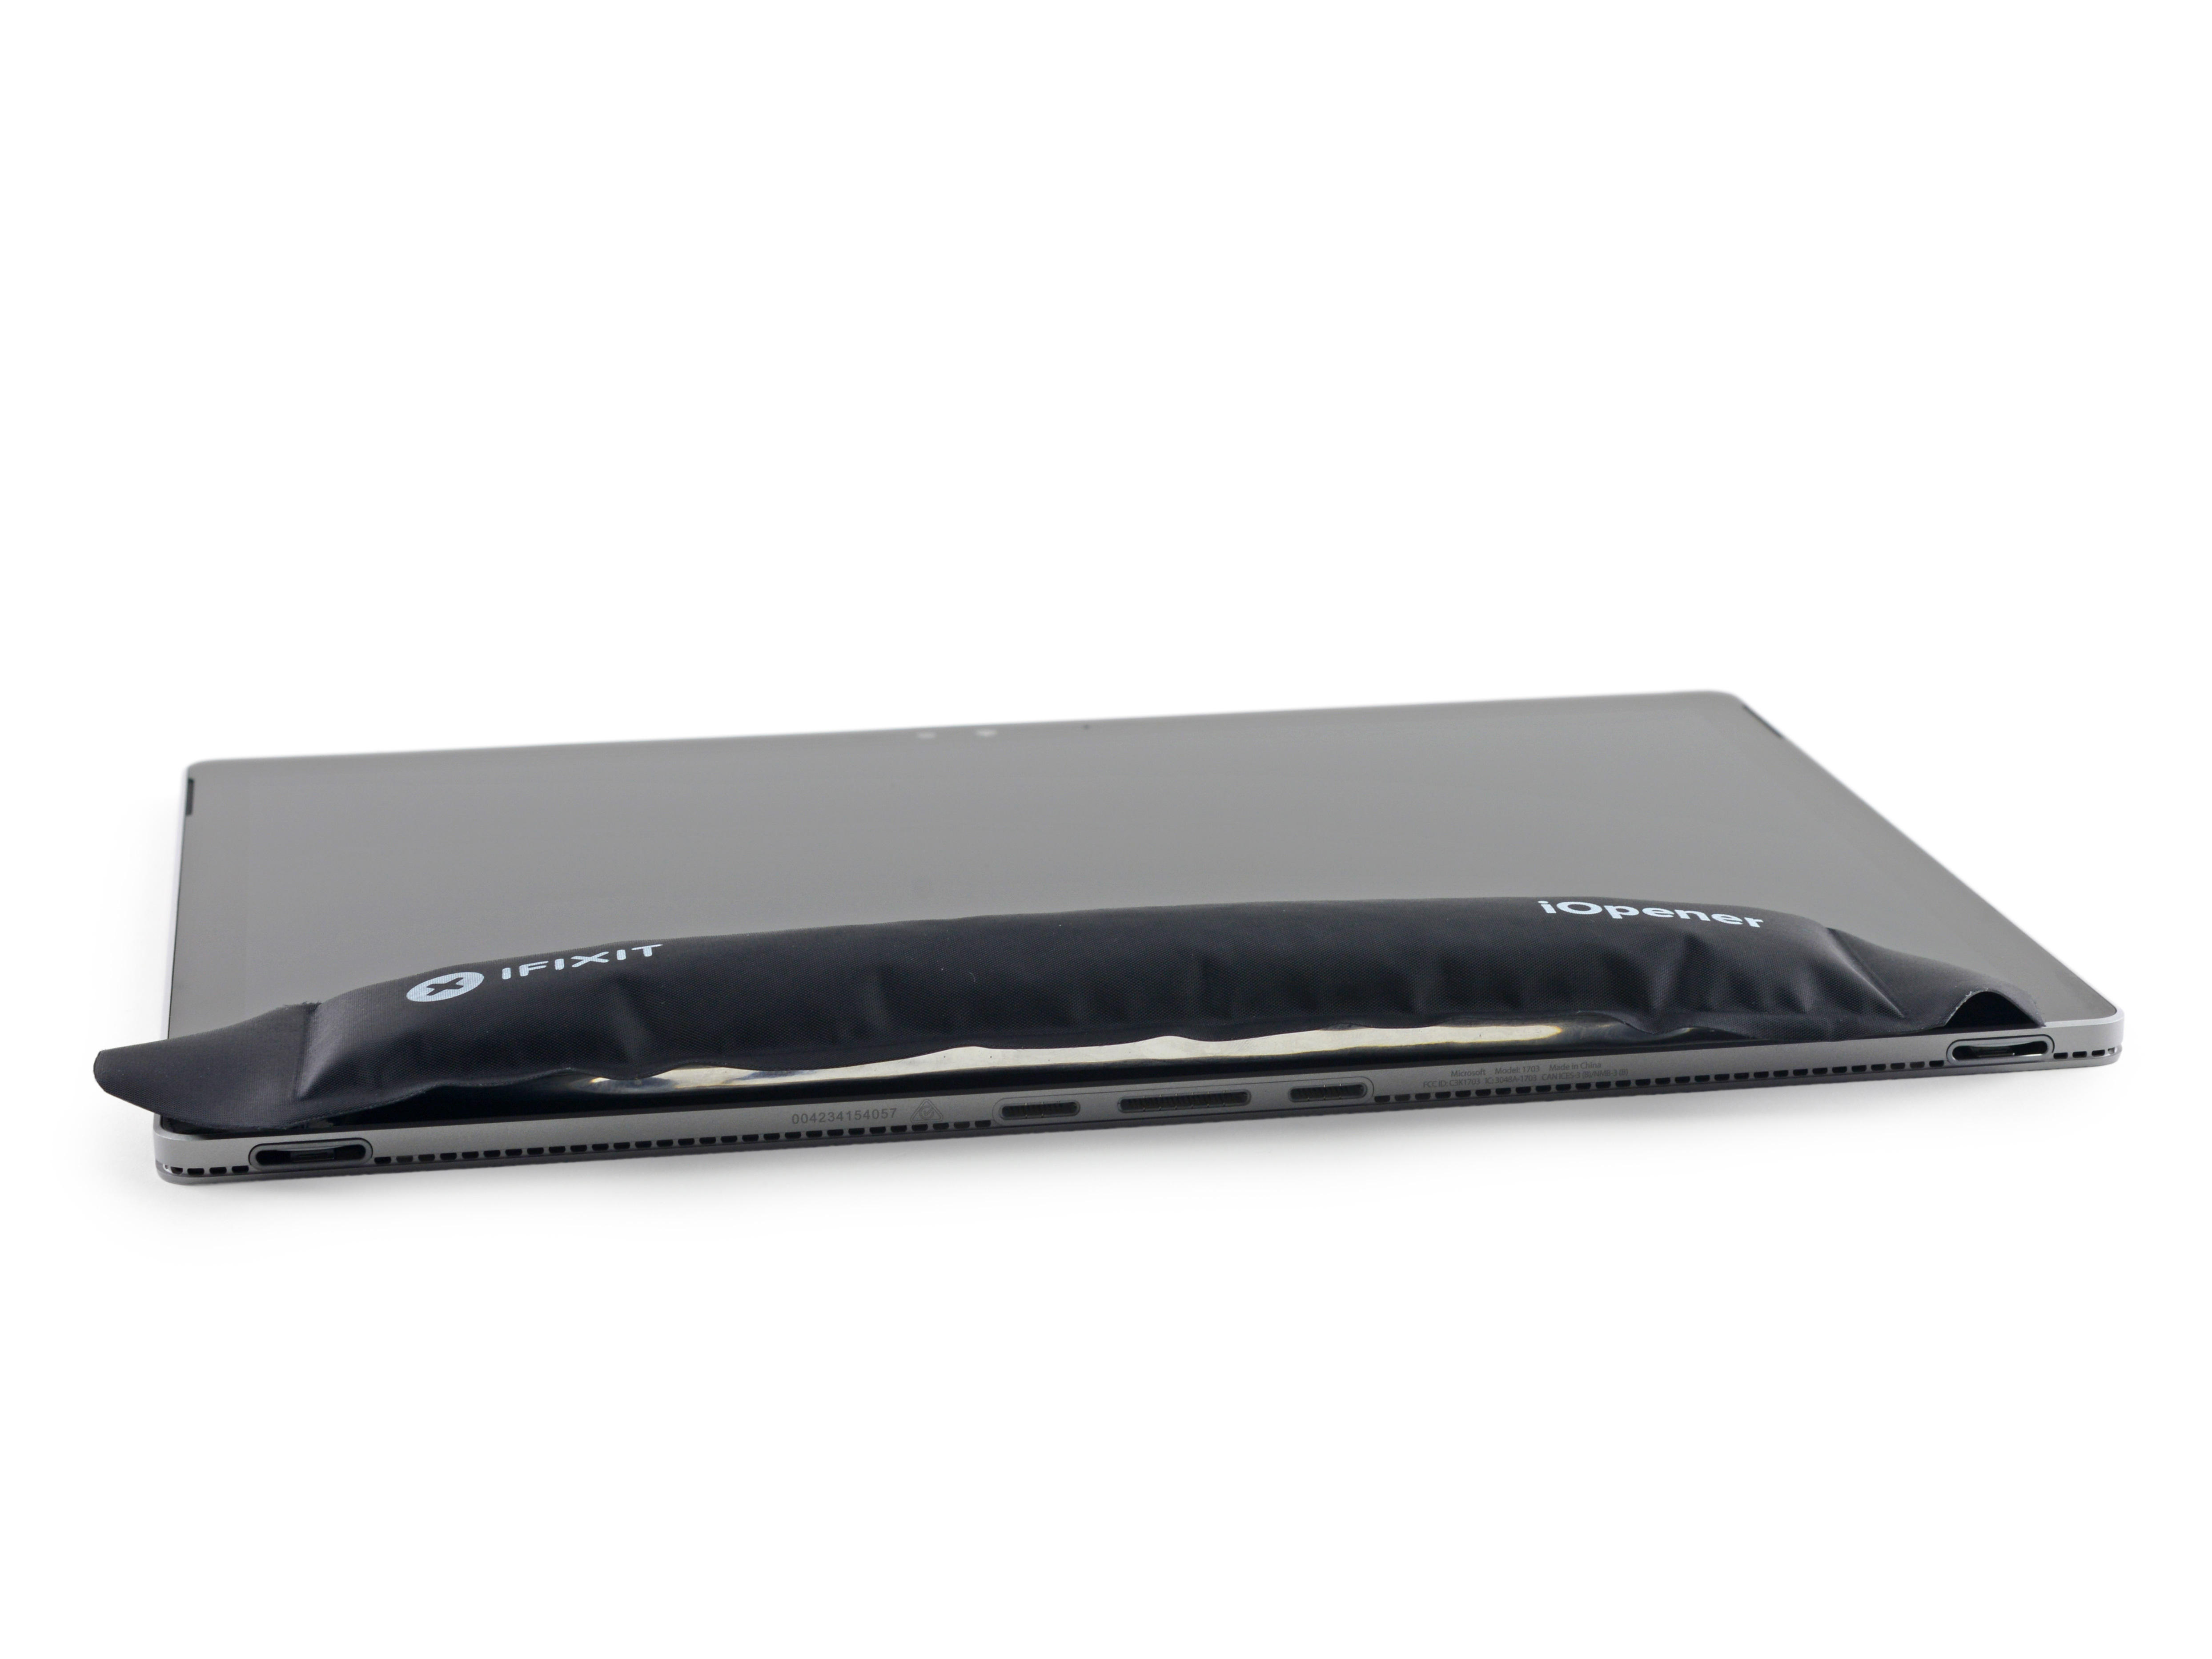
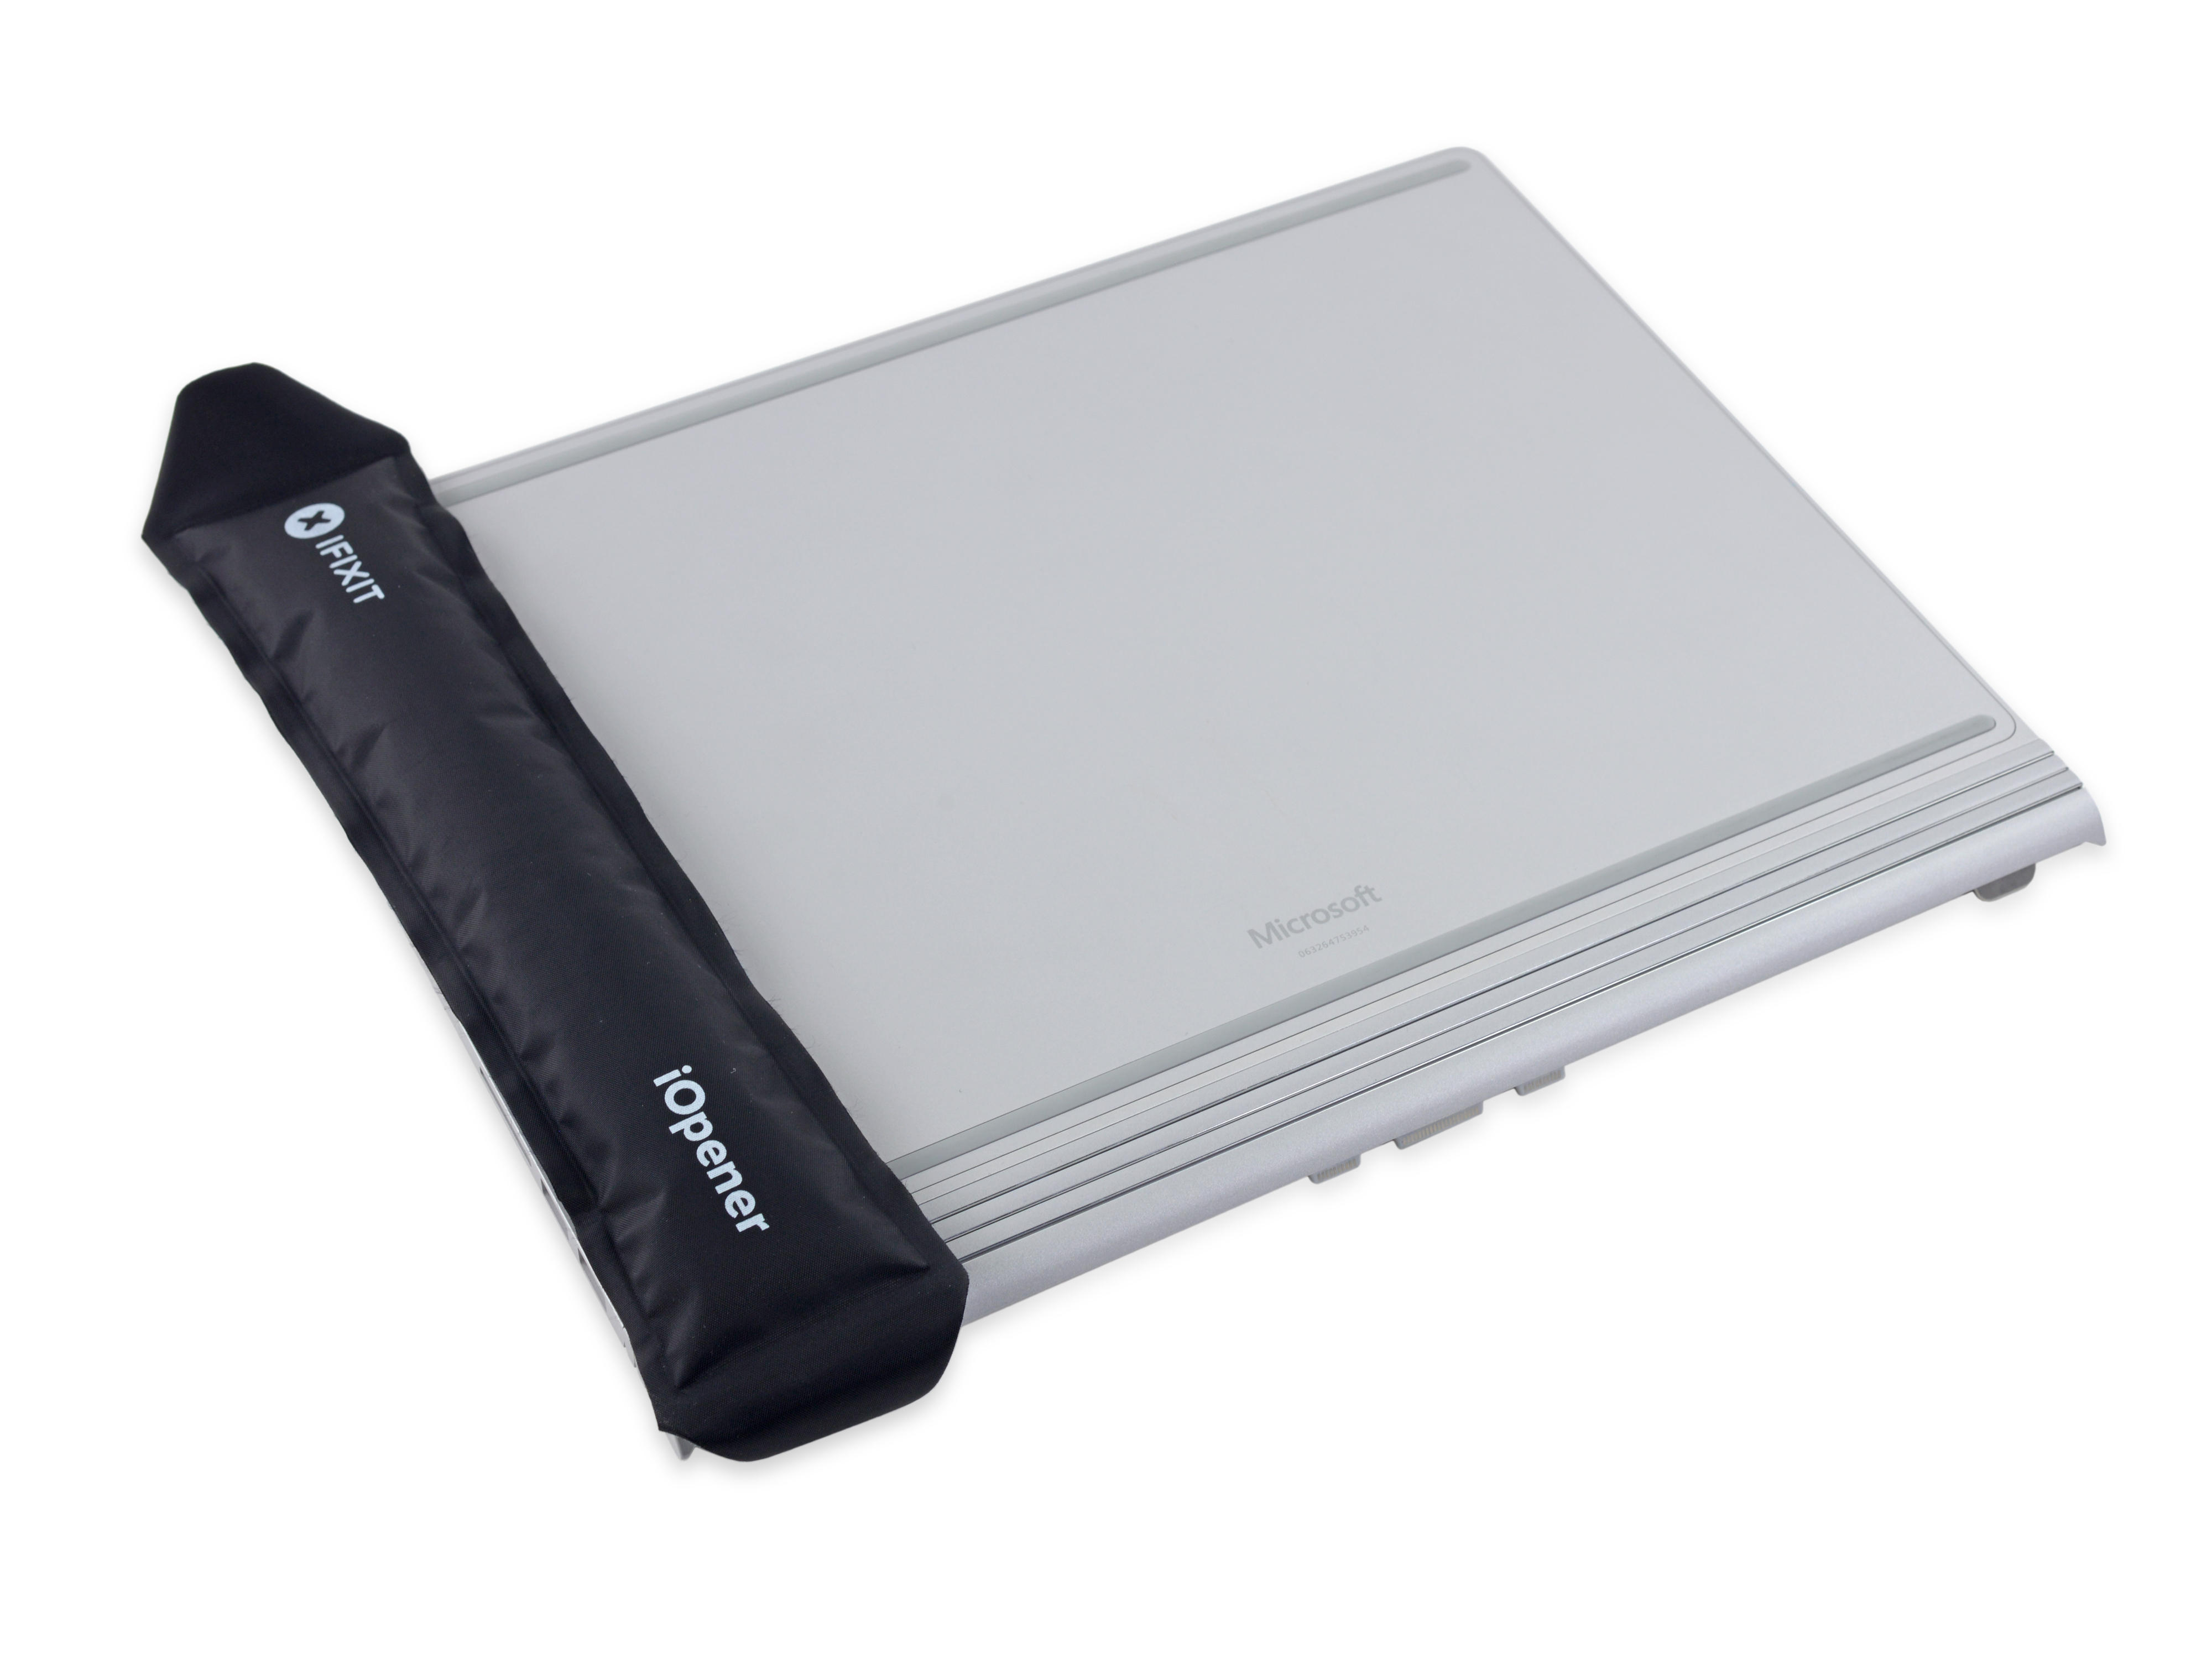
Let's dismantle the screen first, similar to disassembling the Surface Pro 4. We also need to heat the screen first to soften the glue, but the Surface Pro screen is bigger.
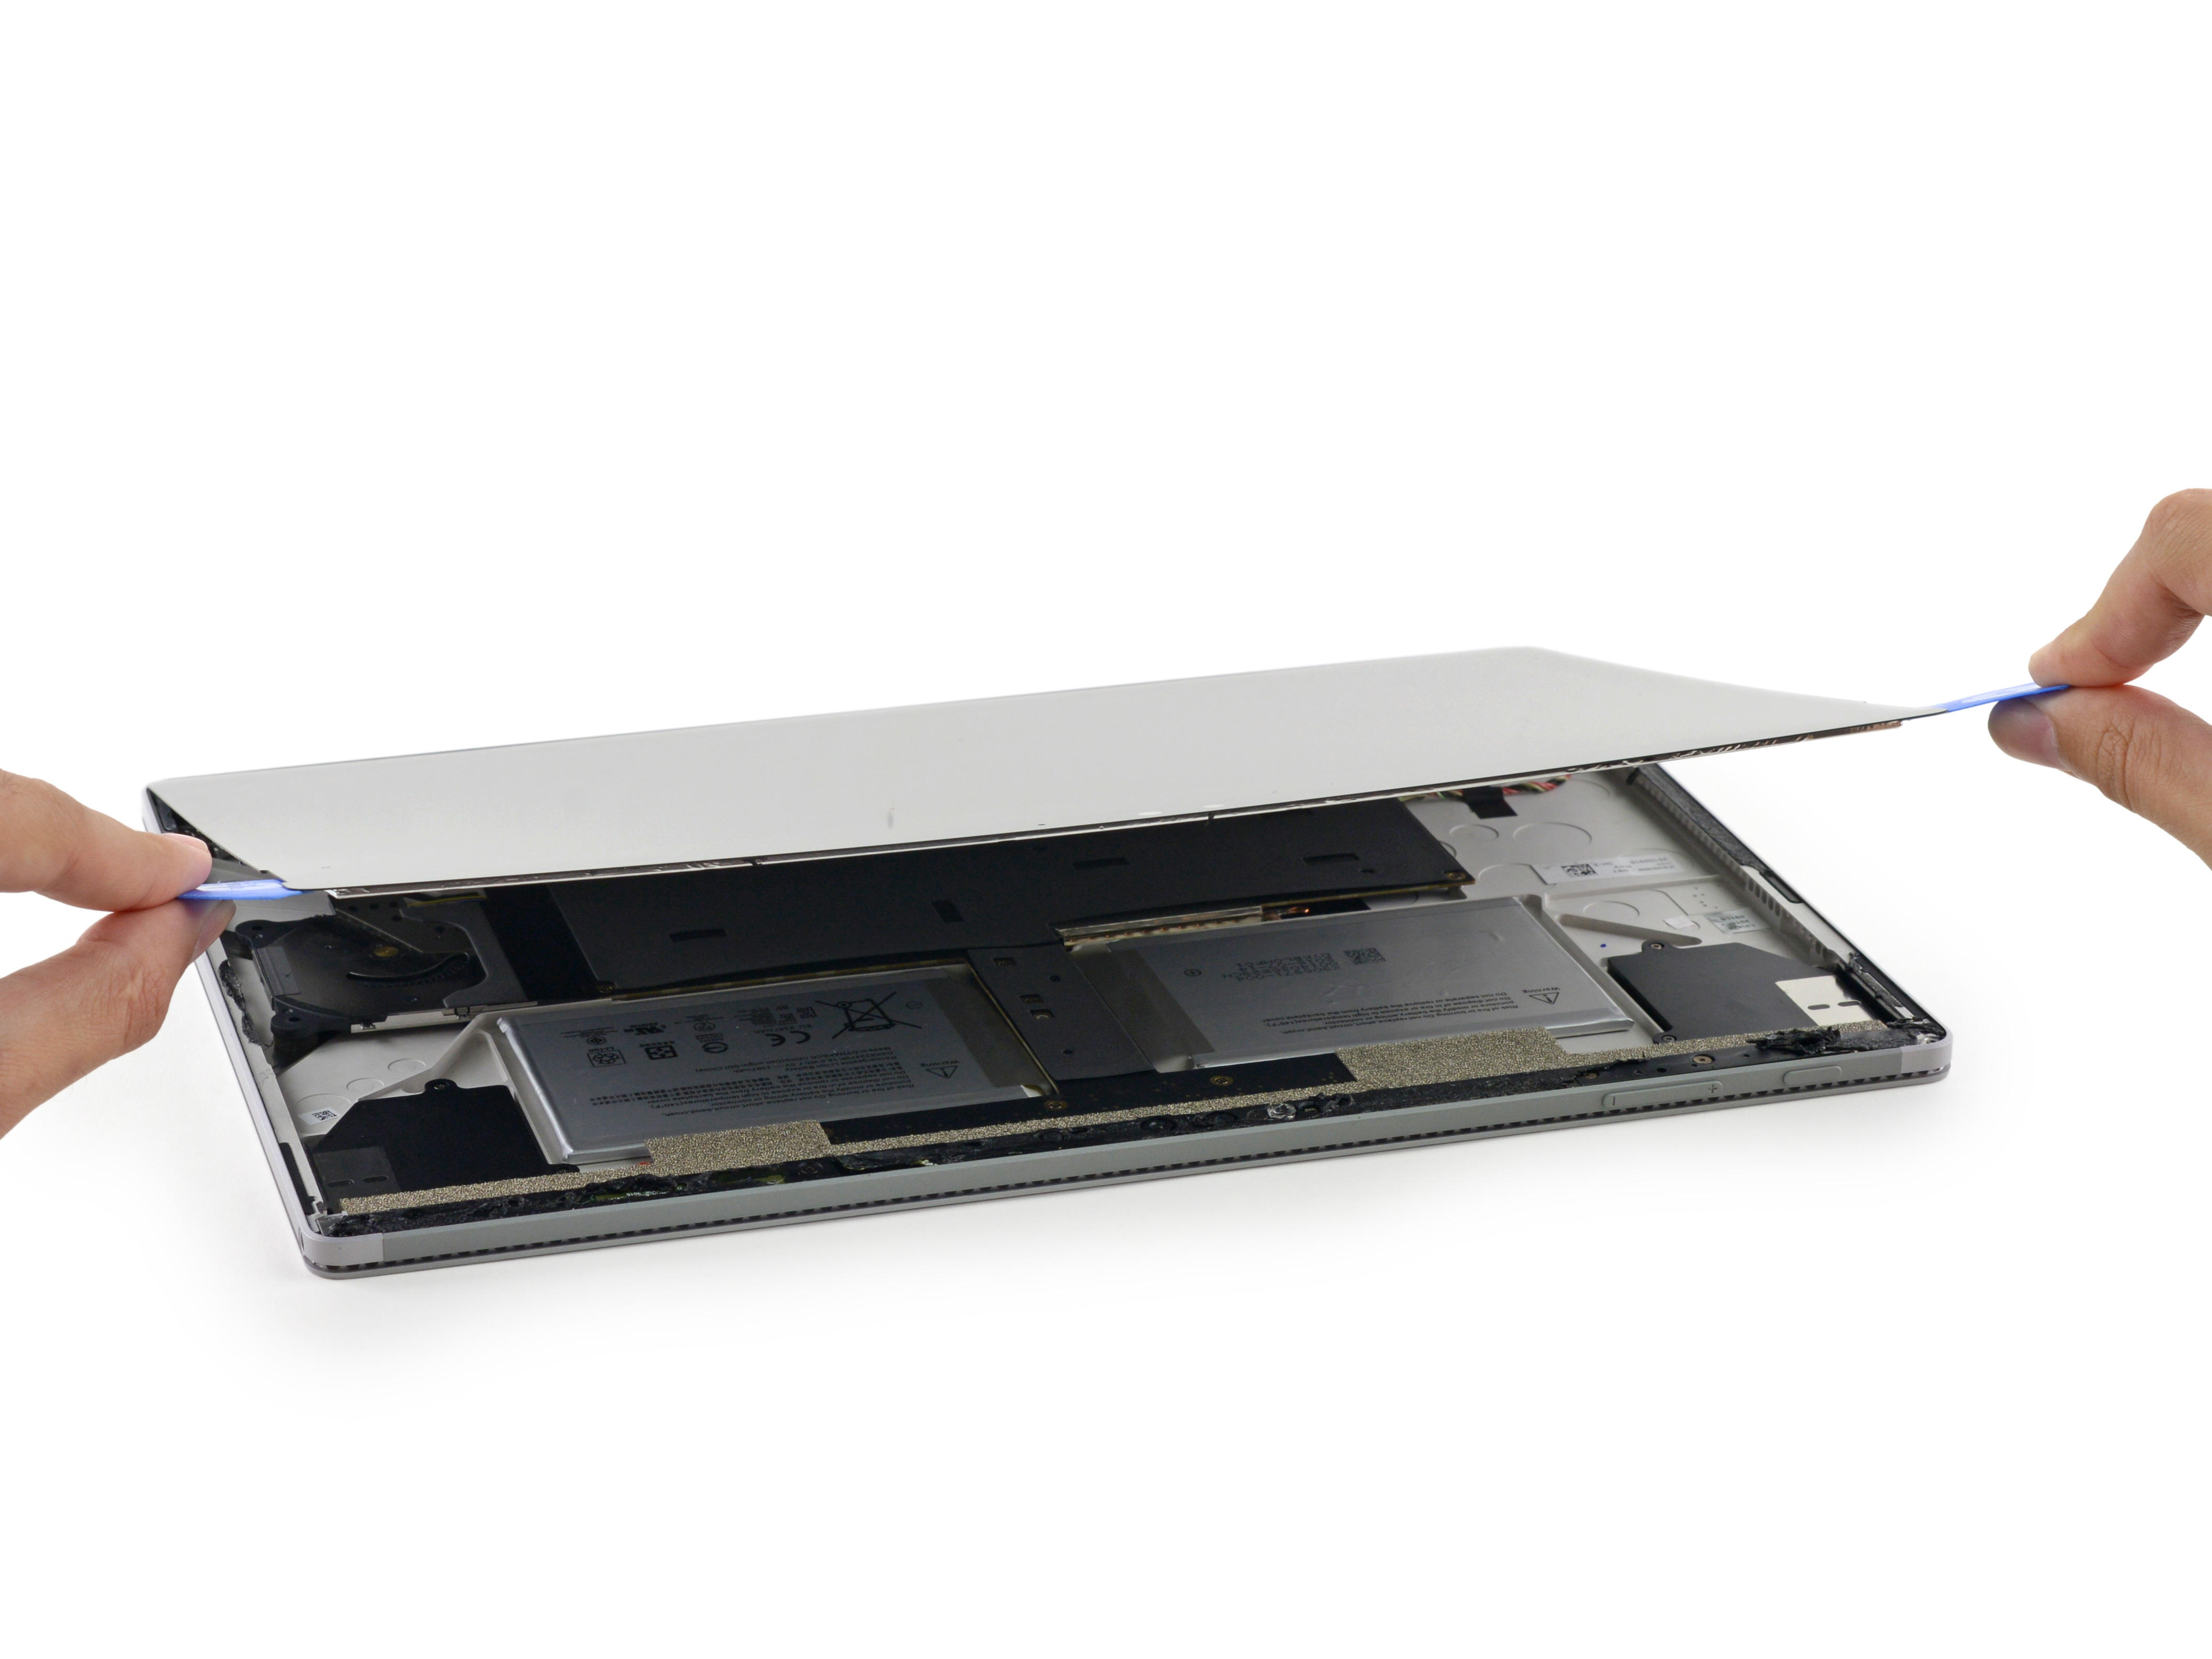
Use a suction cup and paddle to slowly separate the screen along the edges.
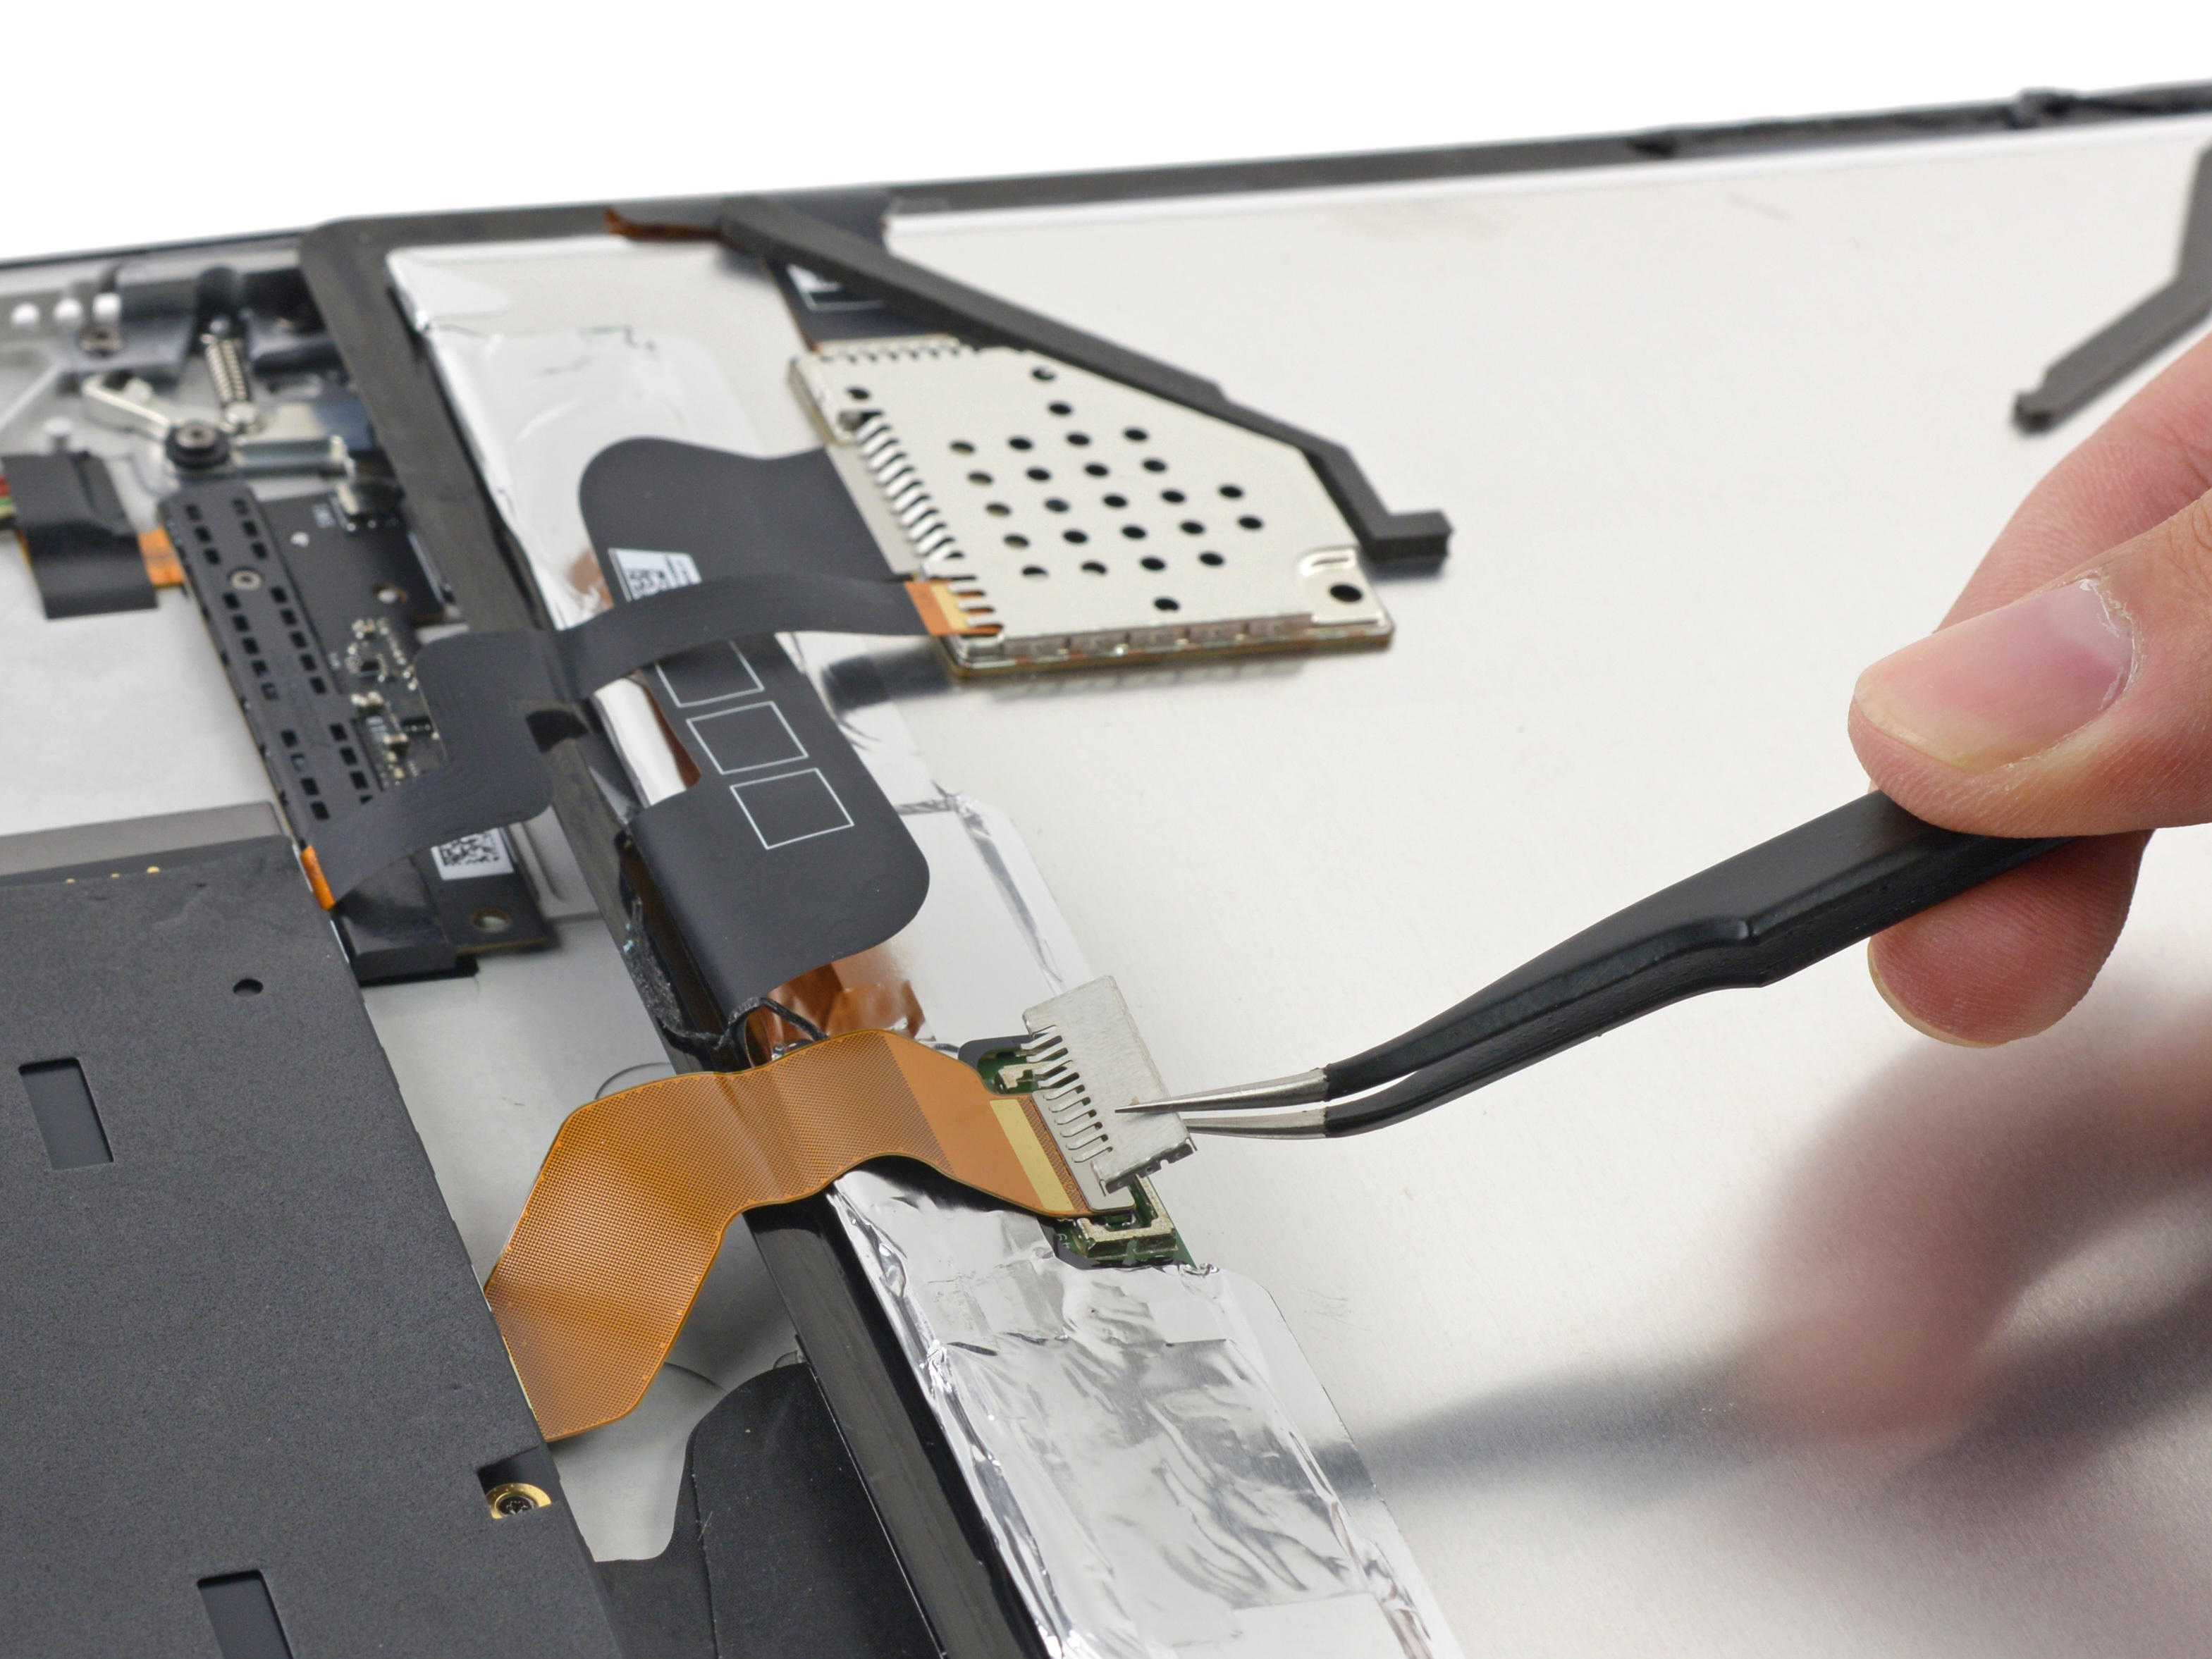
We can reverse the screen and separate the cables. Unlike the general design, the screen cable is soldered to the motherboard, and the general design is to solder the cable to the screen.
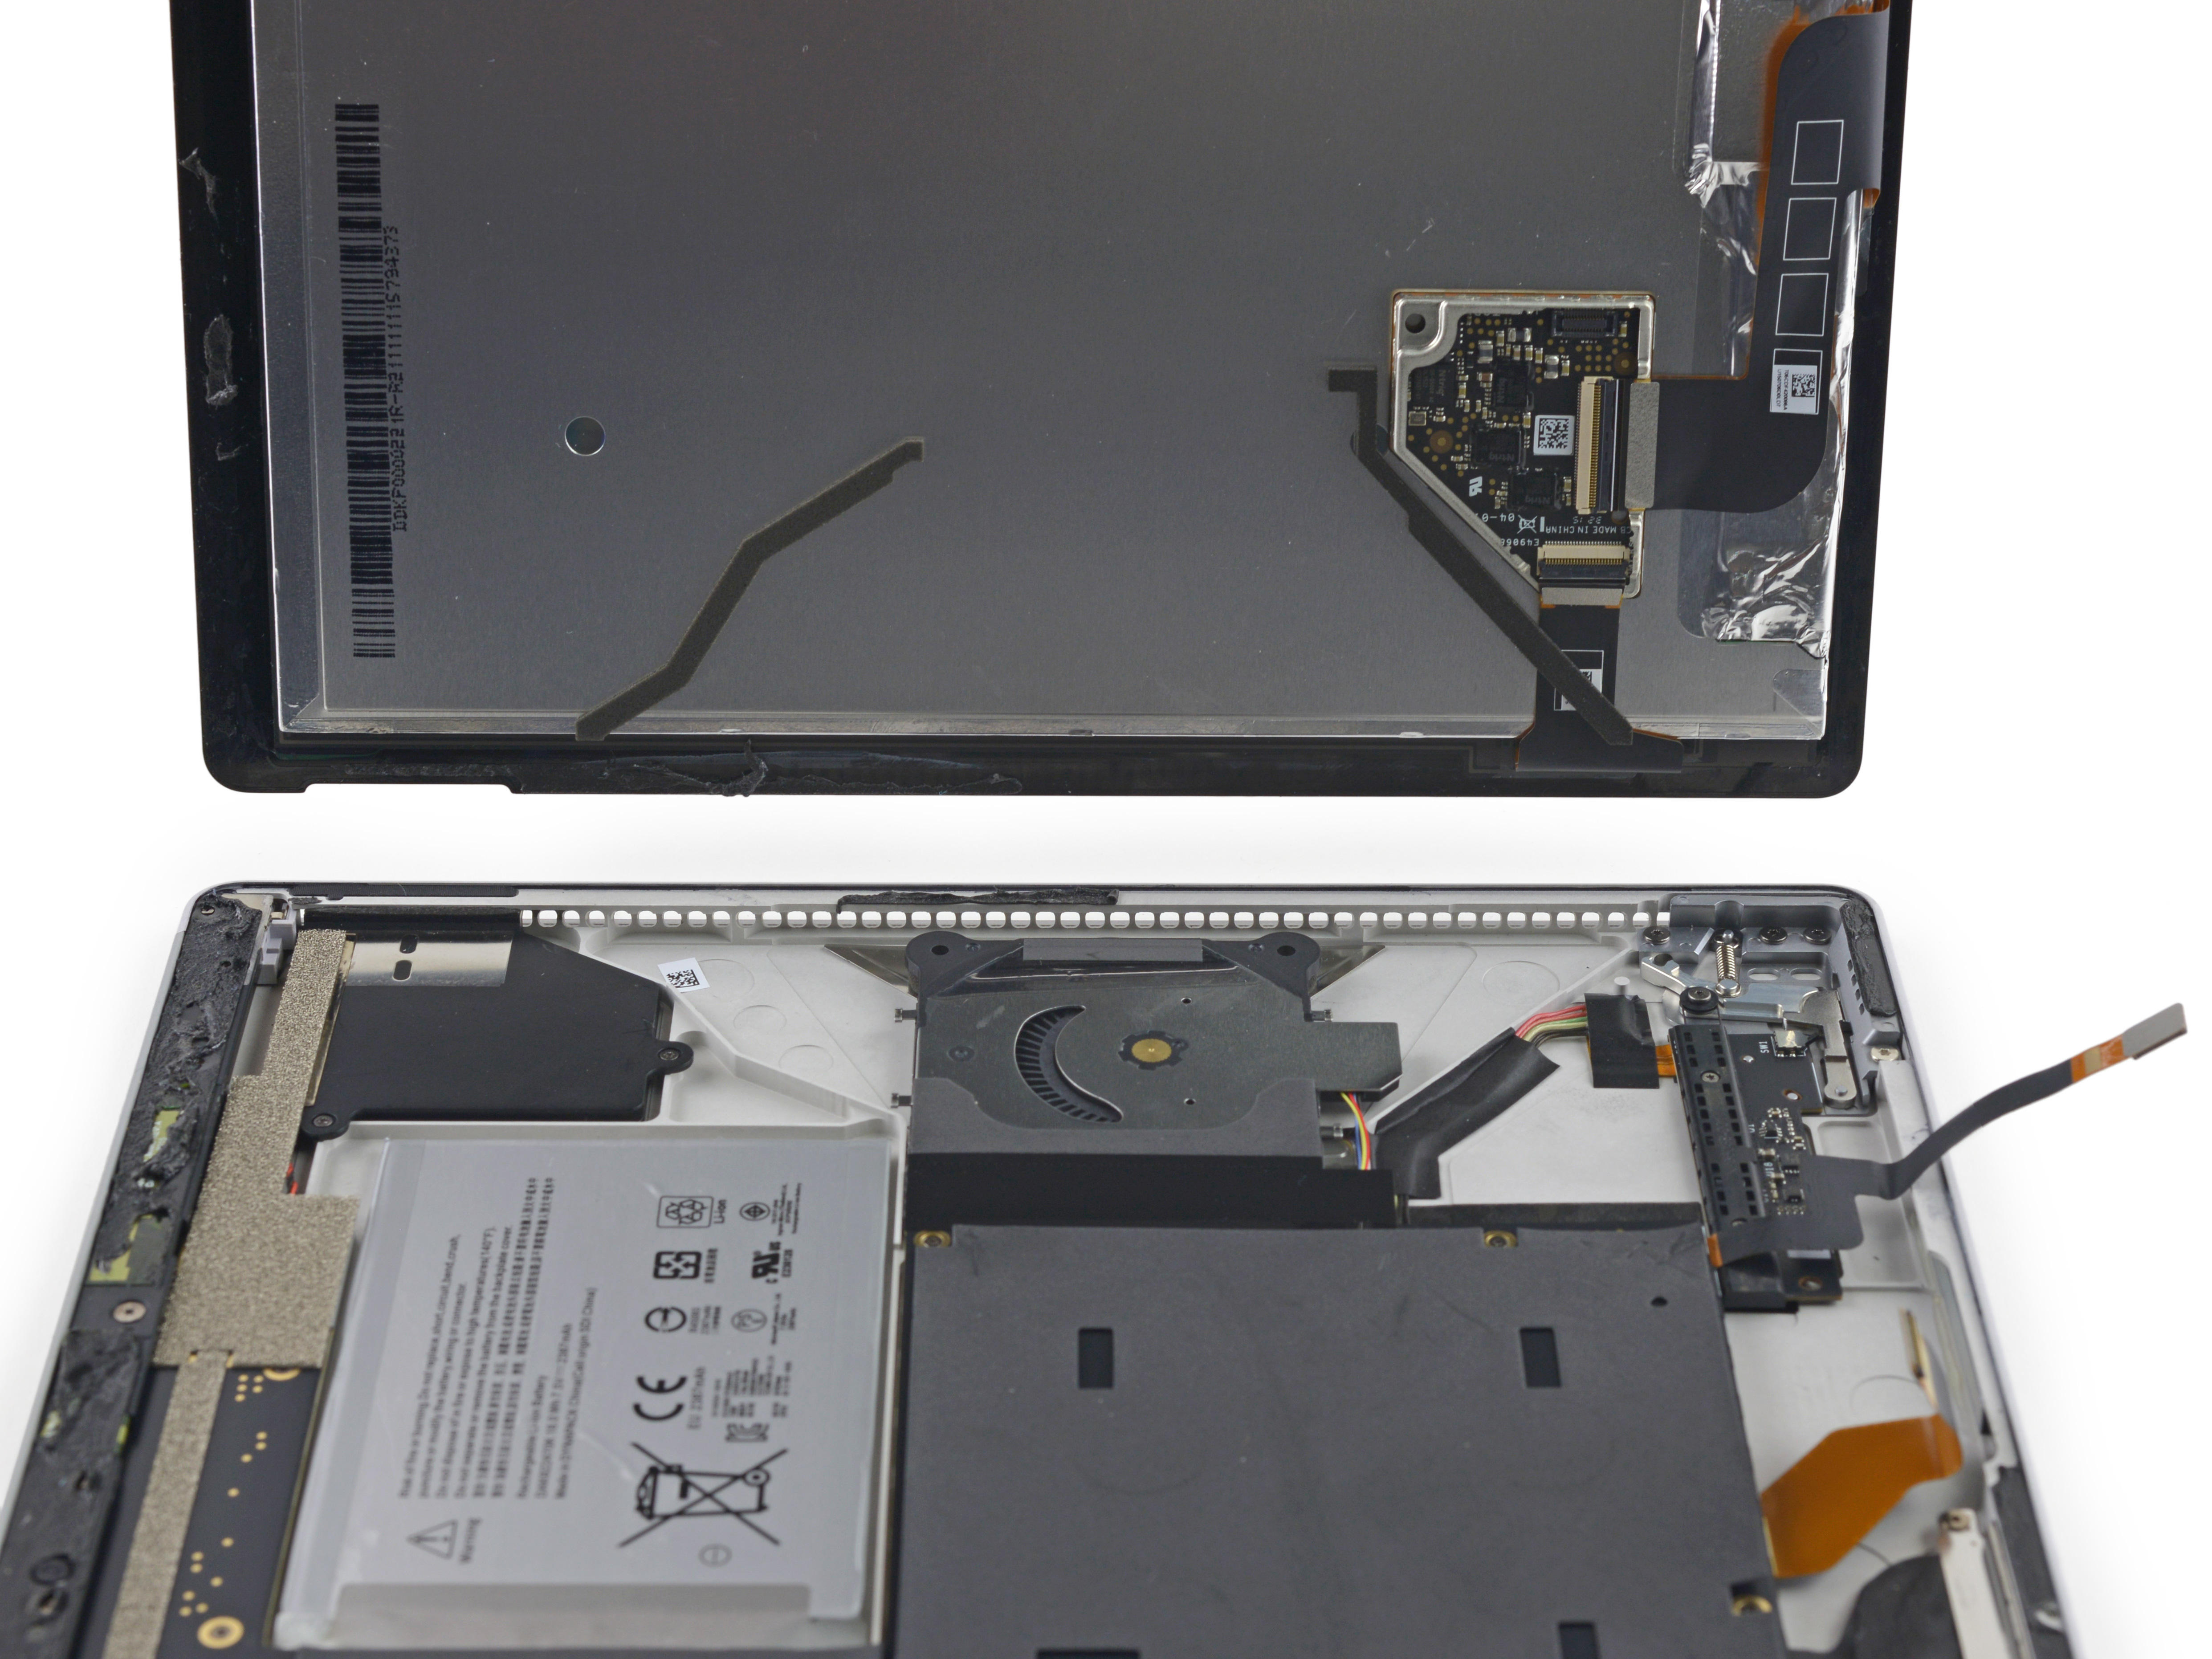
We found two strips of buffer sponges on the back of the screen that combined with the fuselage to form a drainage duct.
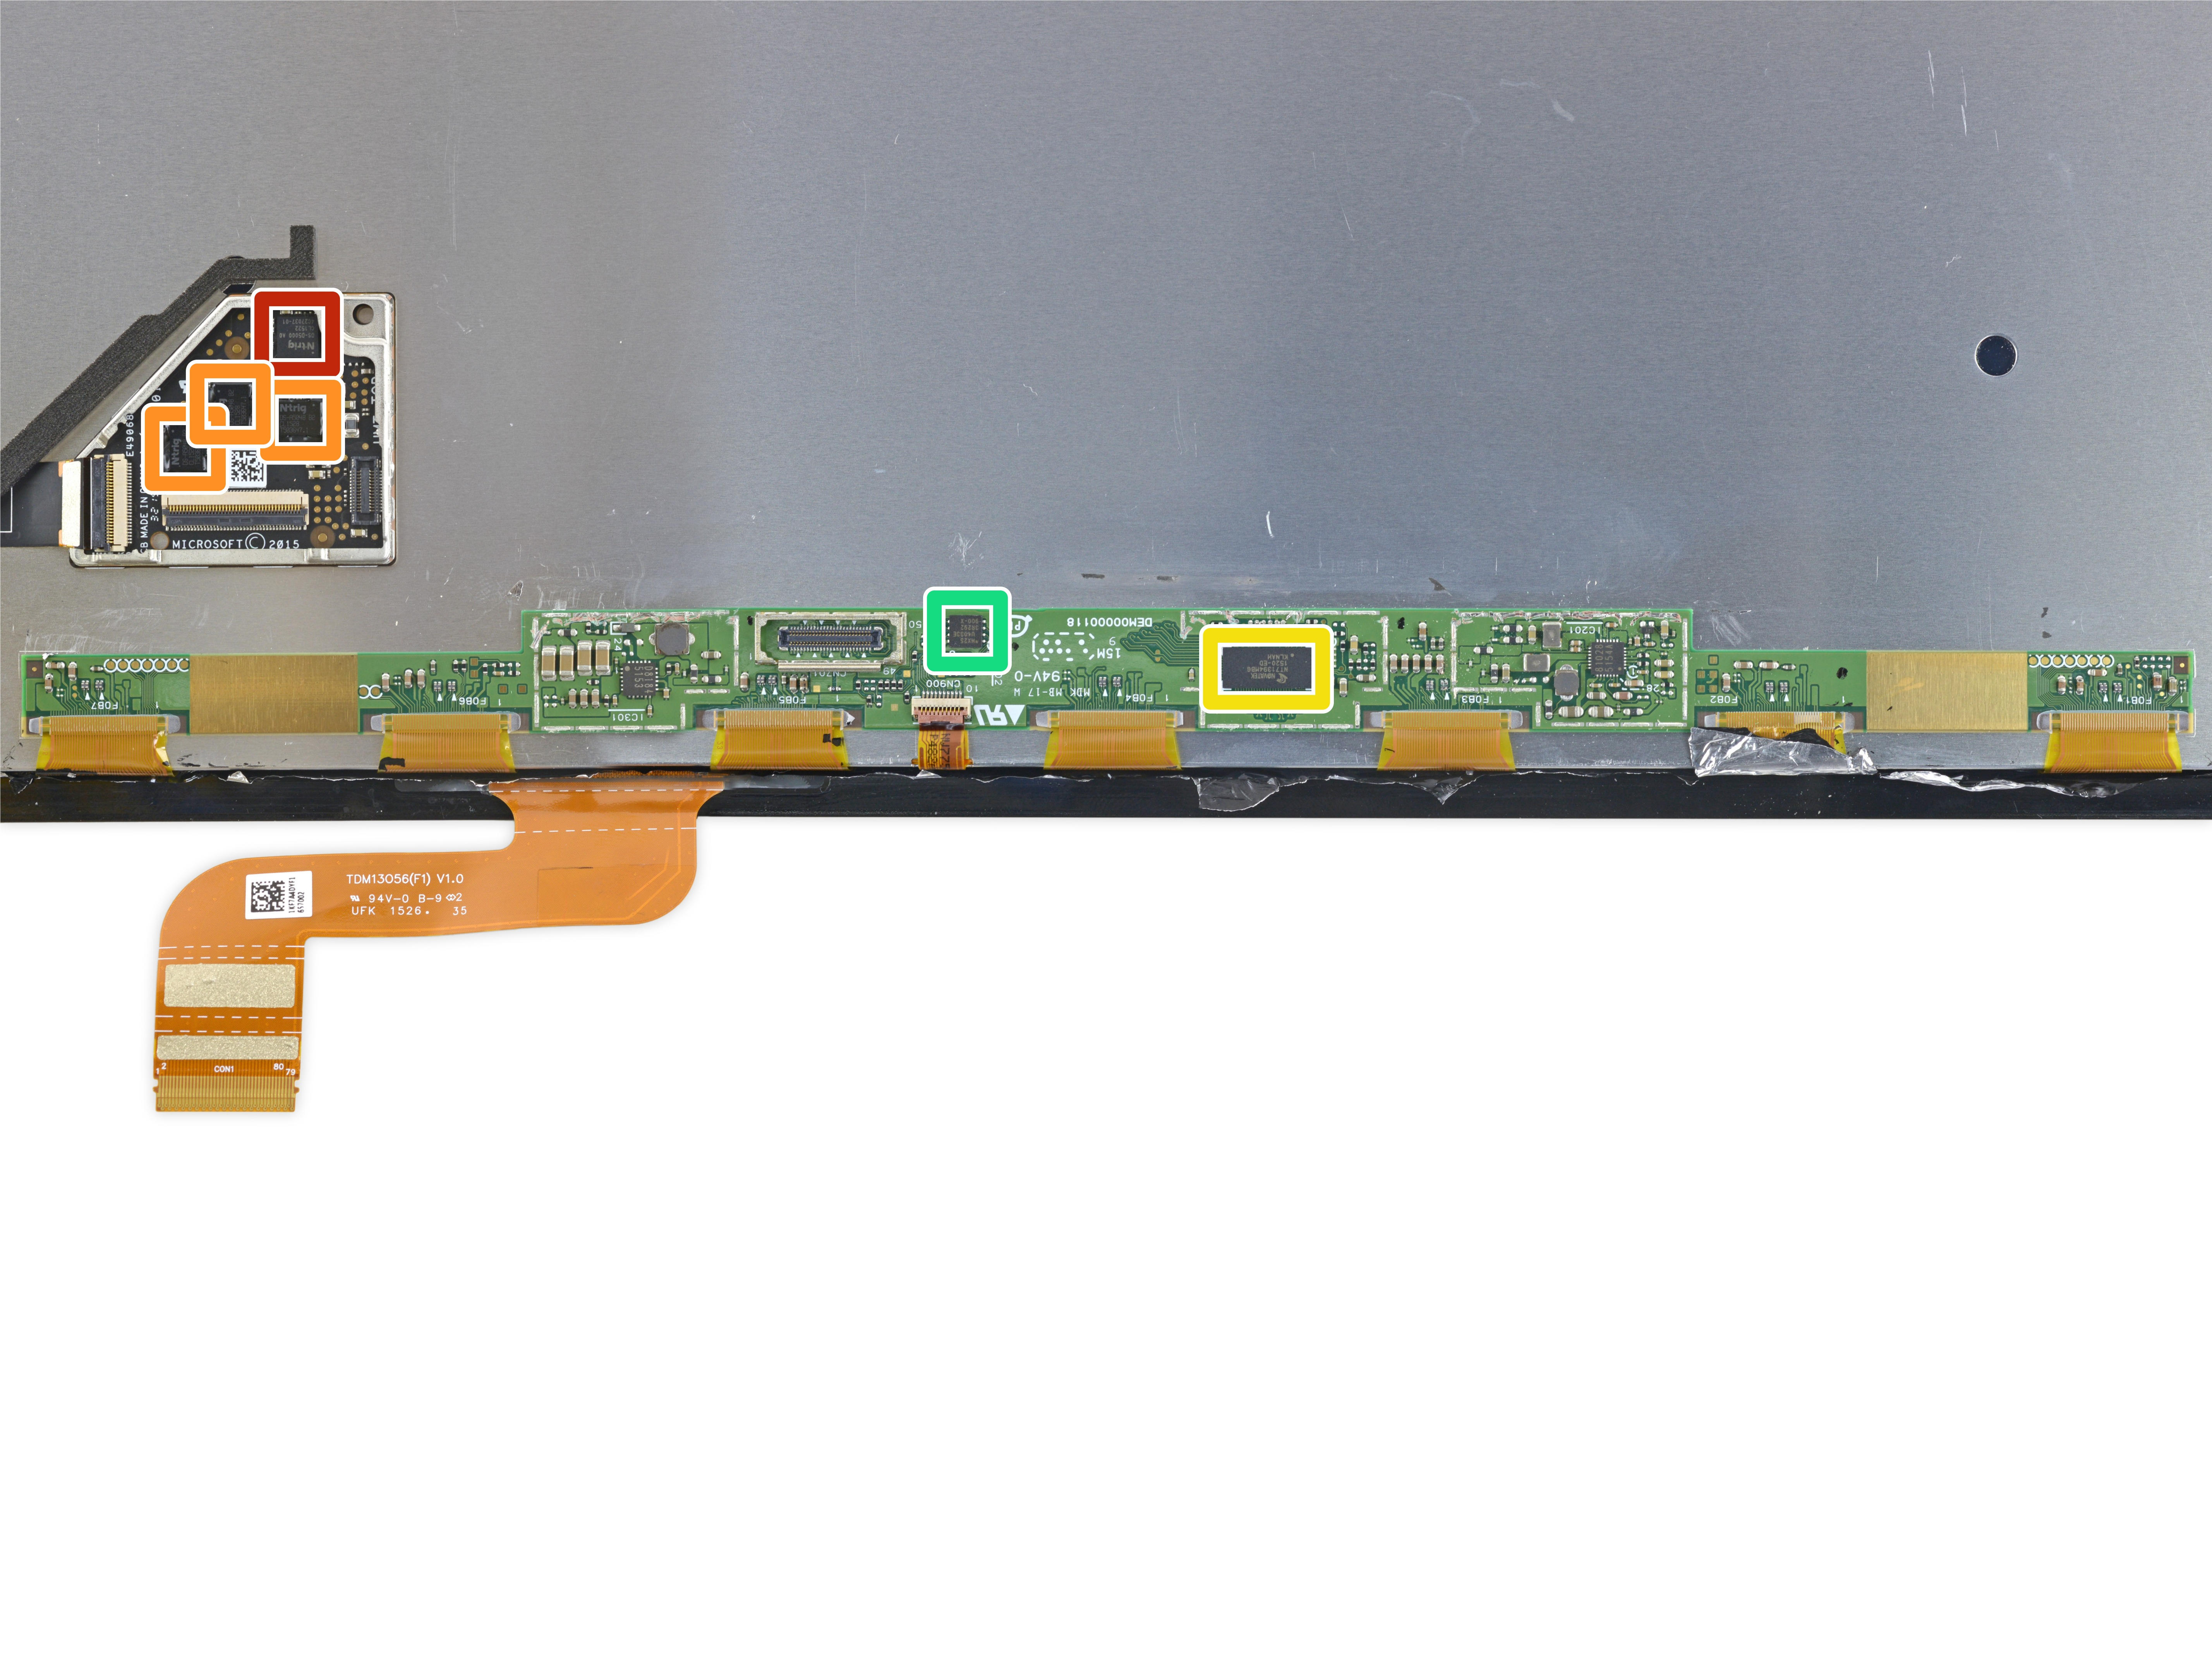
After removing the metal shield and foil on the screen, we look at the chip on the display board.
Red: N-trig DS-D5000 A0
Orange: N-trig DS-A5048 B2
Yellow: Novatek NT71394MBG 1520-ED KLNAH
Green: Megan Electronics MX25U4033E 1.8 V 4.0 Mb Multi-in, Multi-out NOR Serial Flash
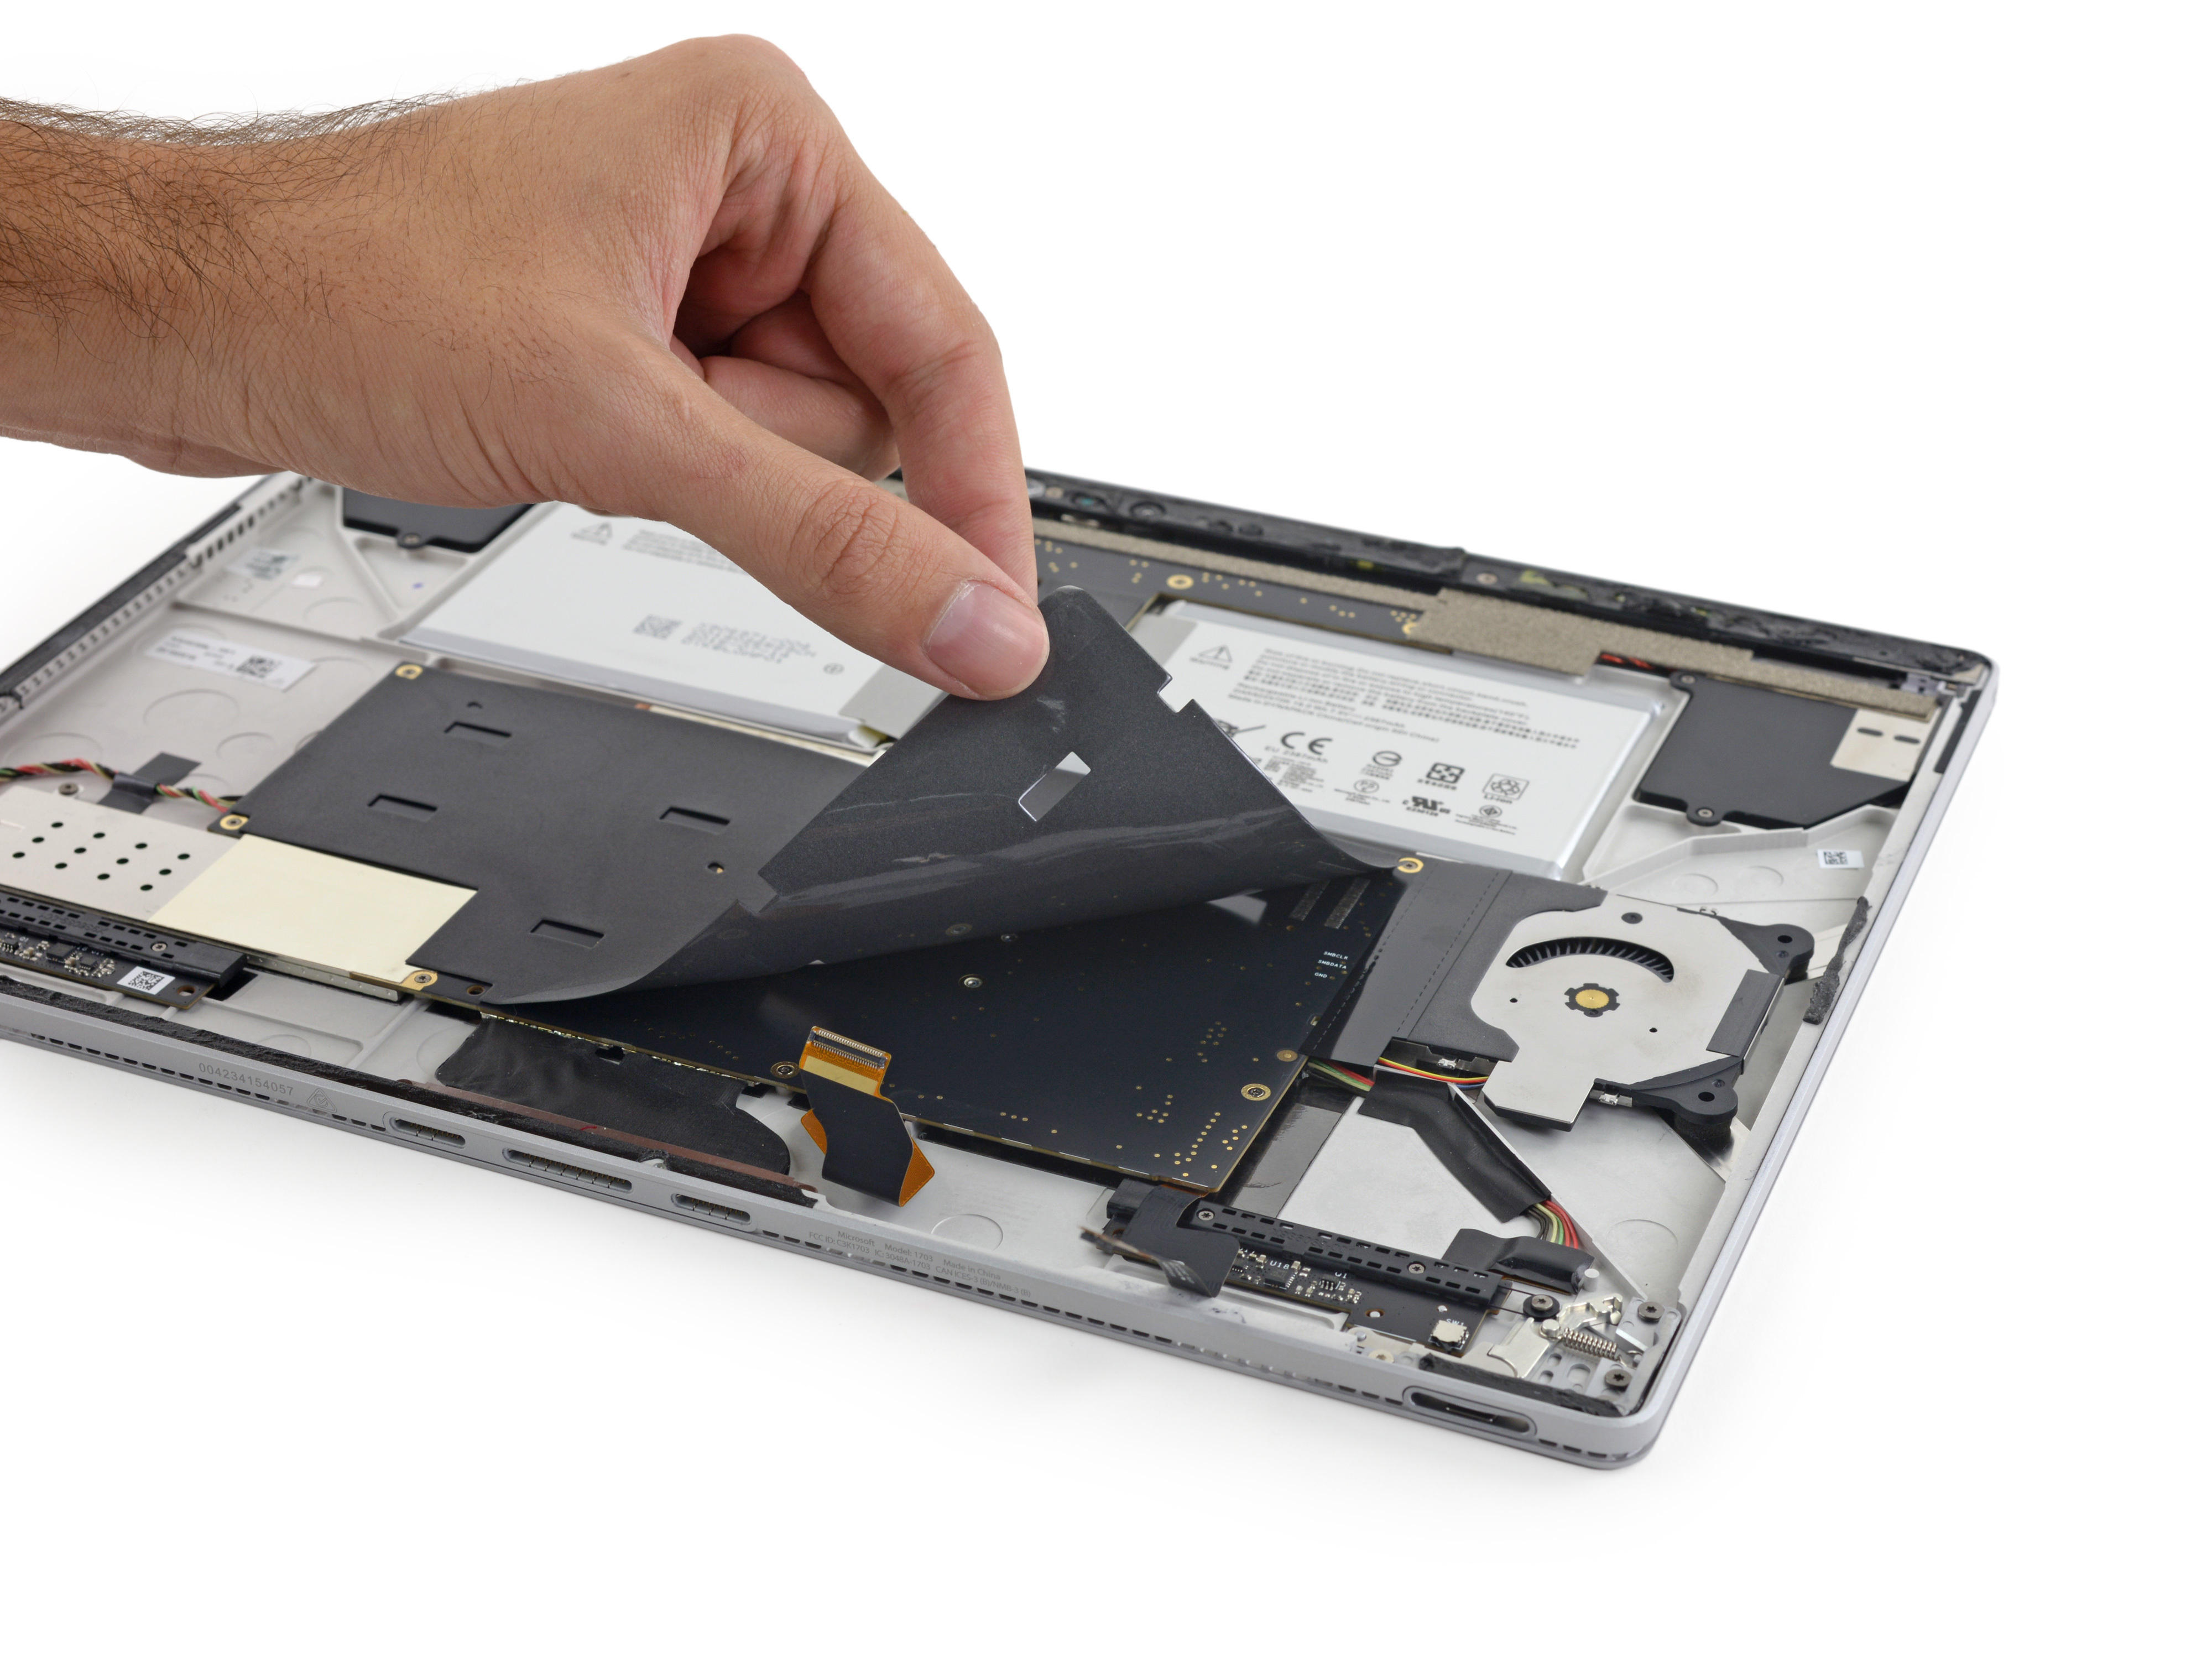
We are now beginning to dismantle the fuselage section. Remove the foam paper that covers the main board first.
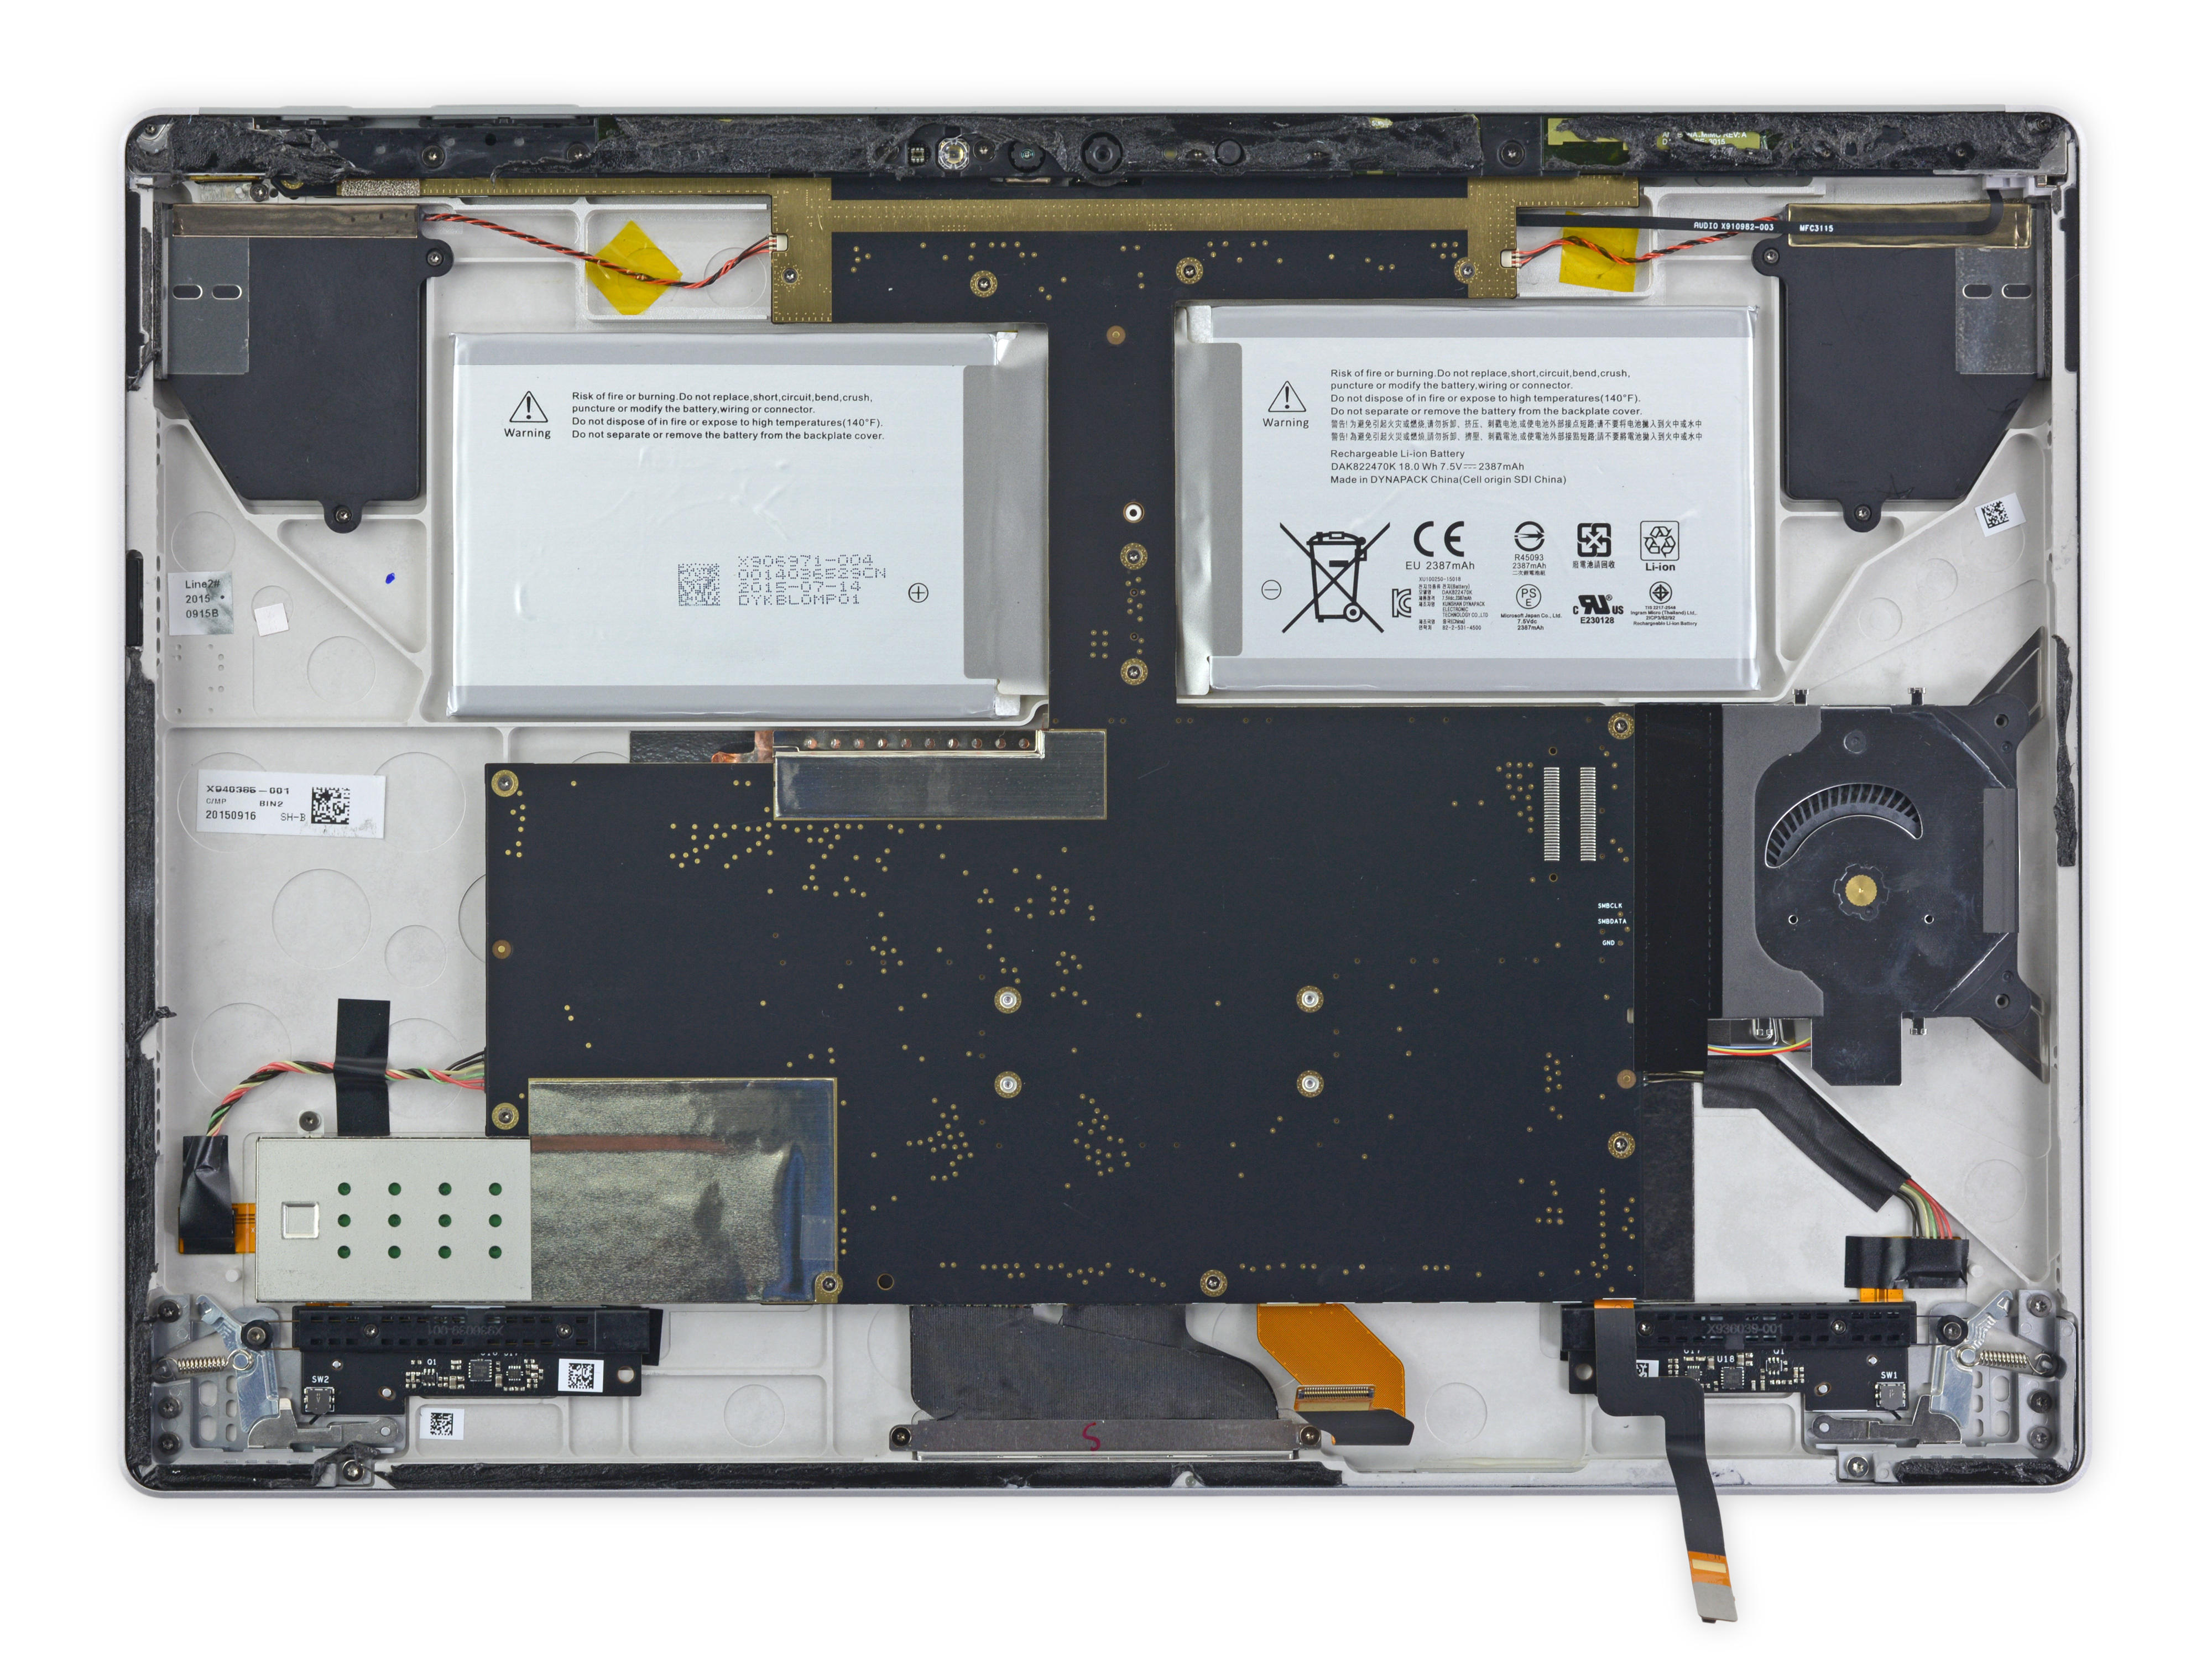
We found that Surface Book's main board is very large, covering almost the entire body.

Like disassembling the Surface Pro 4, we first remove the cover on the camera module.
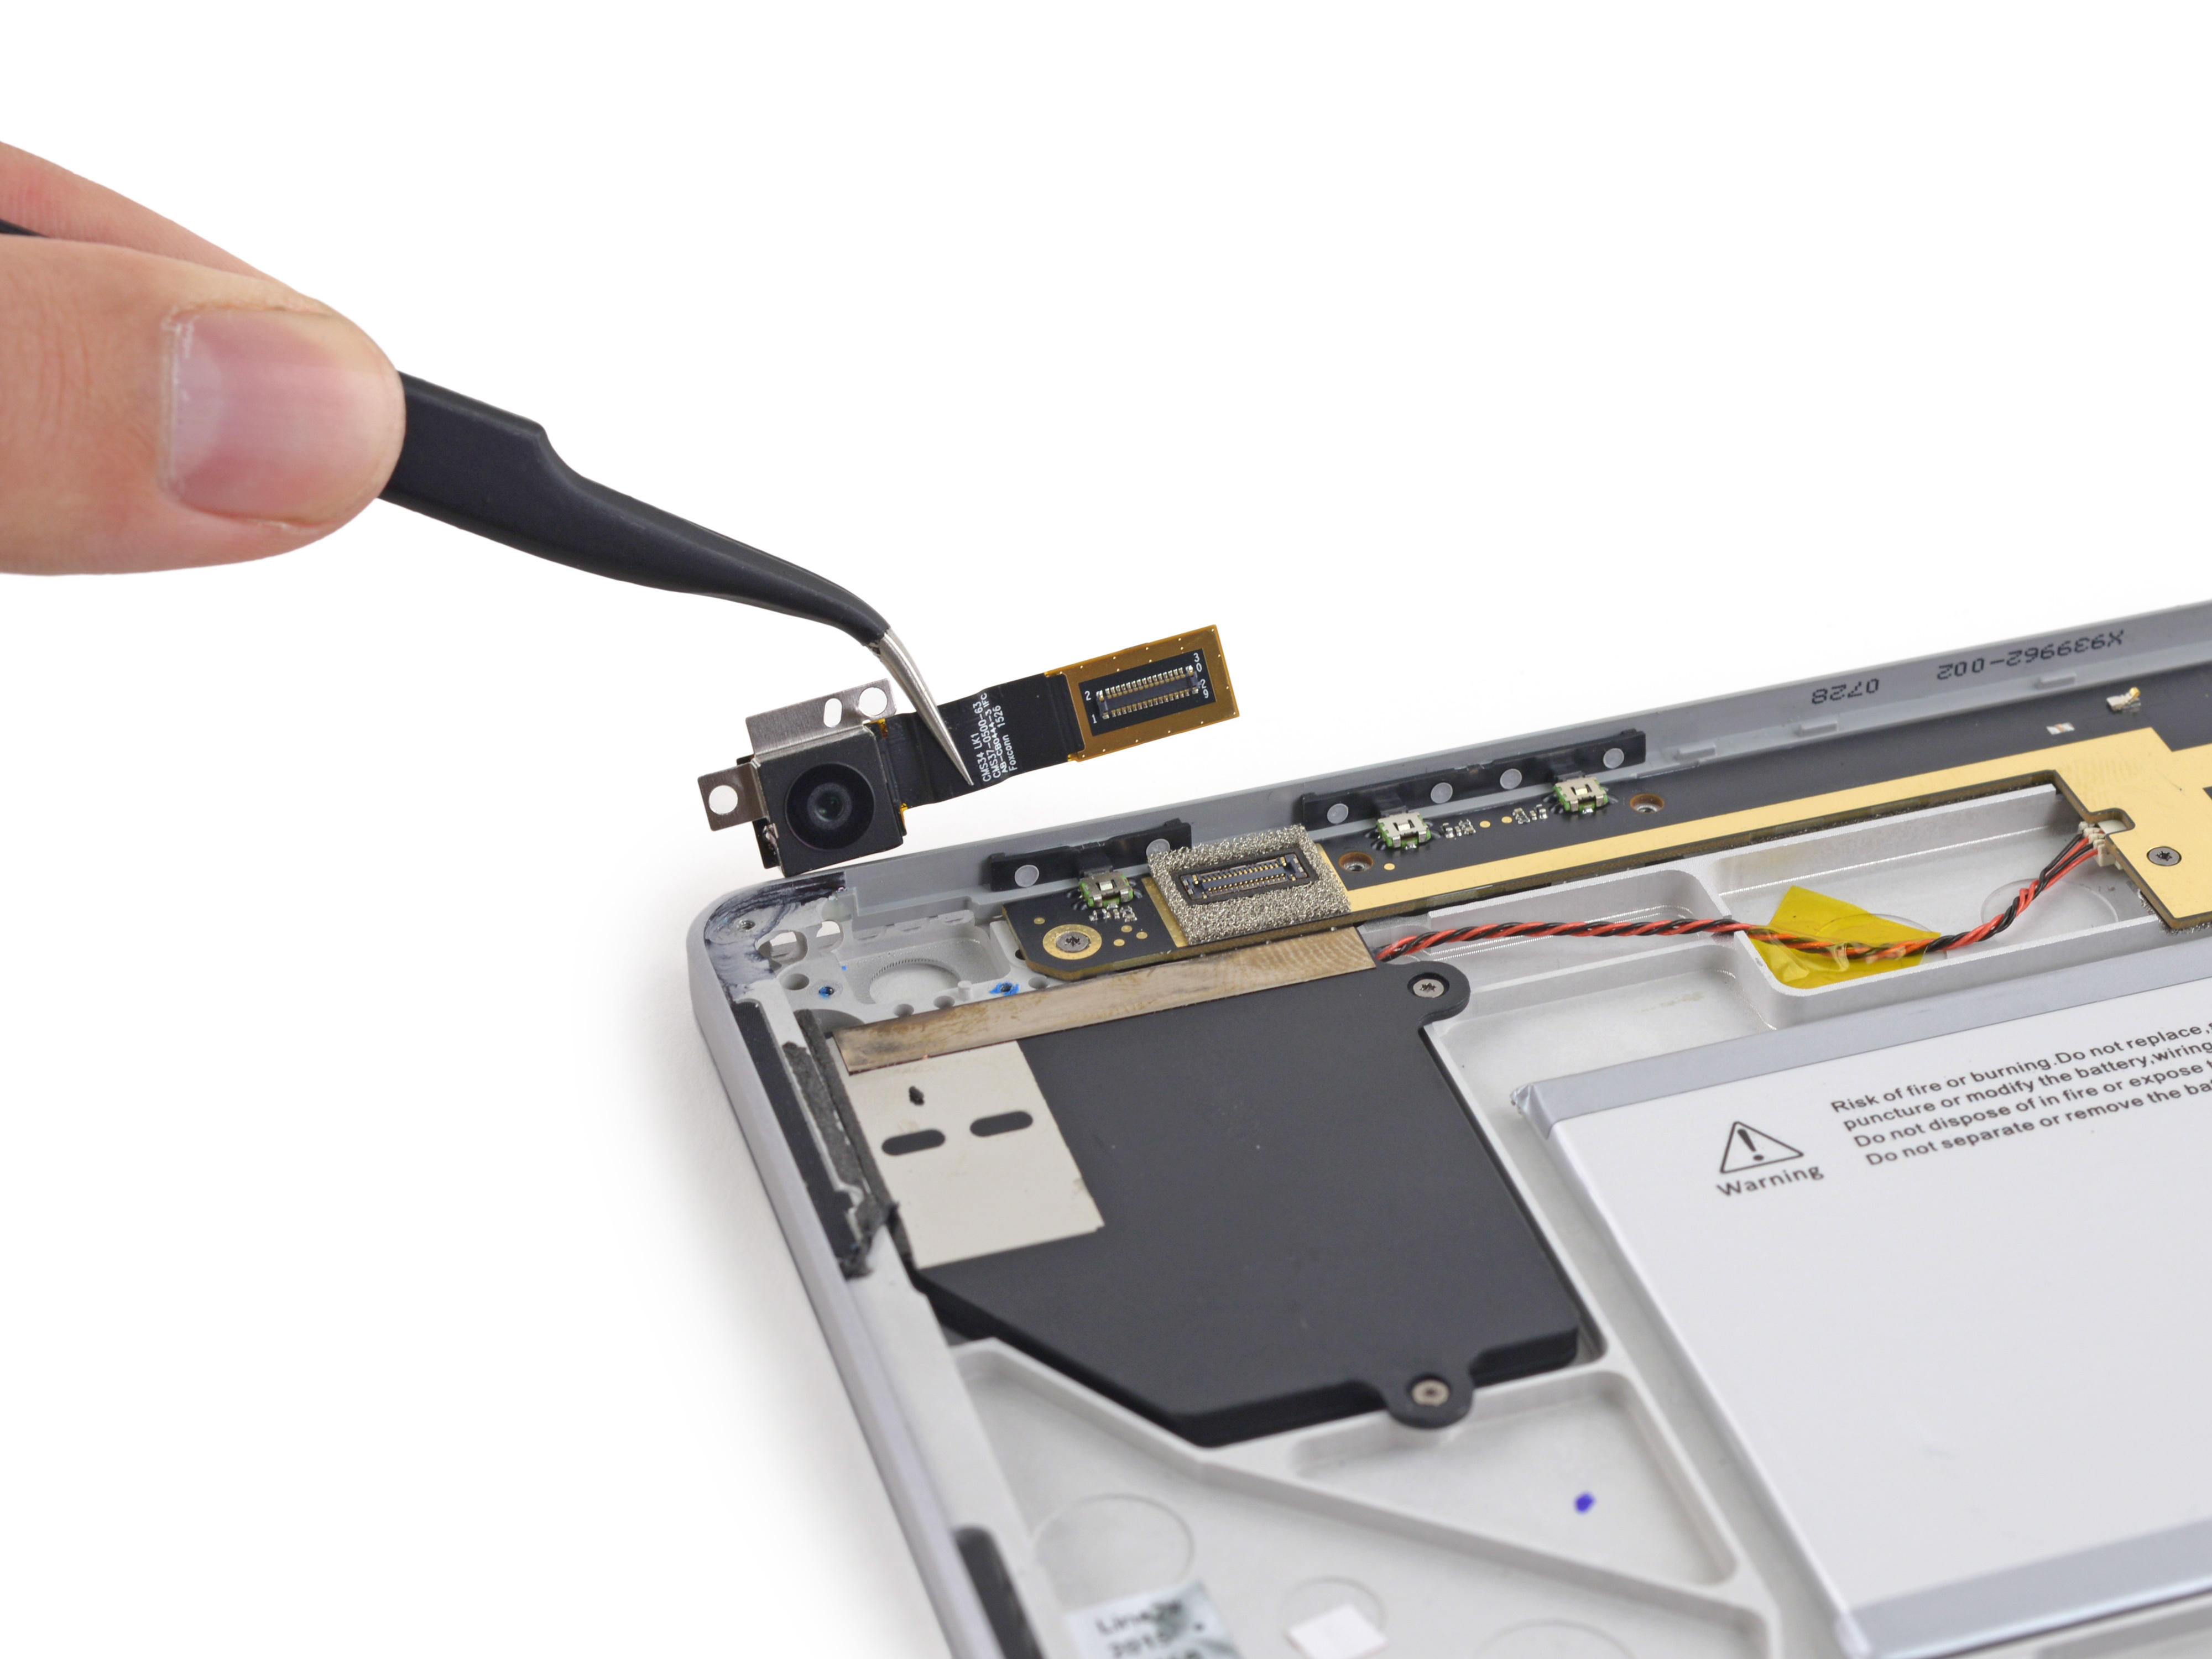
Separate the cable to remove the rear camera.
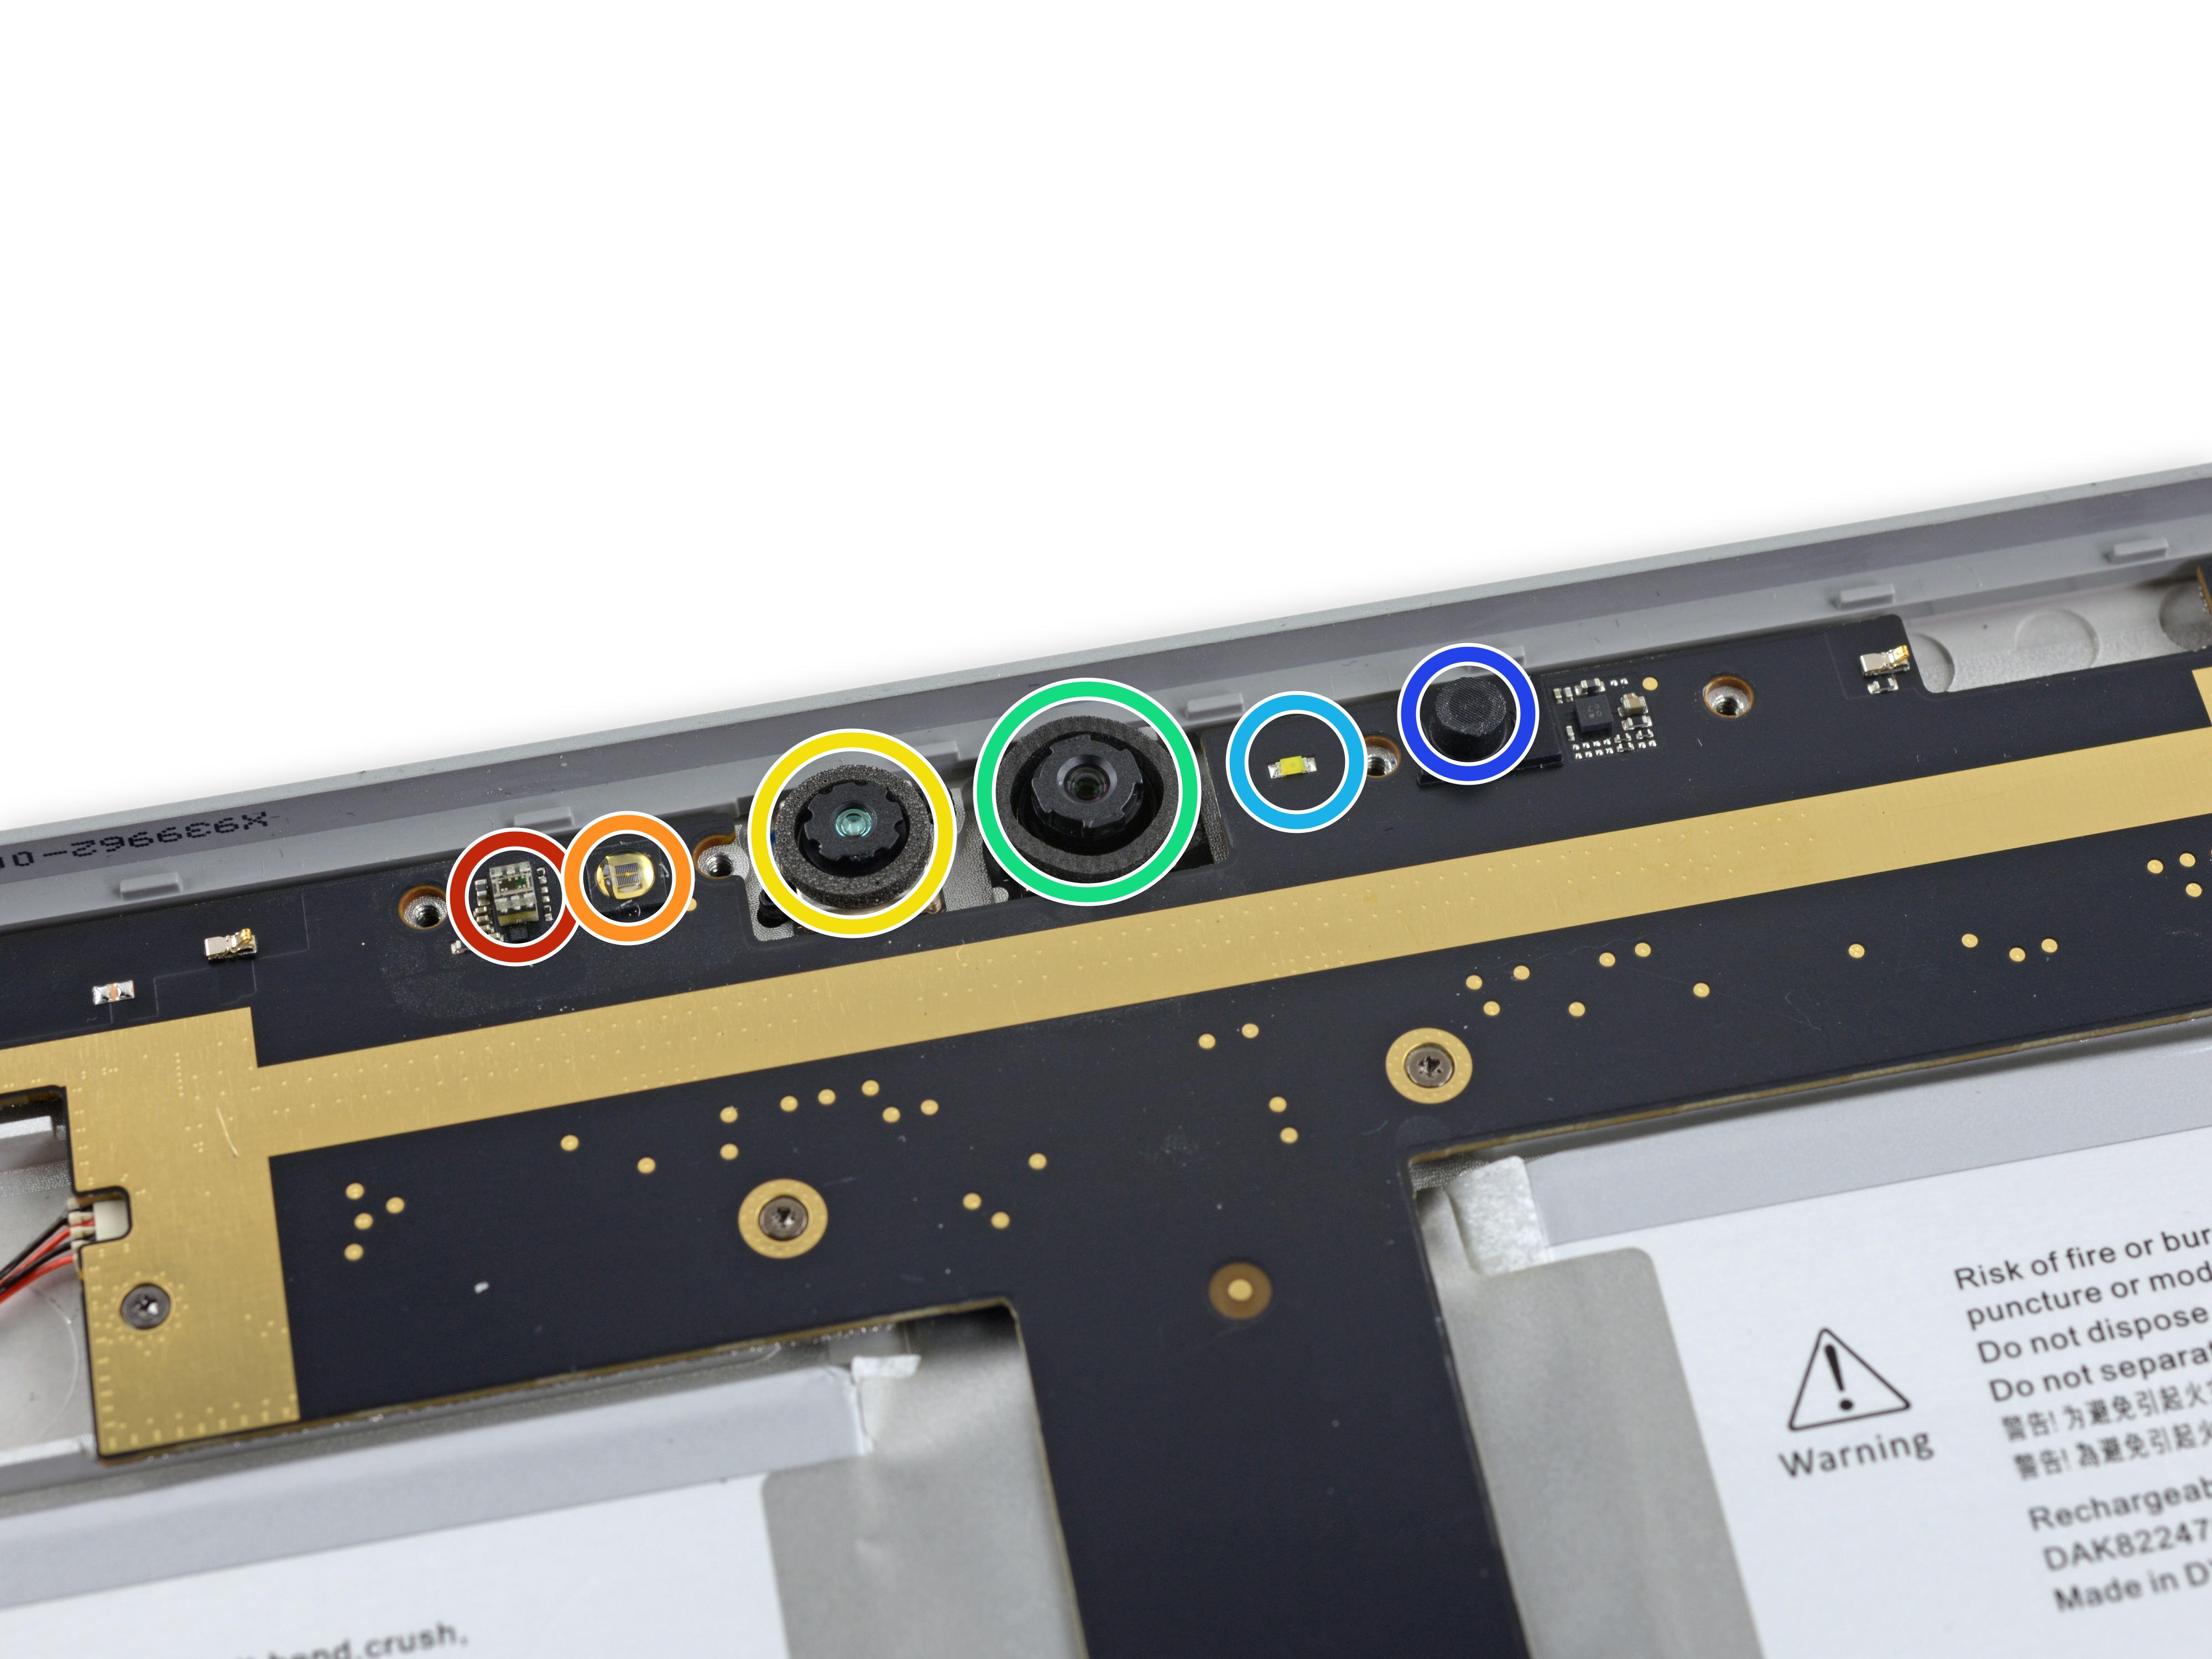
Let's take a look at the front camera module:
Red: light sensor
Orange: Infrared emitter
Yellow: front camera
Green: Infrared camera
Light blue: indicator for rear camera
Dark blue: microphone
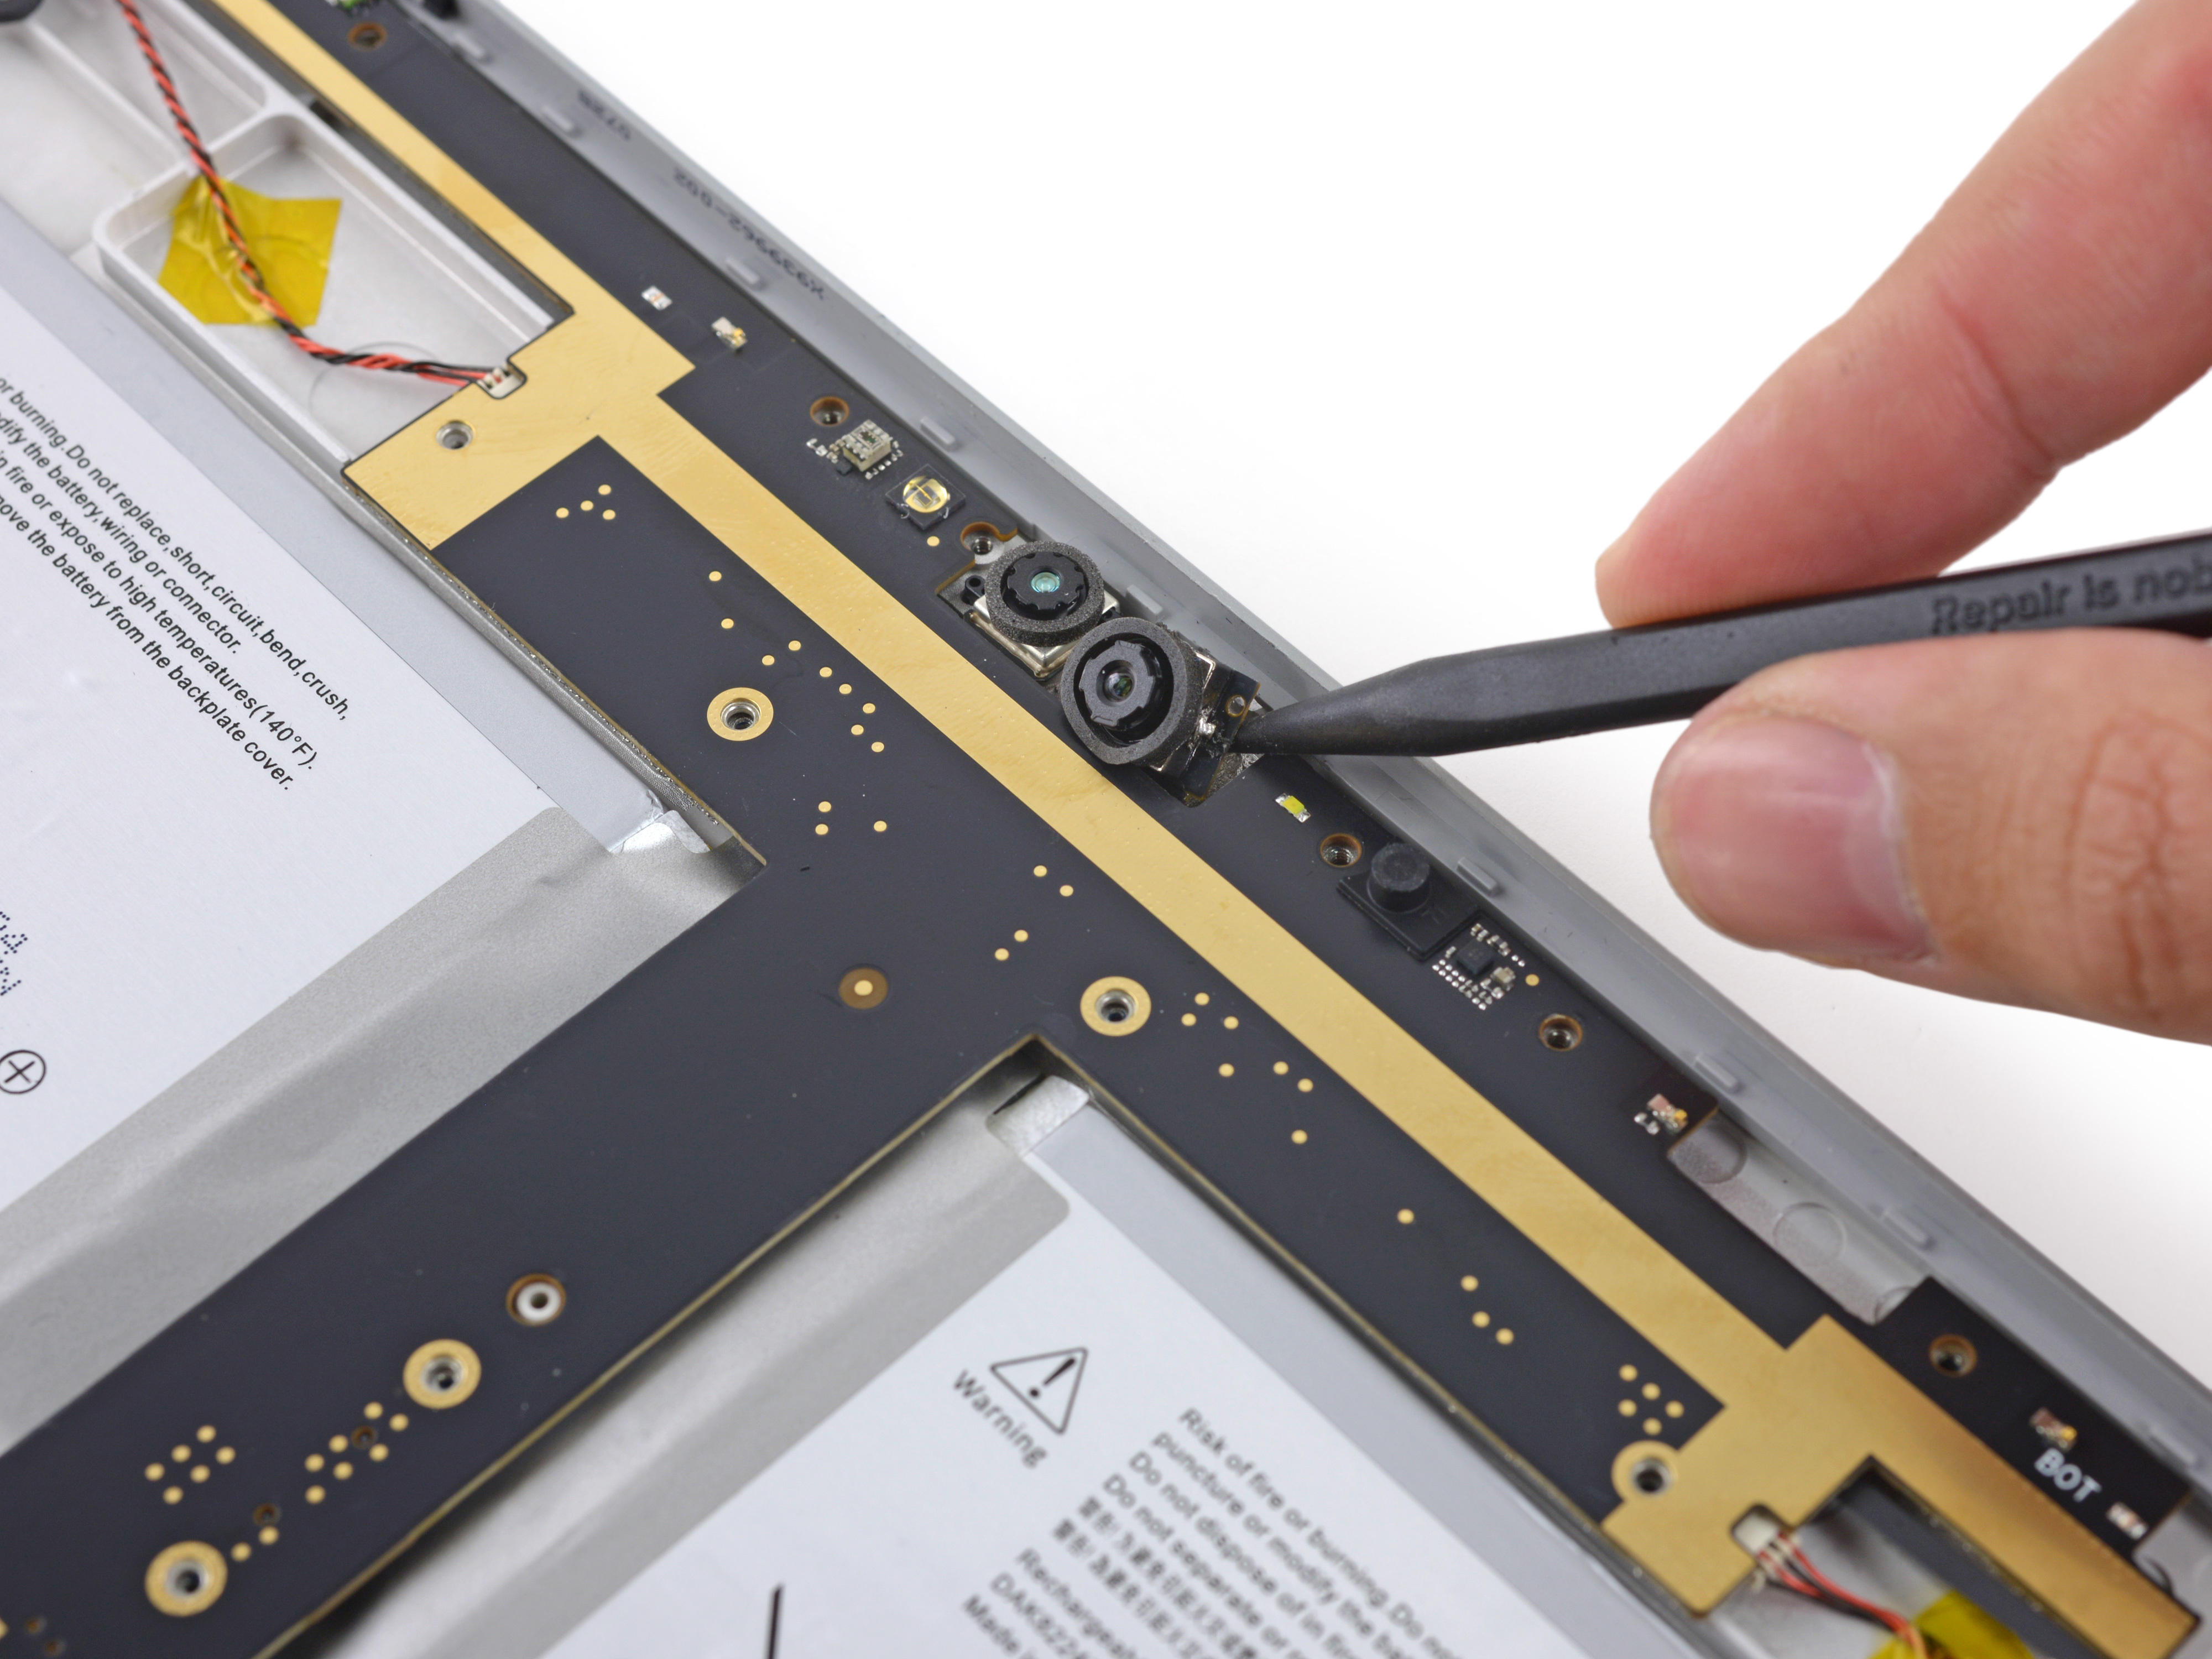
We tried to separate the front camera, but found that the front camera and sensor were glued to the motherboard. We decided to remove the board and then separate it.

There are many cables and cables on the motherboard. We separate them one by one with tweezers and crowbars.

Remove the headphone jack, which is connected to the motherboard through a long cable.
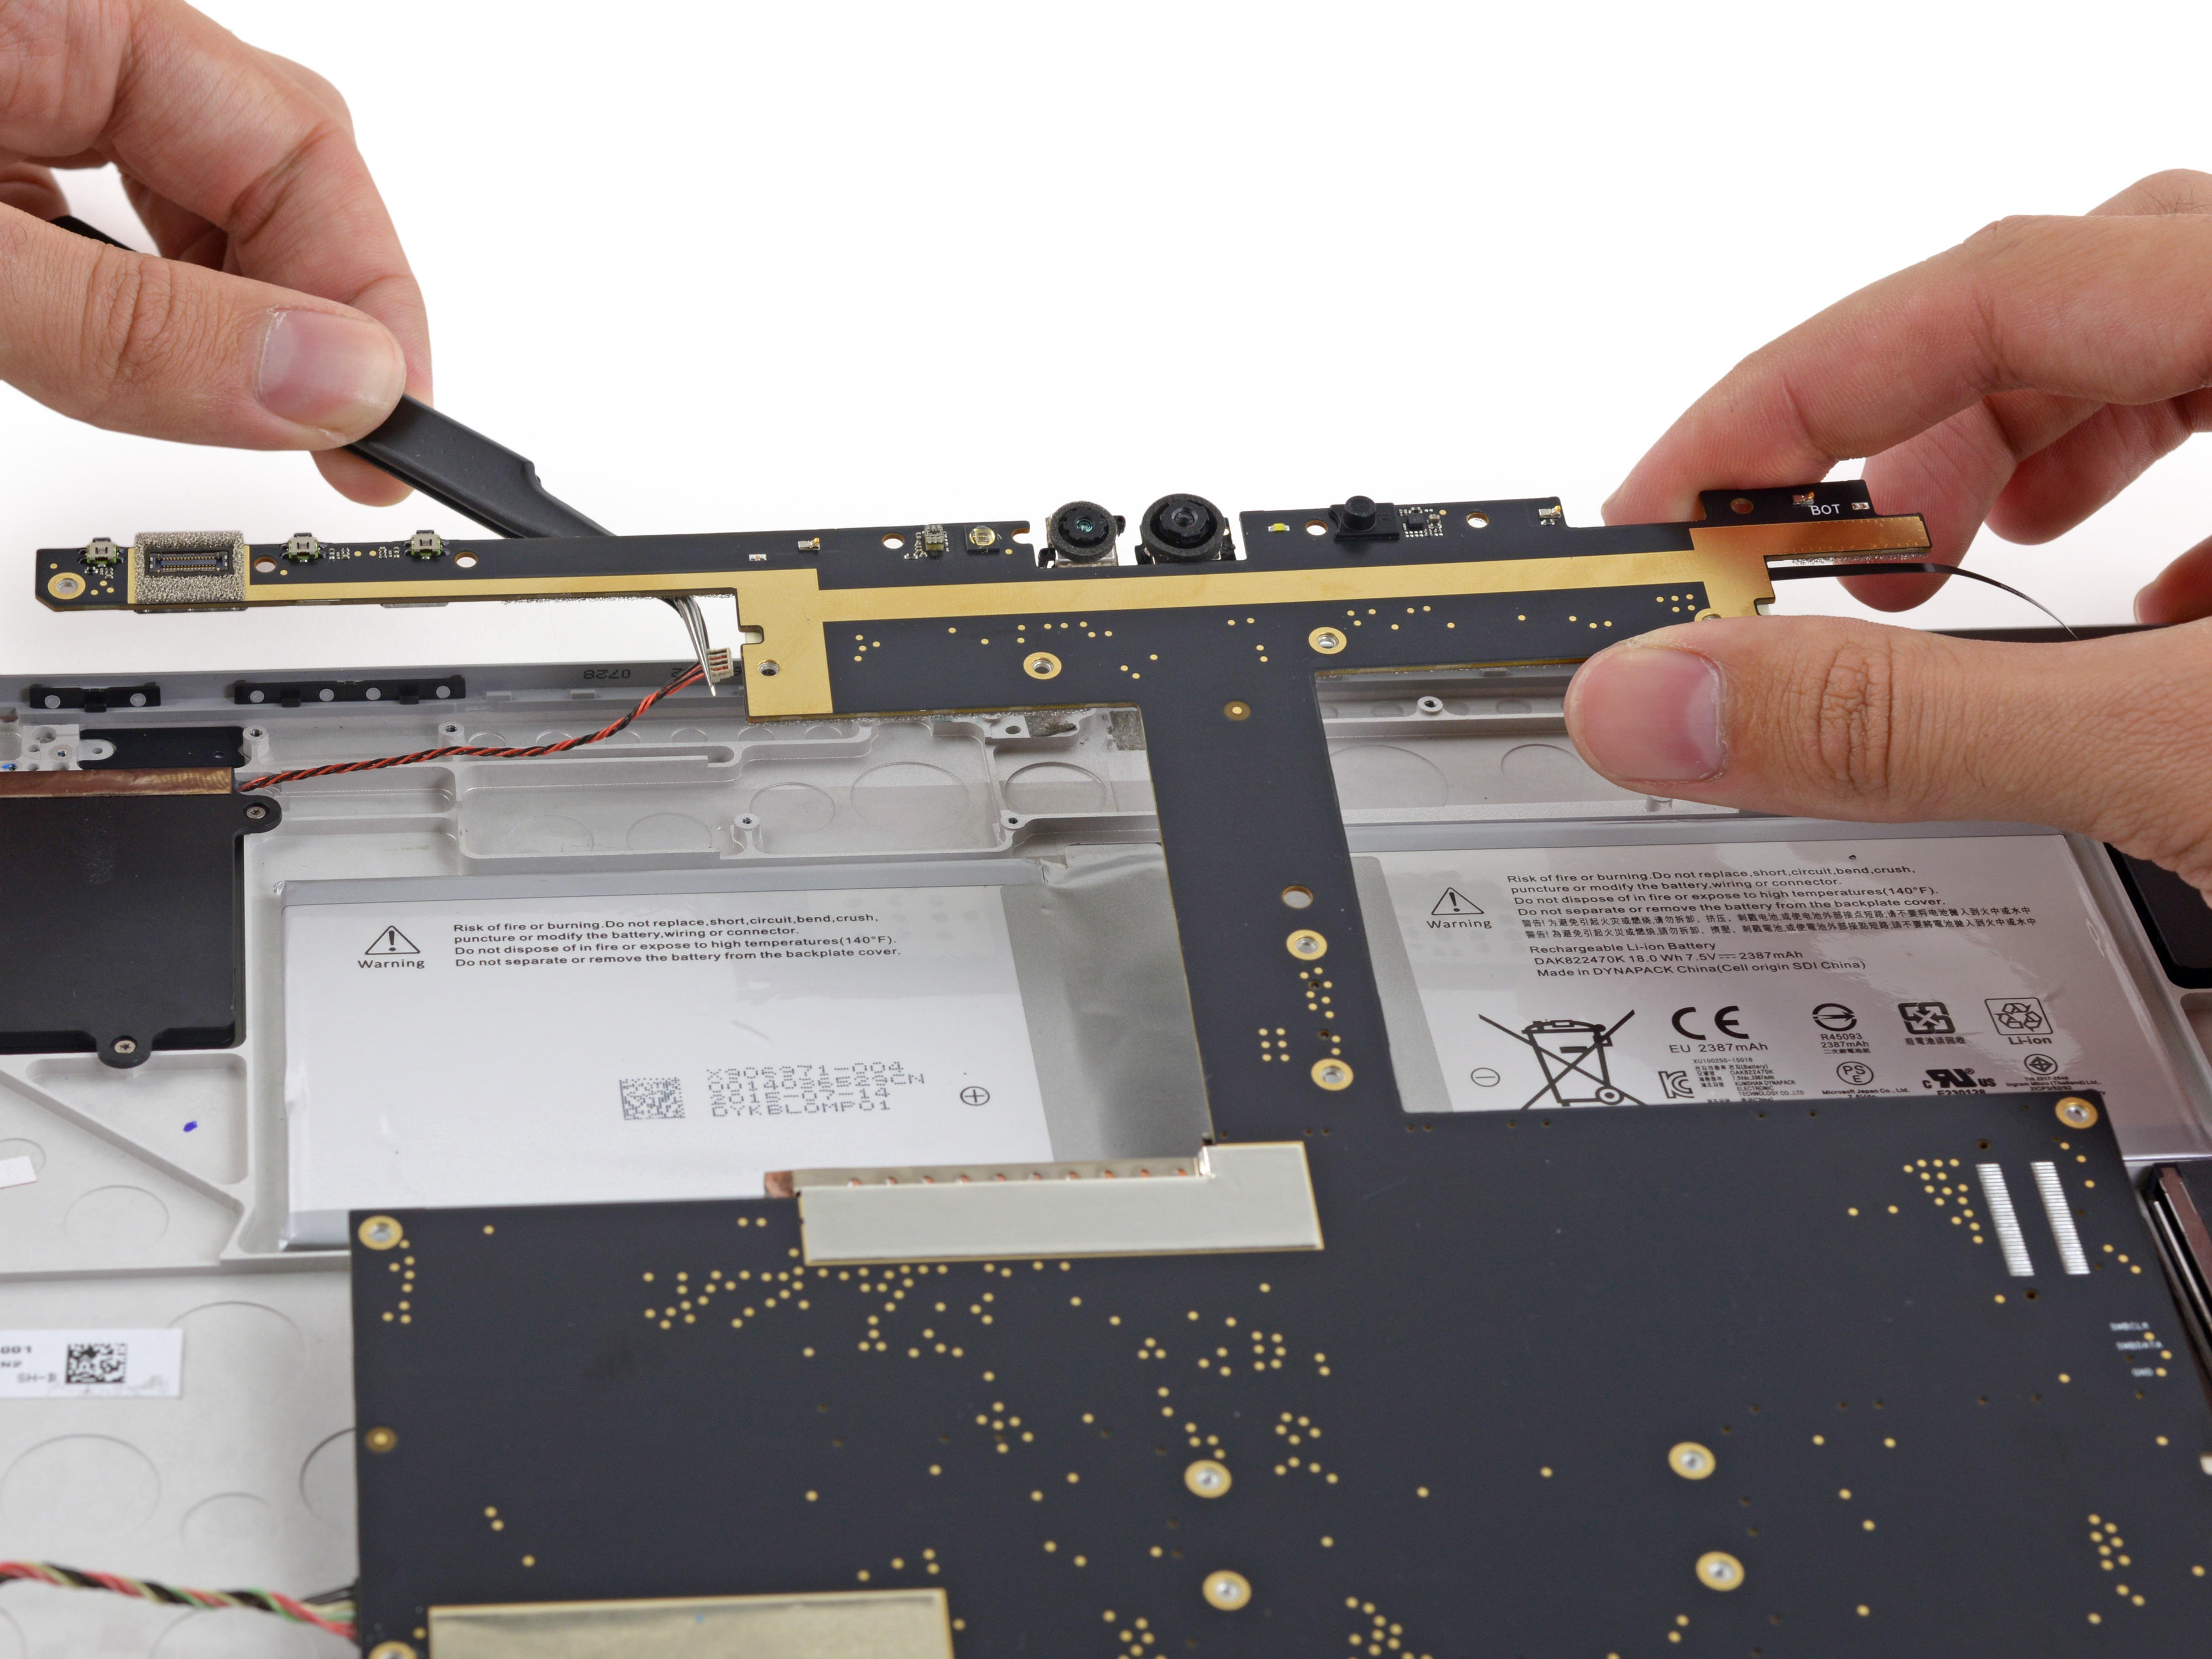
Separating the speaker cables on both sides, we were finally able to remove the motherboard.
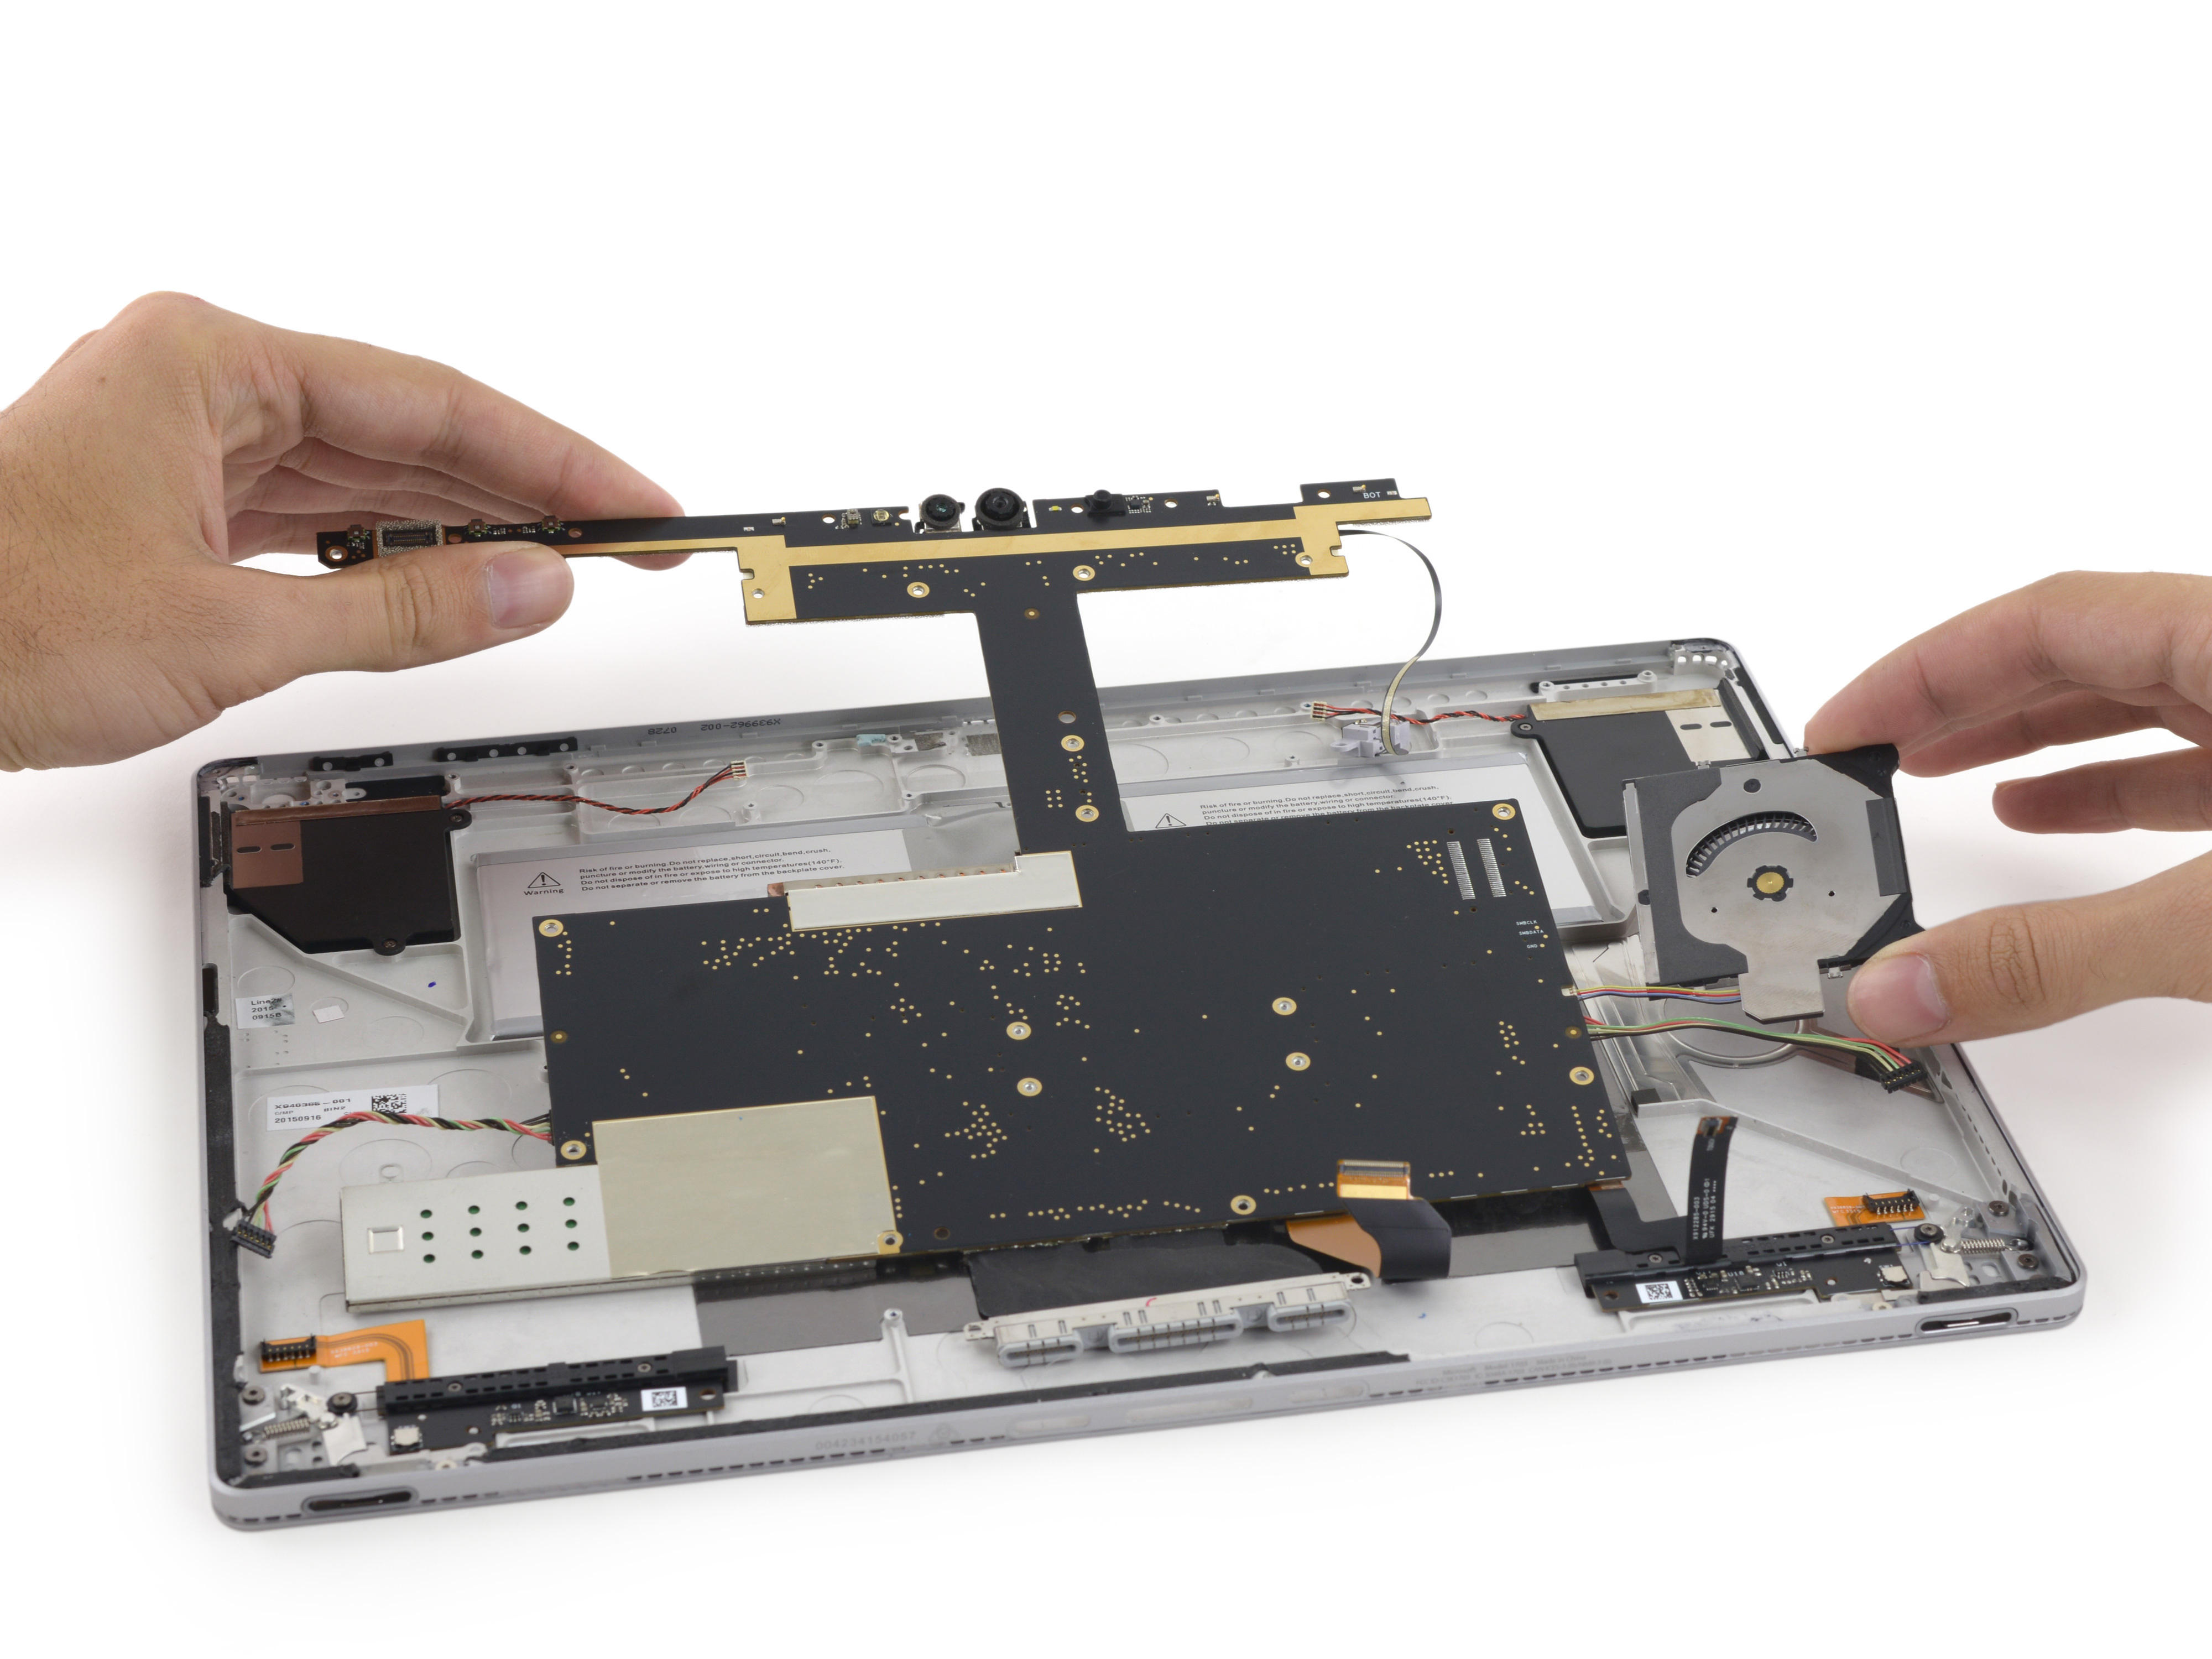
The structure of the motherboard is more complicated, there are a lot of cables, and the shape is very special.

Remove the various cables connected to the motherboard.

A large number of cables indicate that the machine adopts a large number of modular designs. If a fault occurs, the cables can be removed and the corresponding components can be replaced.
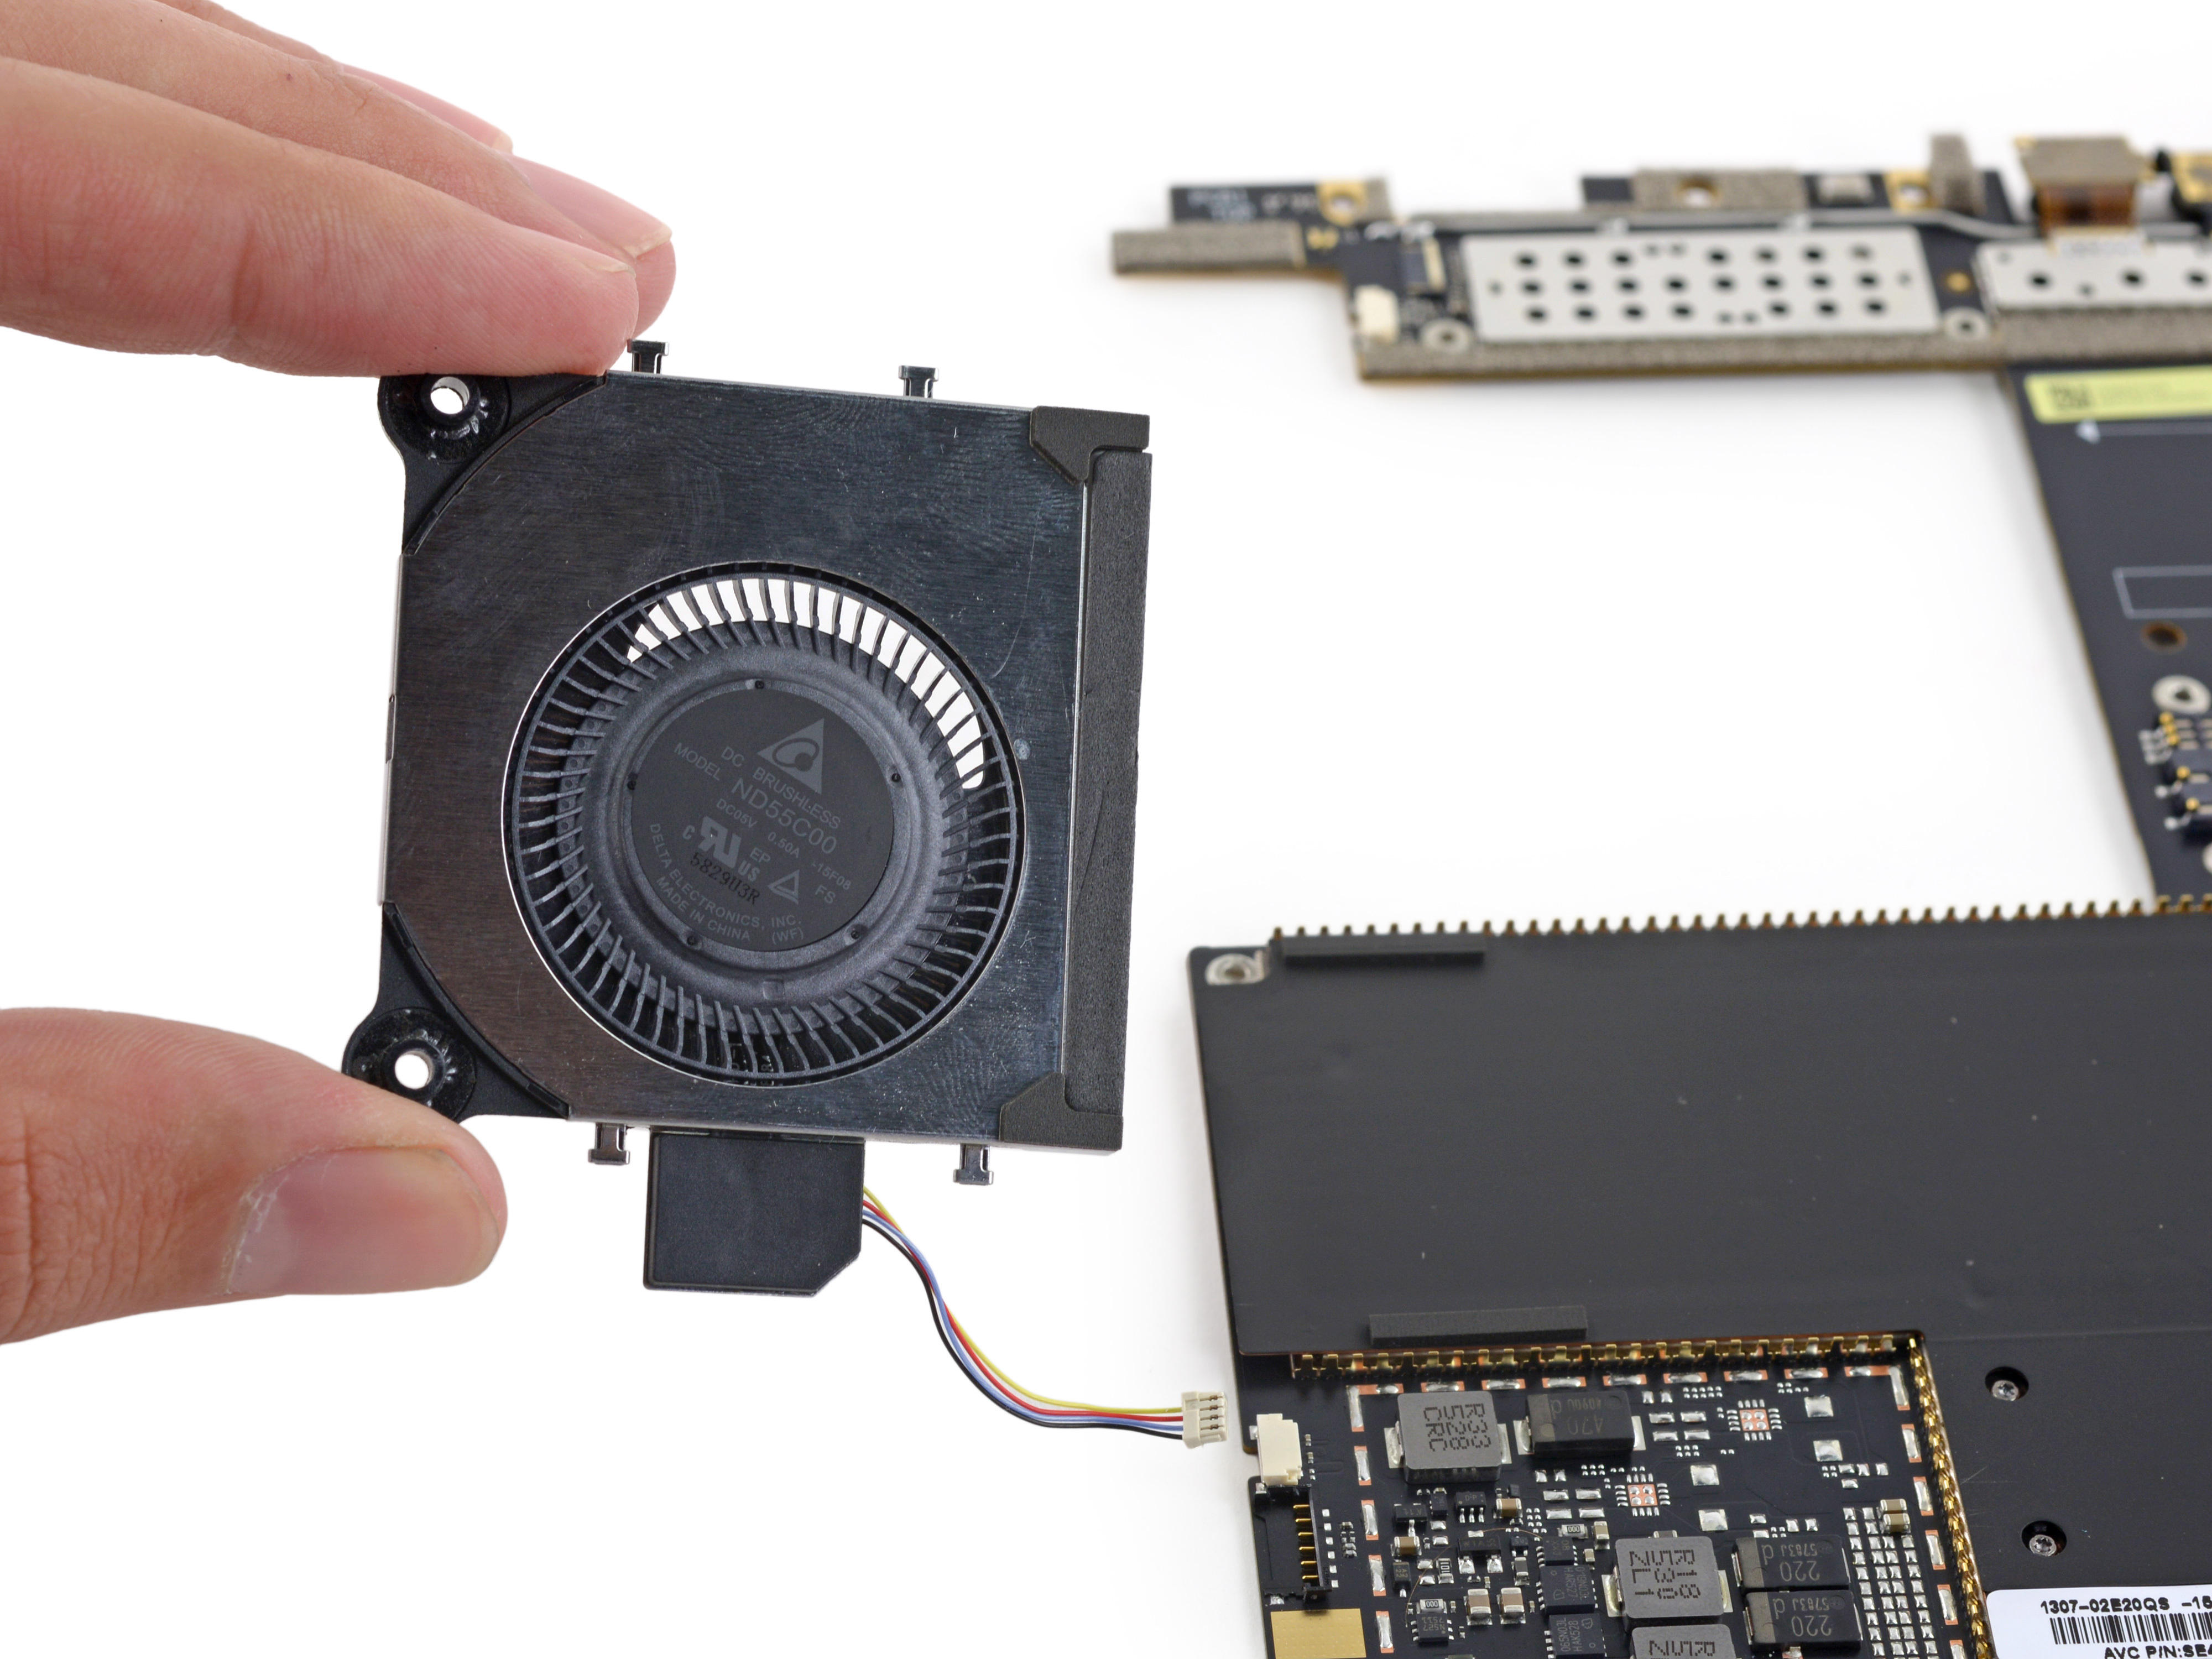
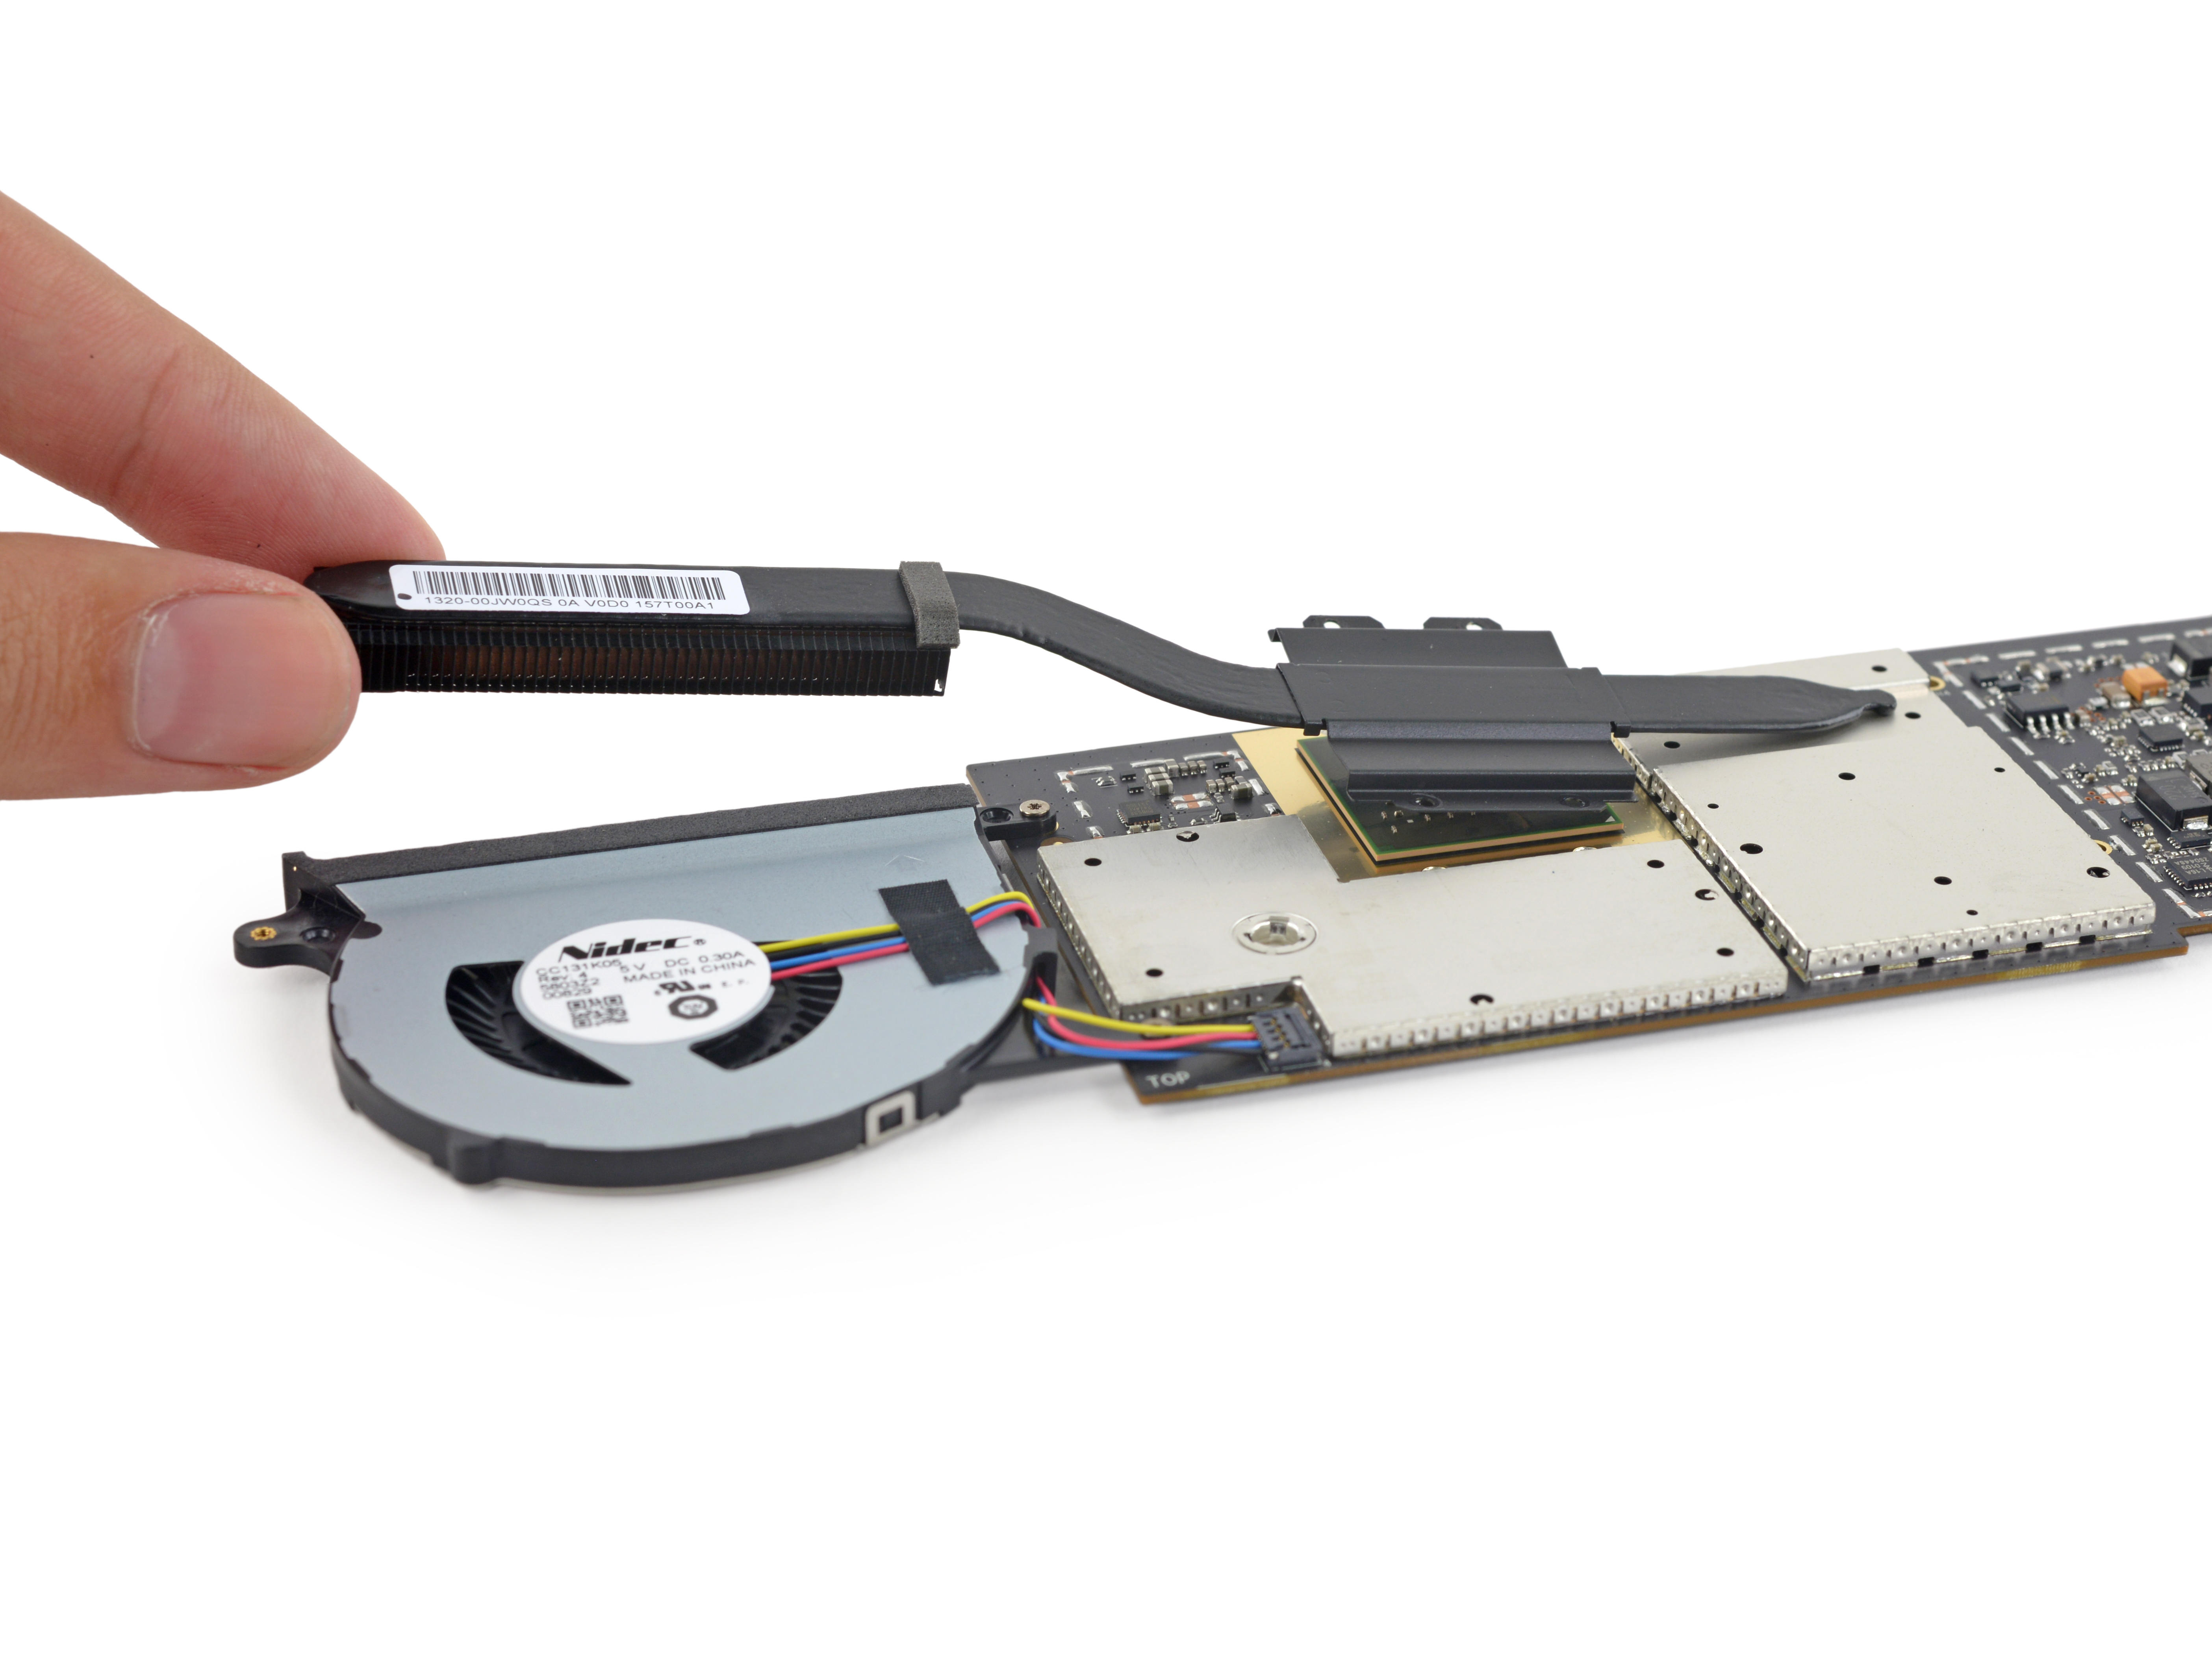
Here we can finally remove the front part of the motherboard. Let's take a look at the fan, the slim 0.5Amp fan.
Next we separate the cooling module.

The heat dissipation module consists of a large copper plate and a heat pipe. The core part is coated with thermal grease, while the other part has a large area of ​​thermal paste. There is a heat pipe at the far end of the cooling module to help dissipate heat, keeping the heat away from the cpu and other components as much as possible.

We removed the cameras one by one.
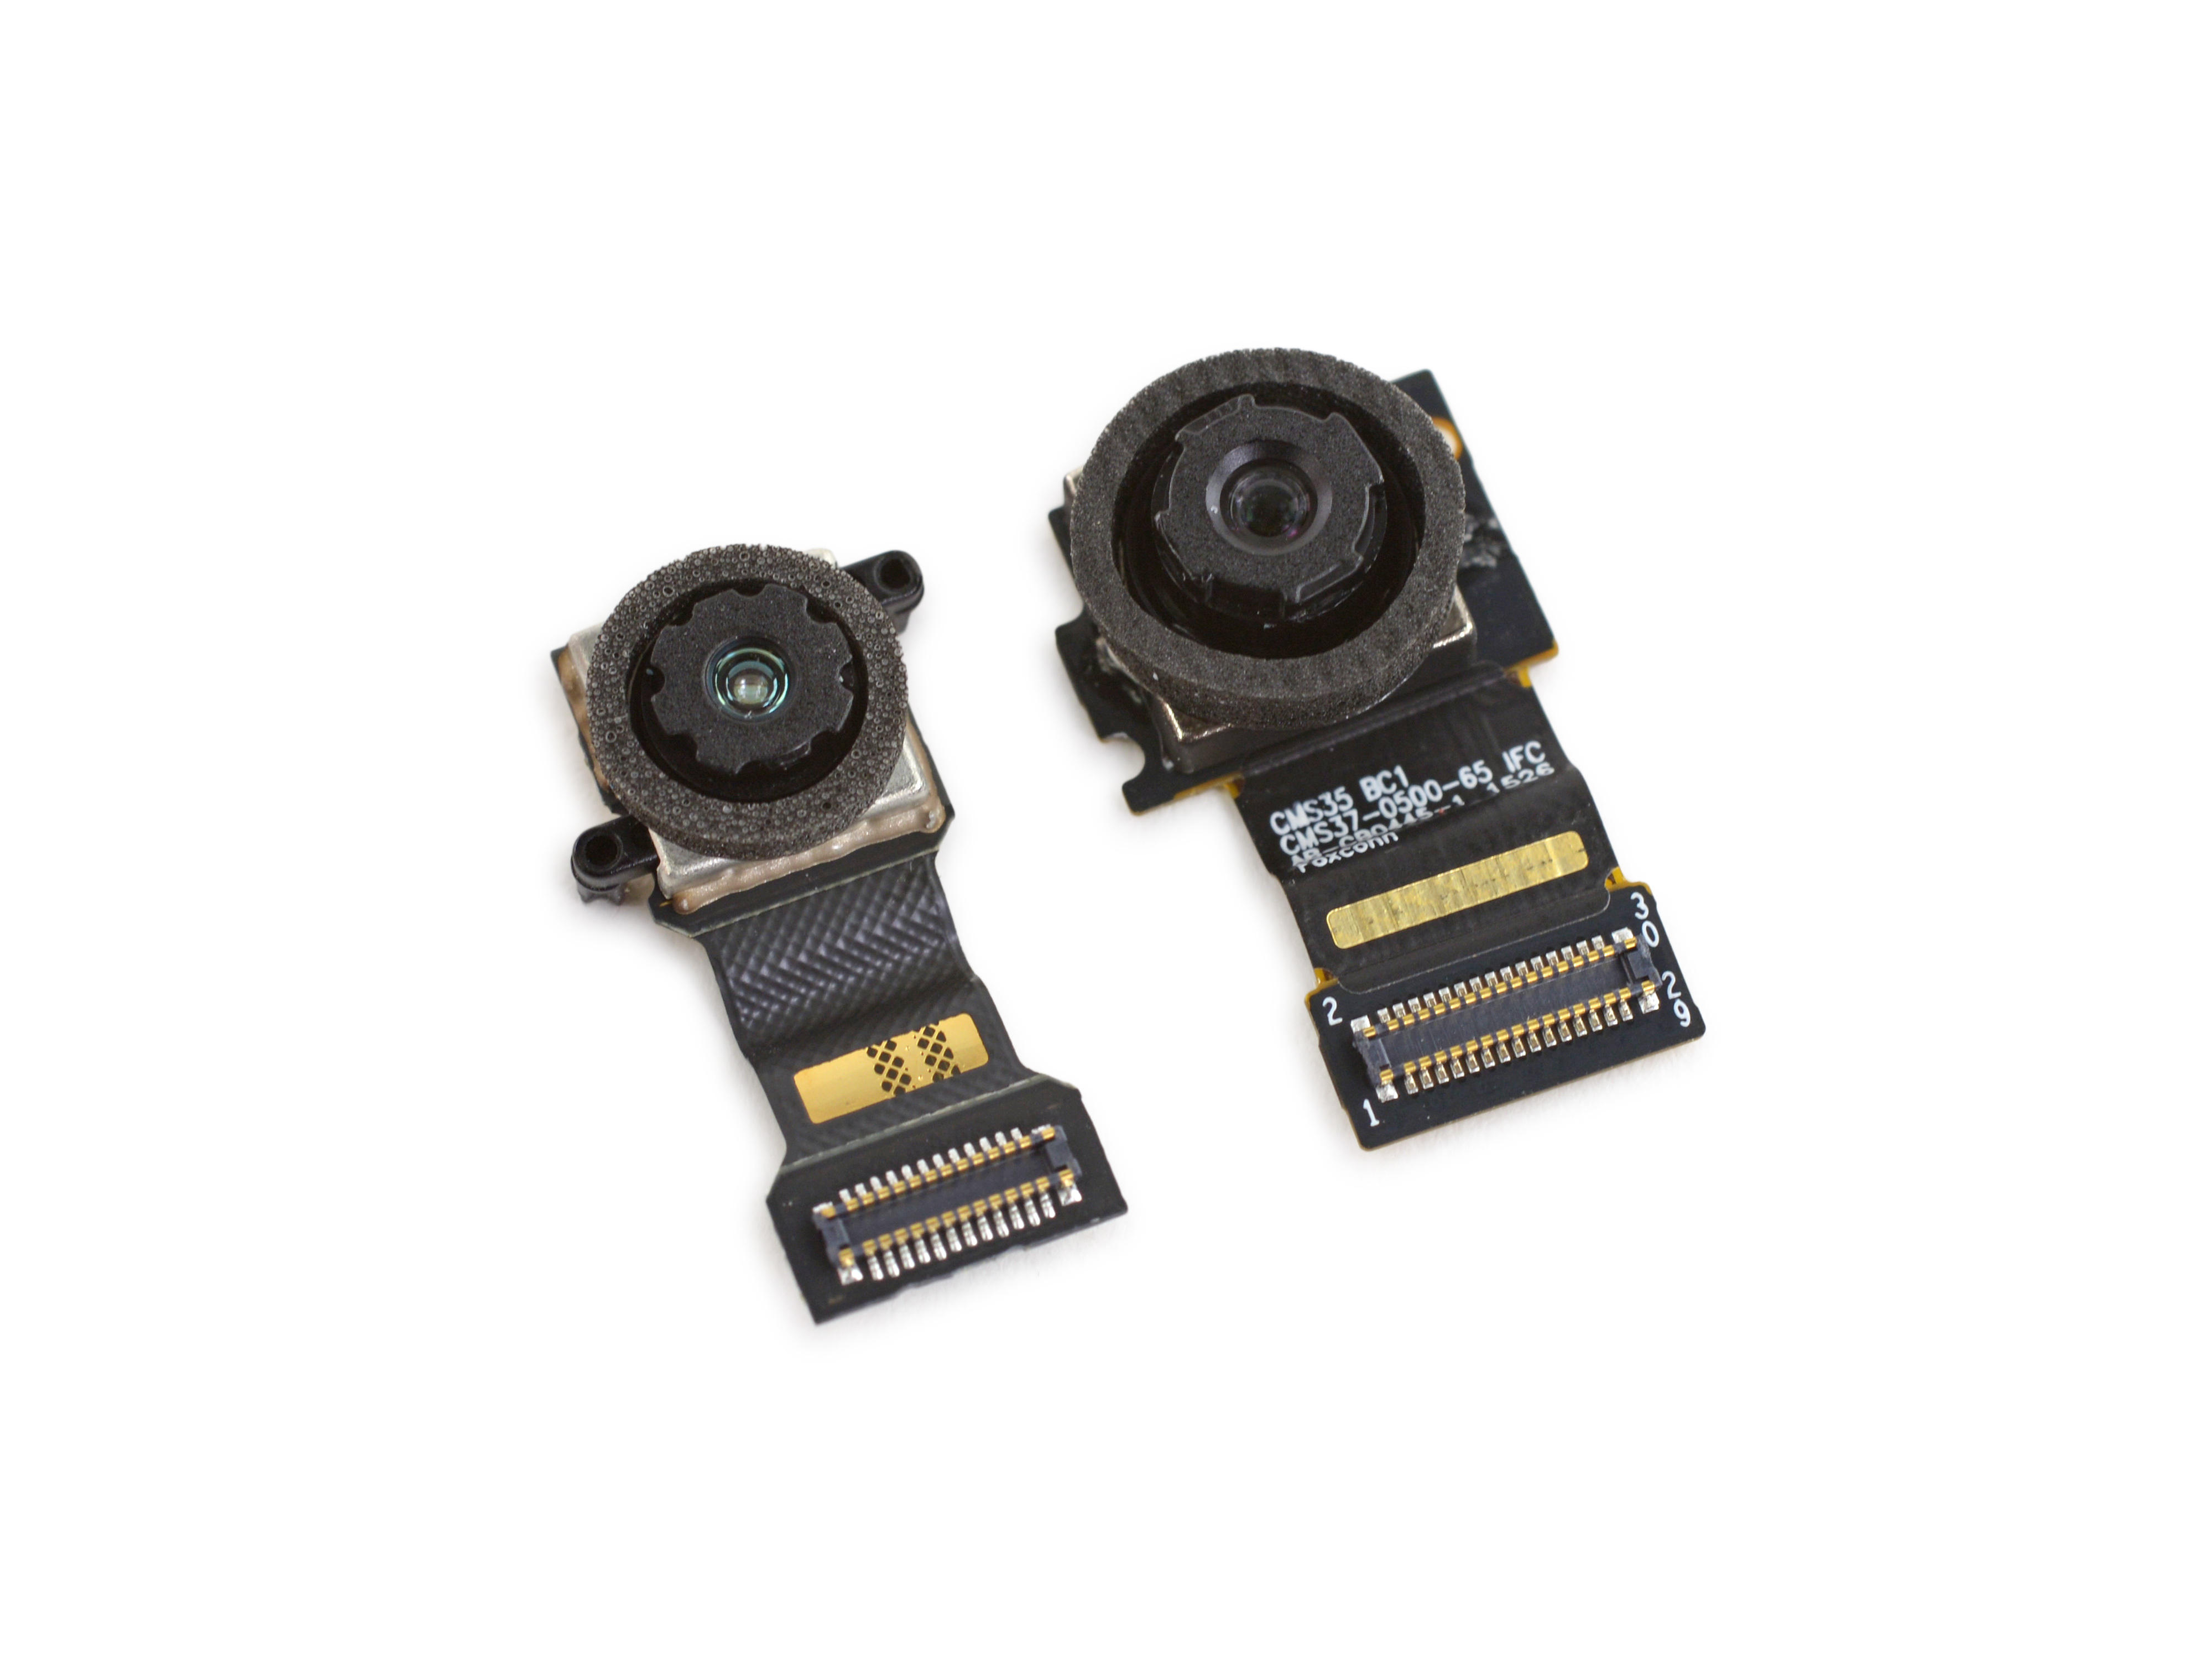
On the left is an infrared camera for facial recognition. The right side is a 5-megapixel front camera.
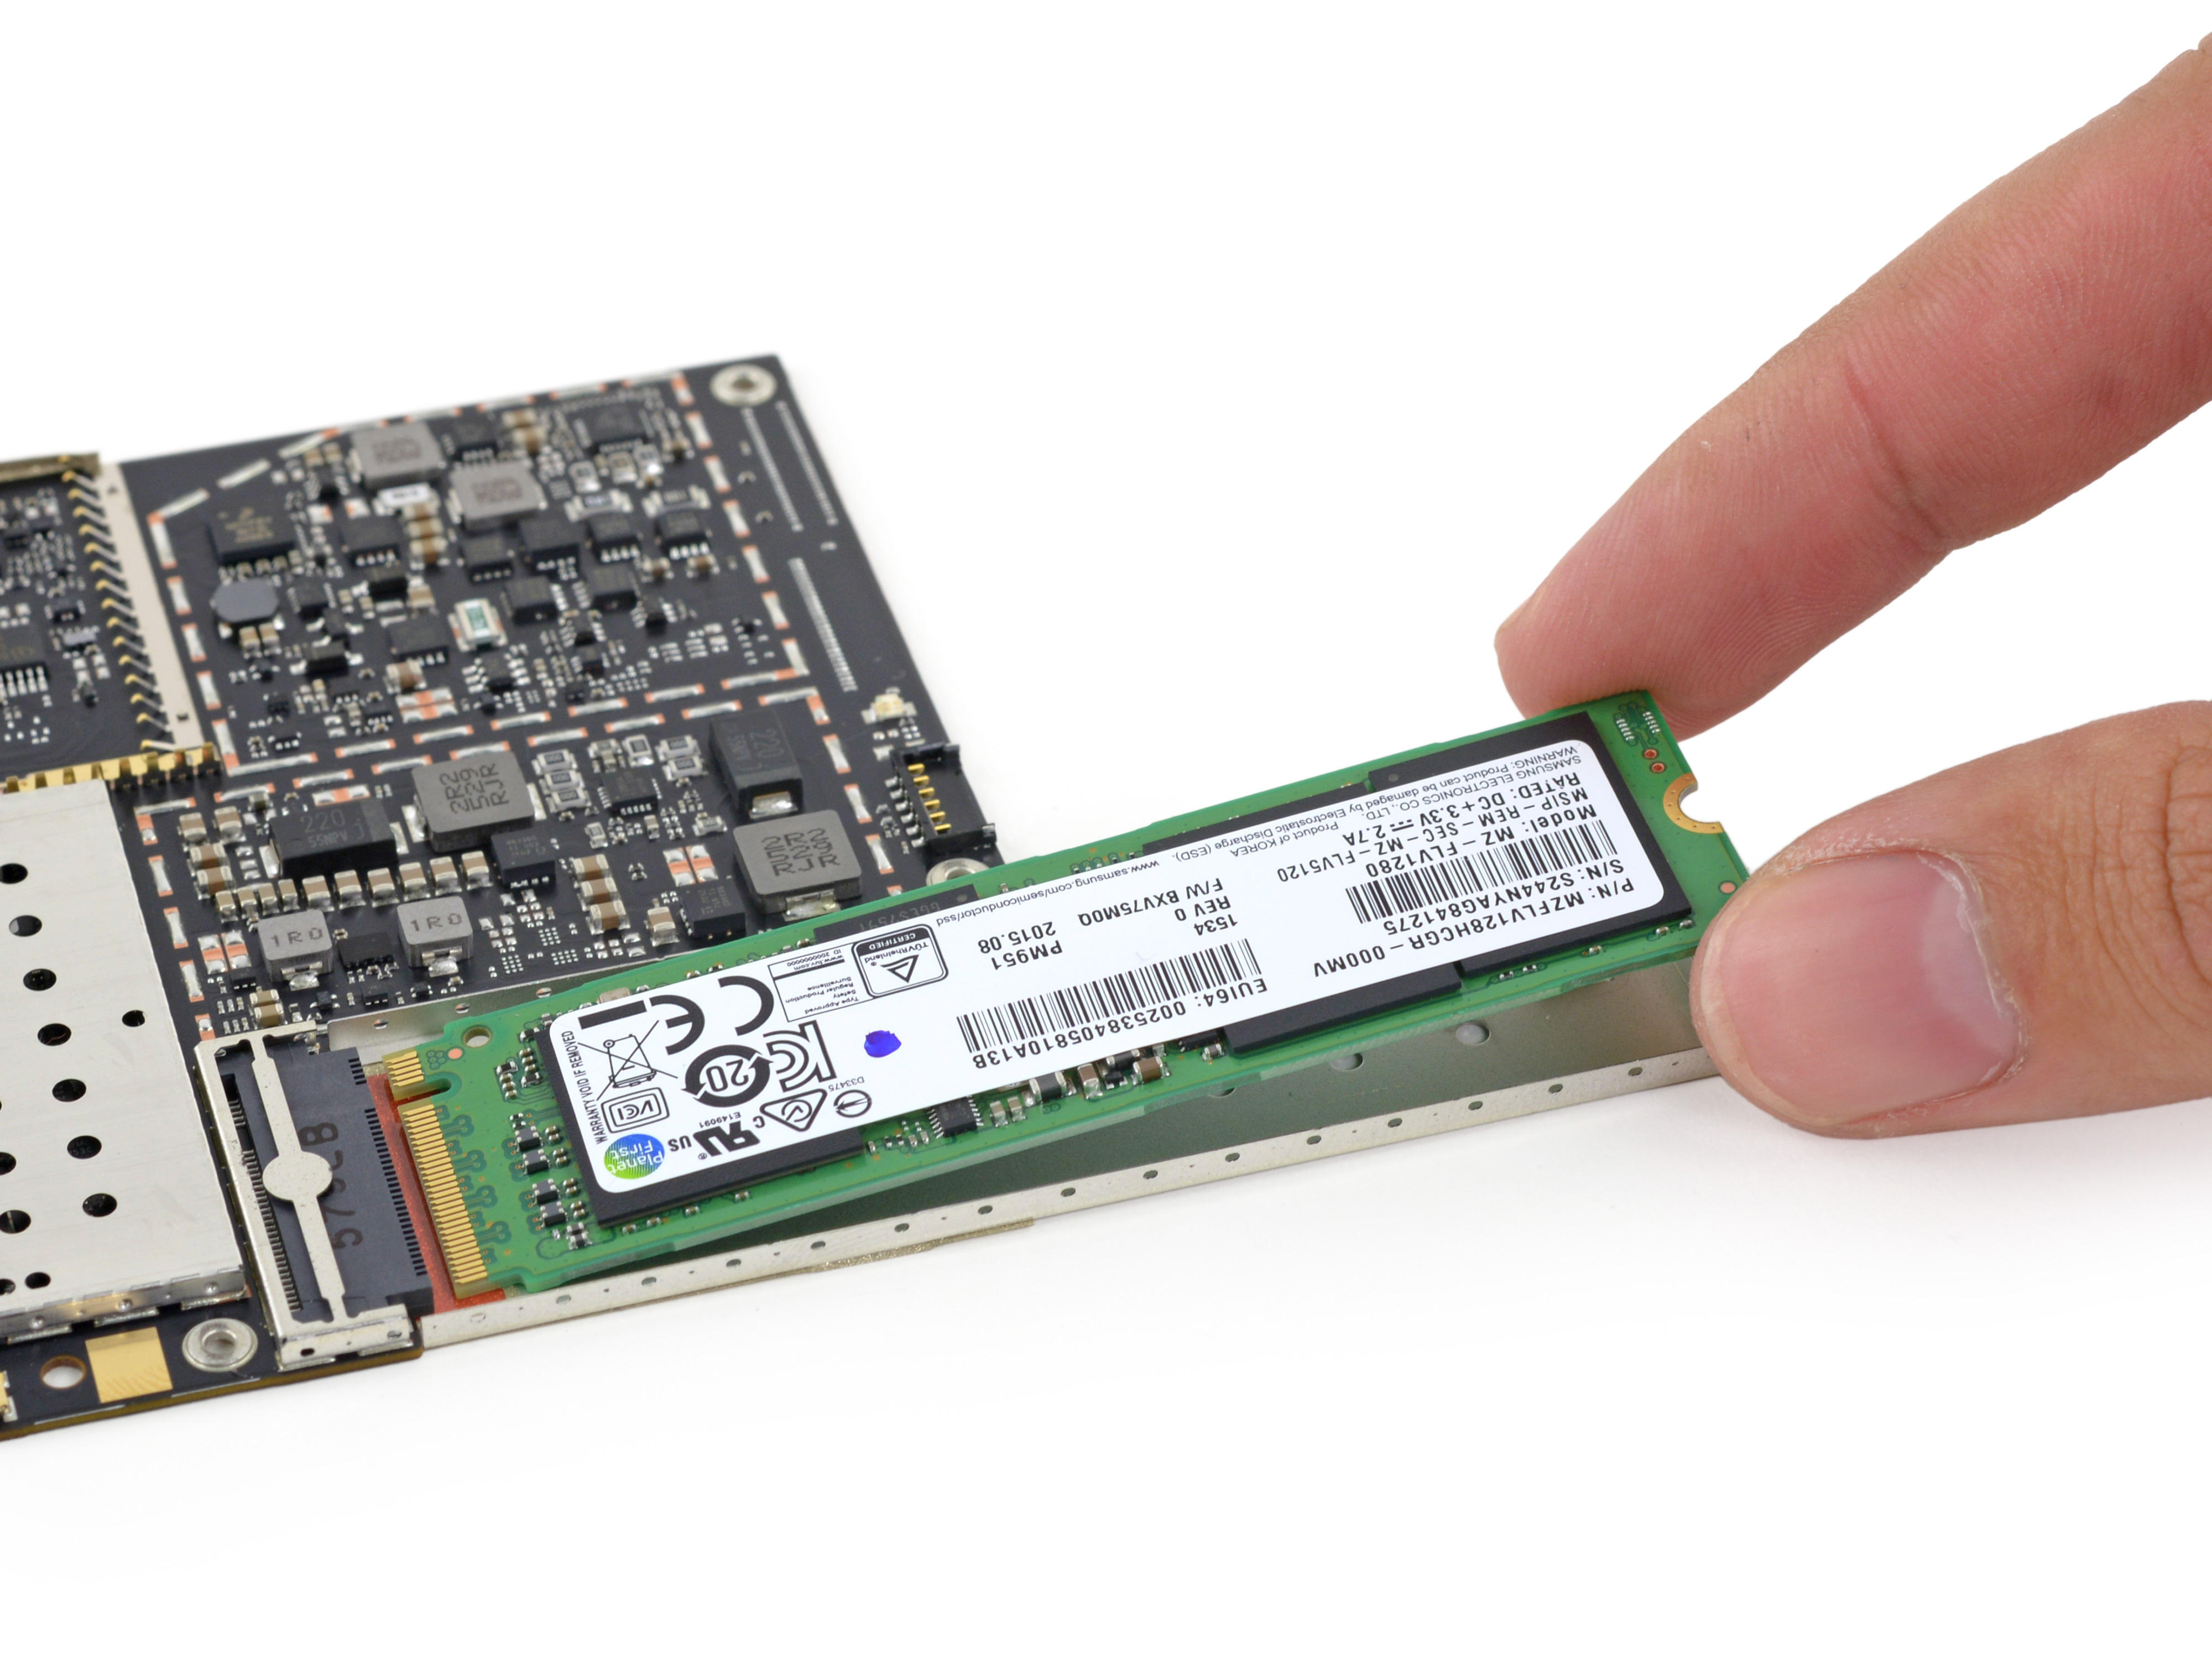
Remove the SSD, this 128G SSD is provided by Samsung, model PM951.
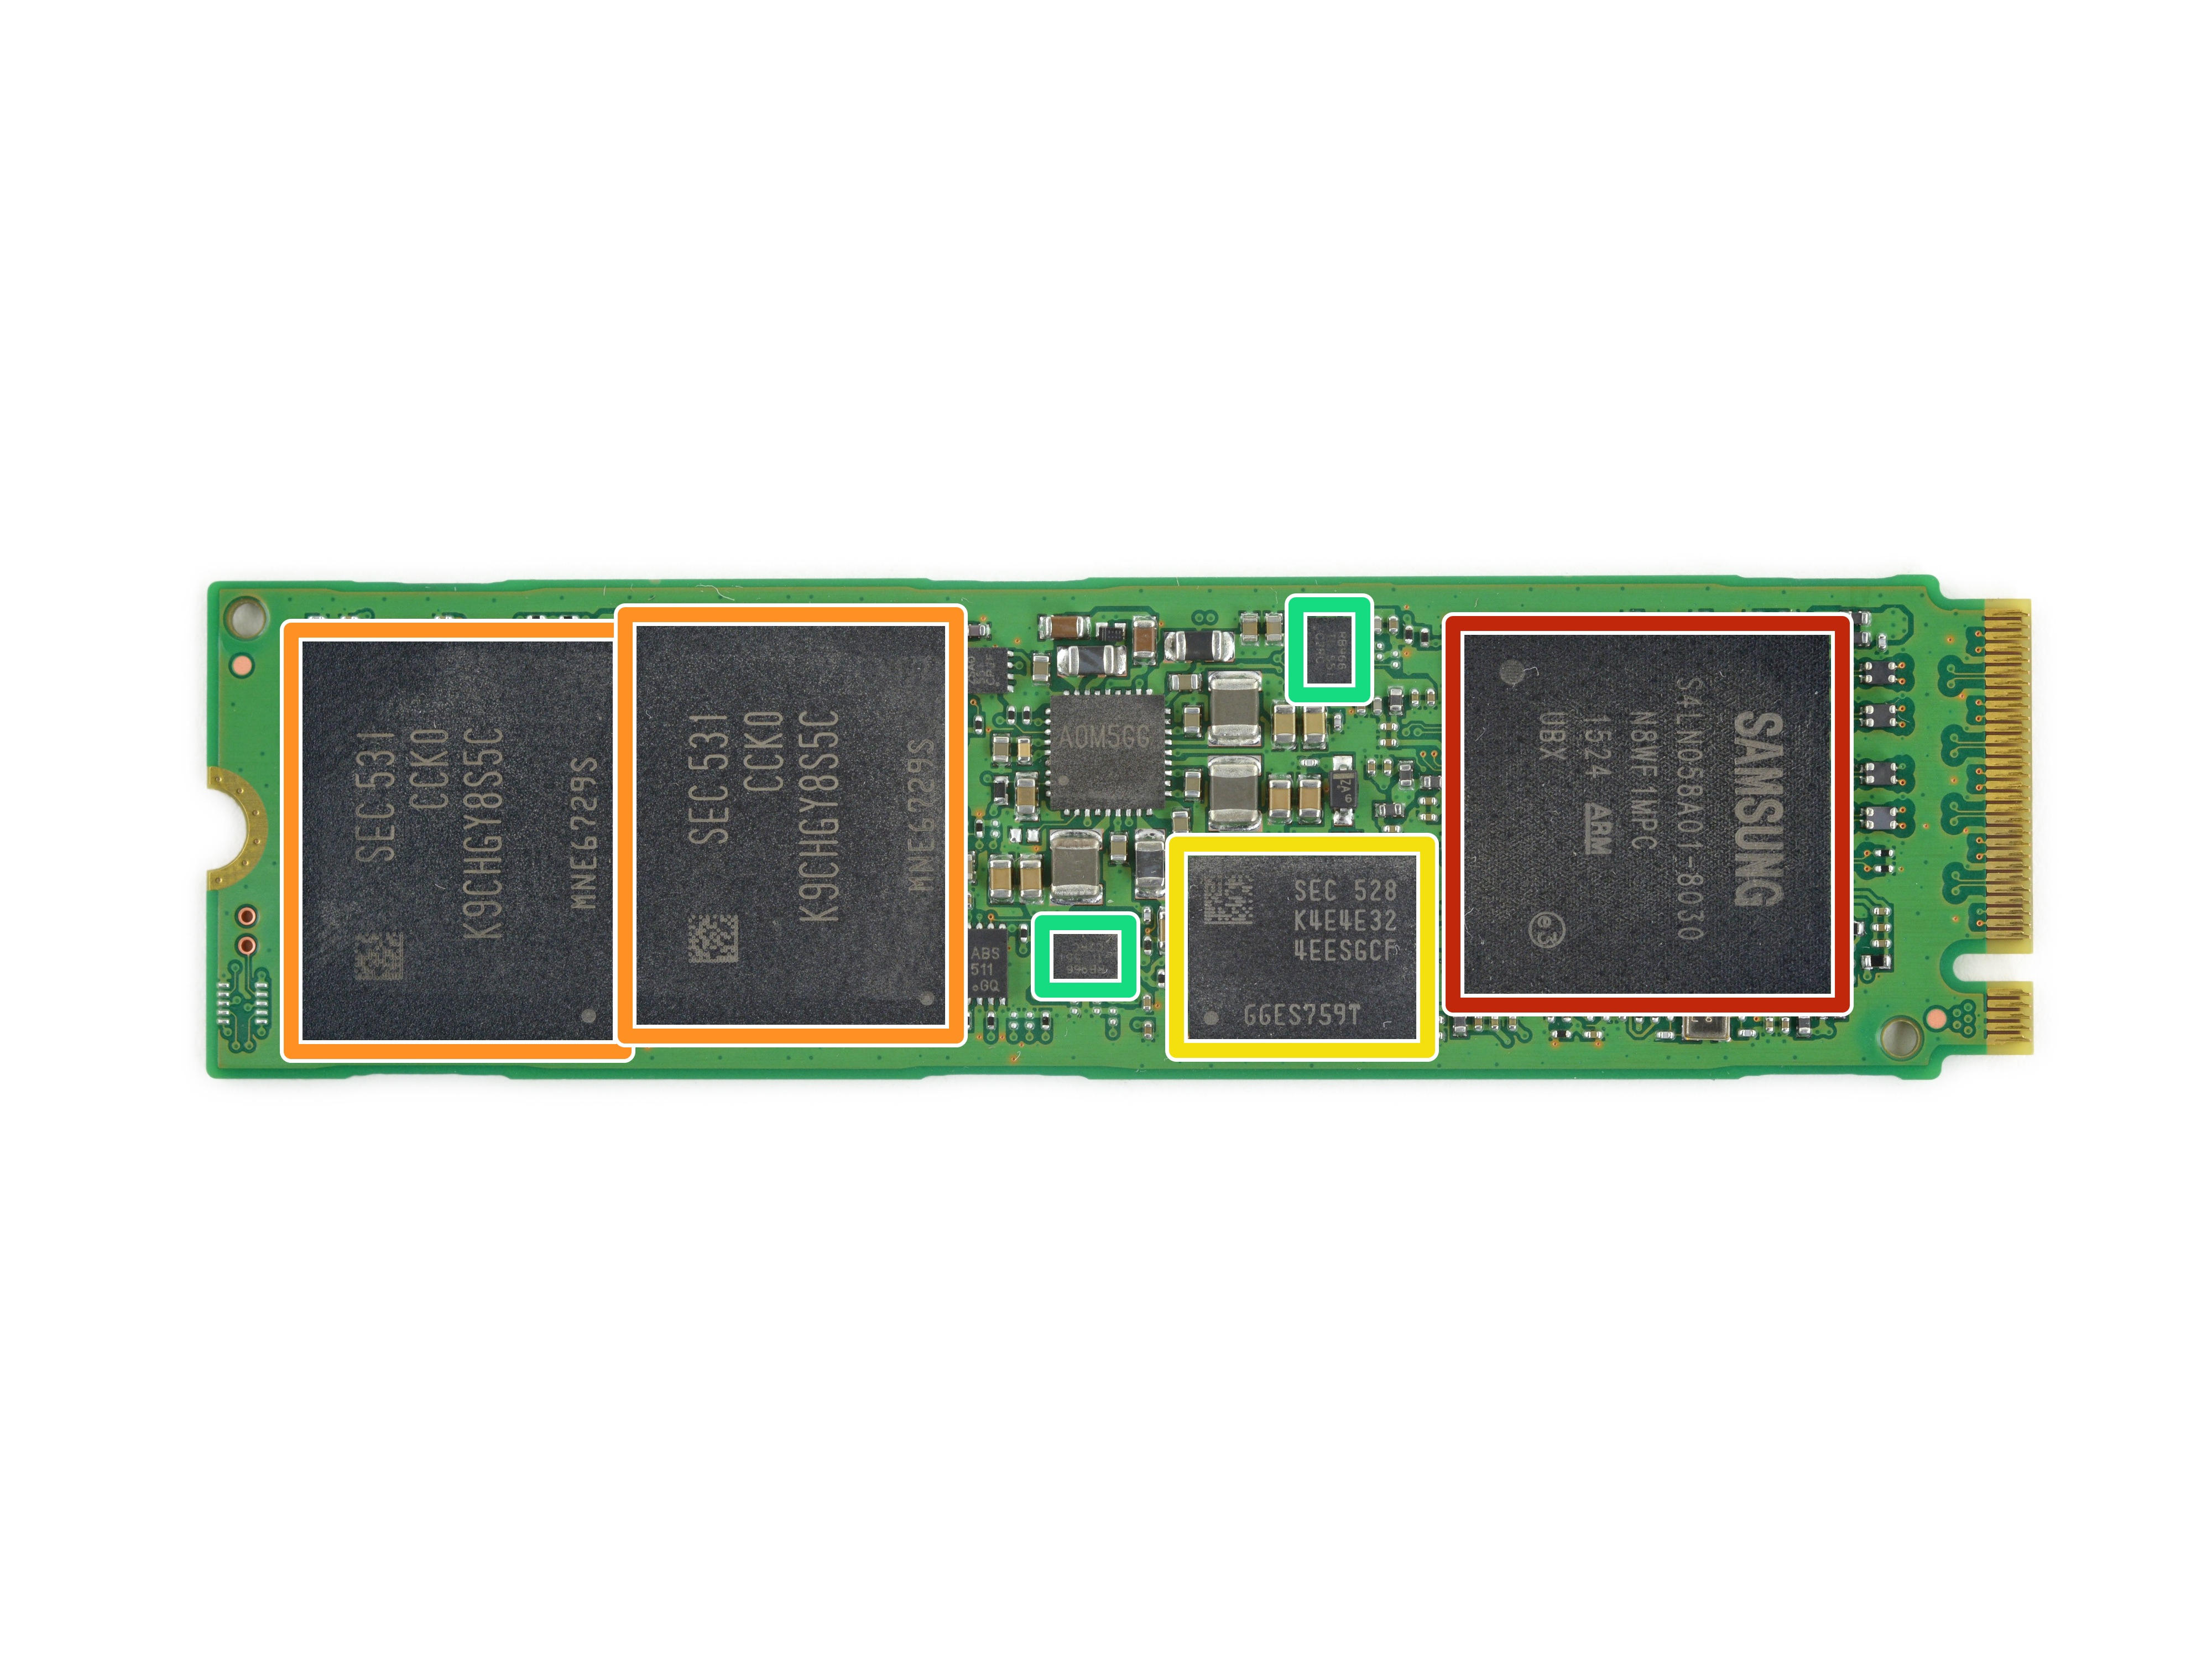
This SSD looks very familiar. Like the Surface Pro 4, let's take a look at what chips are on this SSD.
Samsung S4LN058A01 CIE 3.0 x4 NVMe Flash Controller
Samsung K9CHGY8S5C 64 GB NAND Flash
Samsung K4E4E324EE 4 Gbit (512 MB) DRAM
Texas Instruments TPS22966 5.5V, 6A, 16mΩ, Dual Channel Load Switch
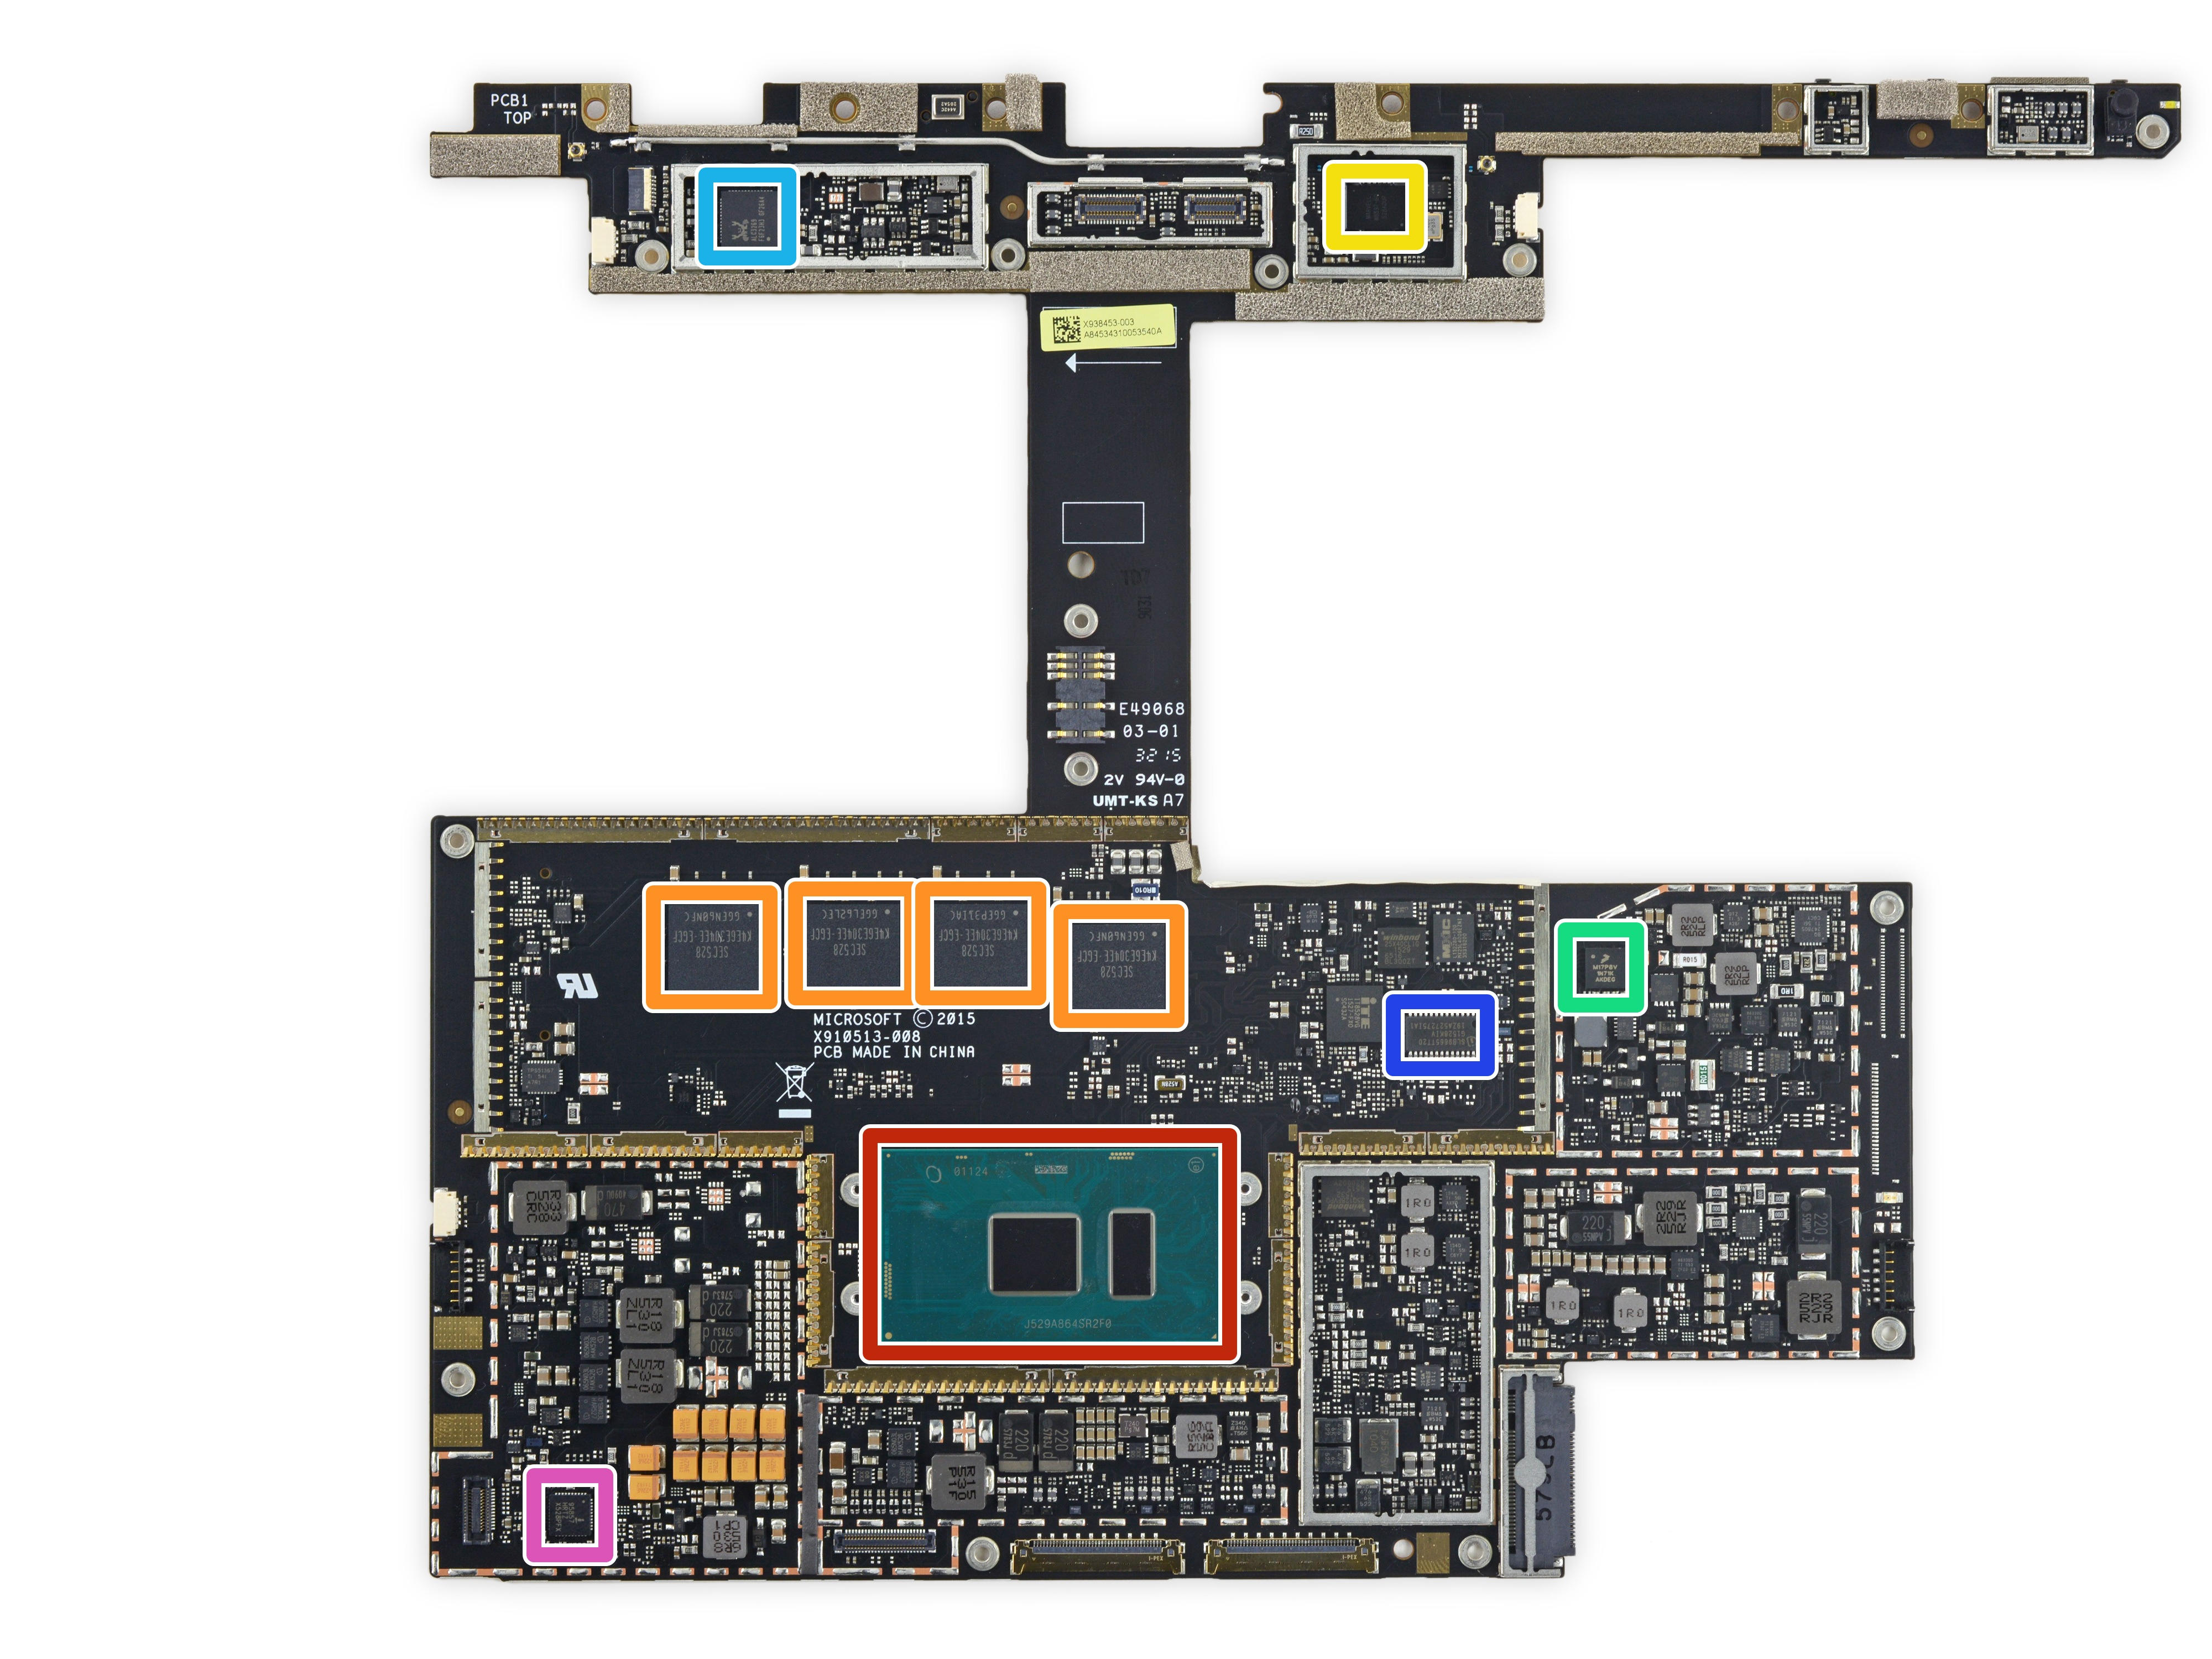
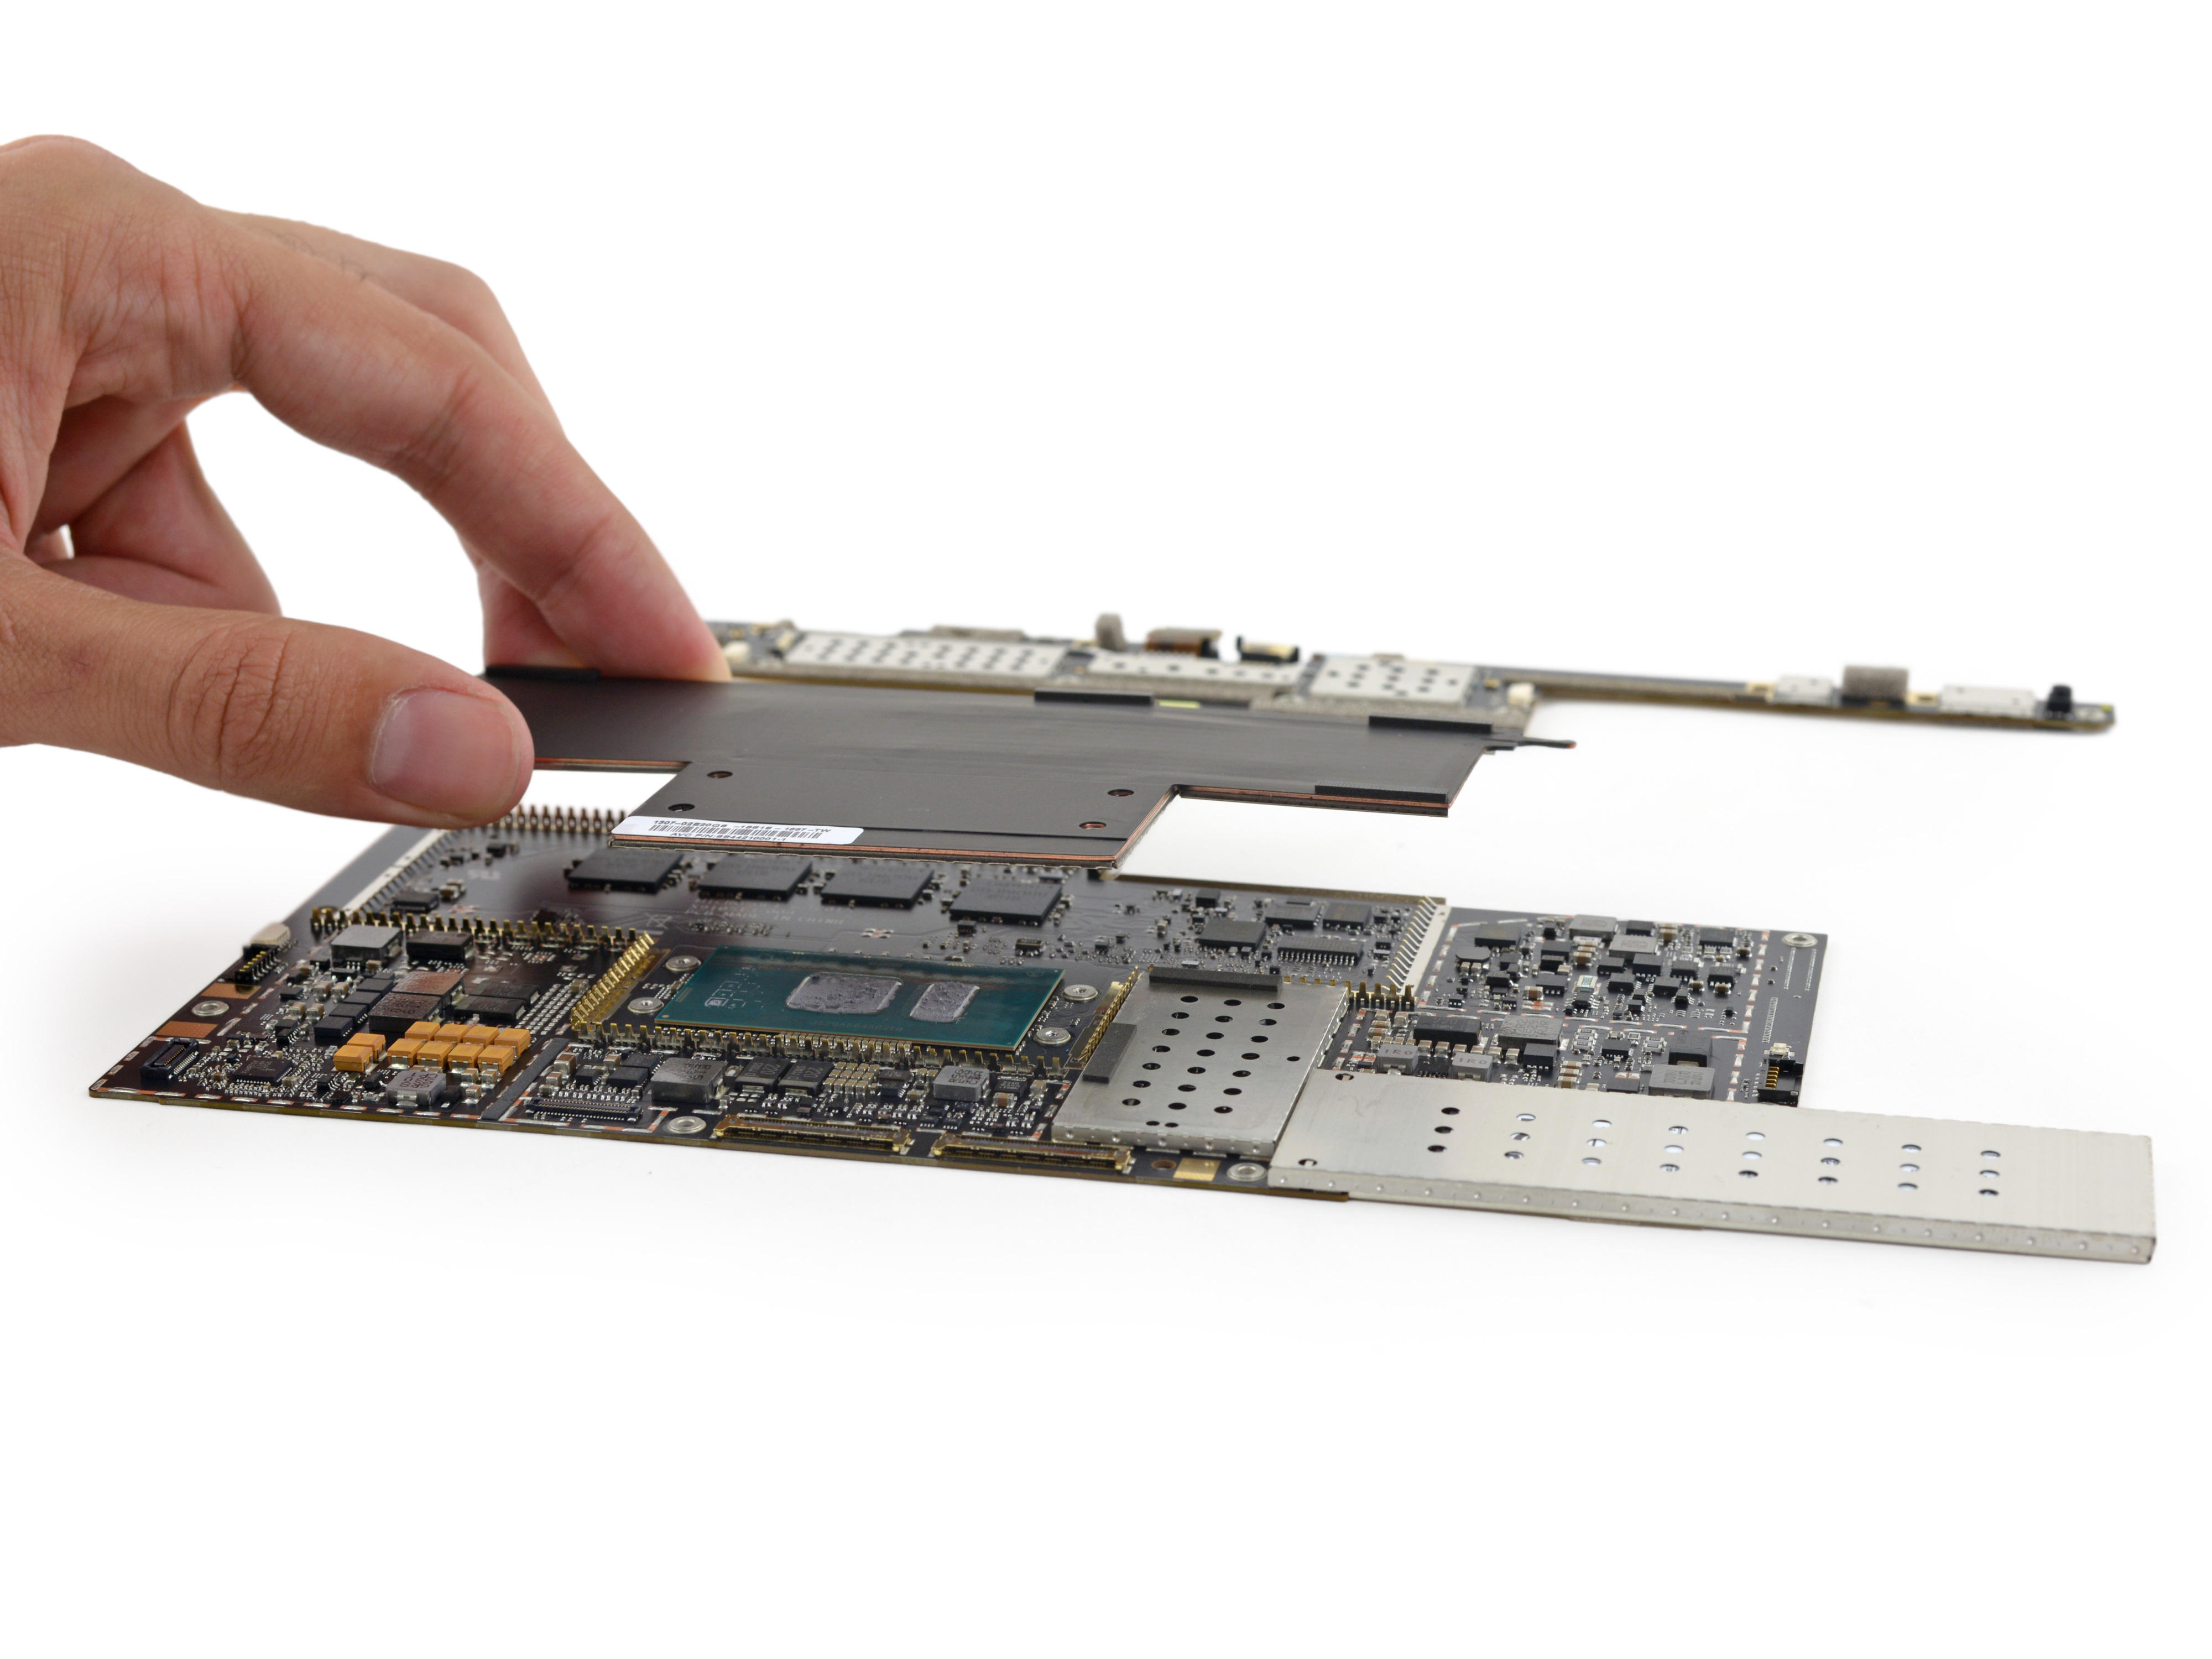
Now let's look at what chips are on the motherboard.
Intel SR2F0 Core i5-6300U processor (3M cache, maximum frequency 3.00 GHz)
Samsung K4E6E304EE-EGCF 16Gbit LPDDR3 1867MHz SDRAM Memory (4 Chips, 8 GB in total)
Marvell Avastar W8897, Wi-Fi/Bluetooth combo chip
Freescale Kinetis KL17 MKL17Z256VFM4 48MHz ARM Cortex-M0 +
Realtek ALC3269 Audio Codec
Infineon Technologies SLB9665TT20 Trusted Platform Module
Intersil ISL95857 1 + 2 + 1 Voltage Regulator
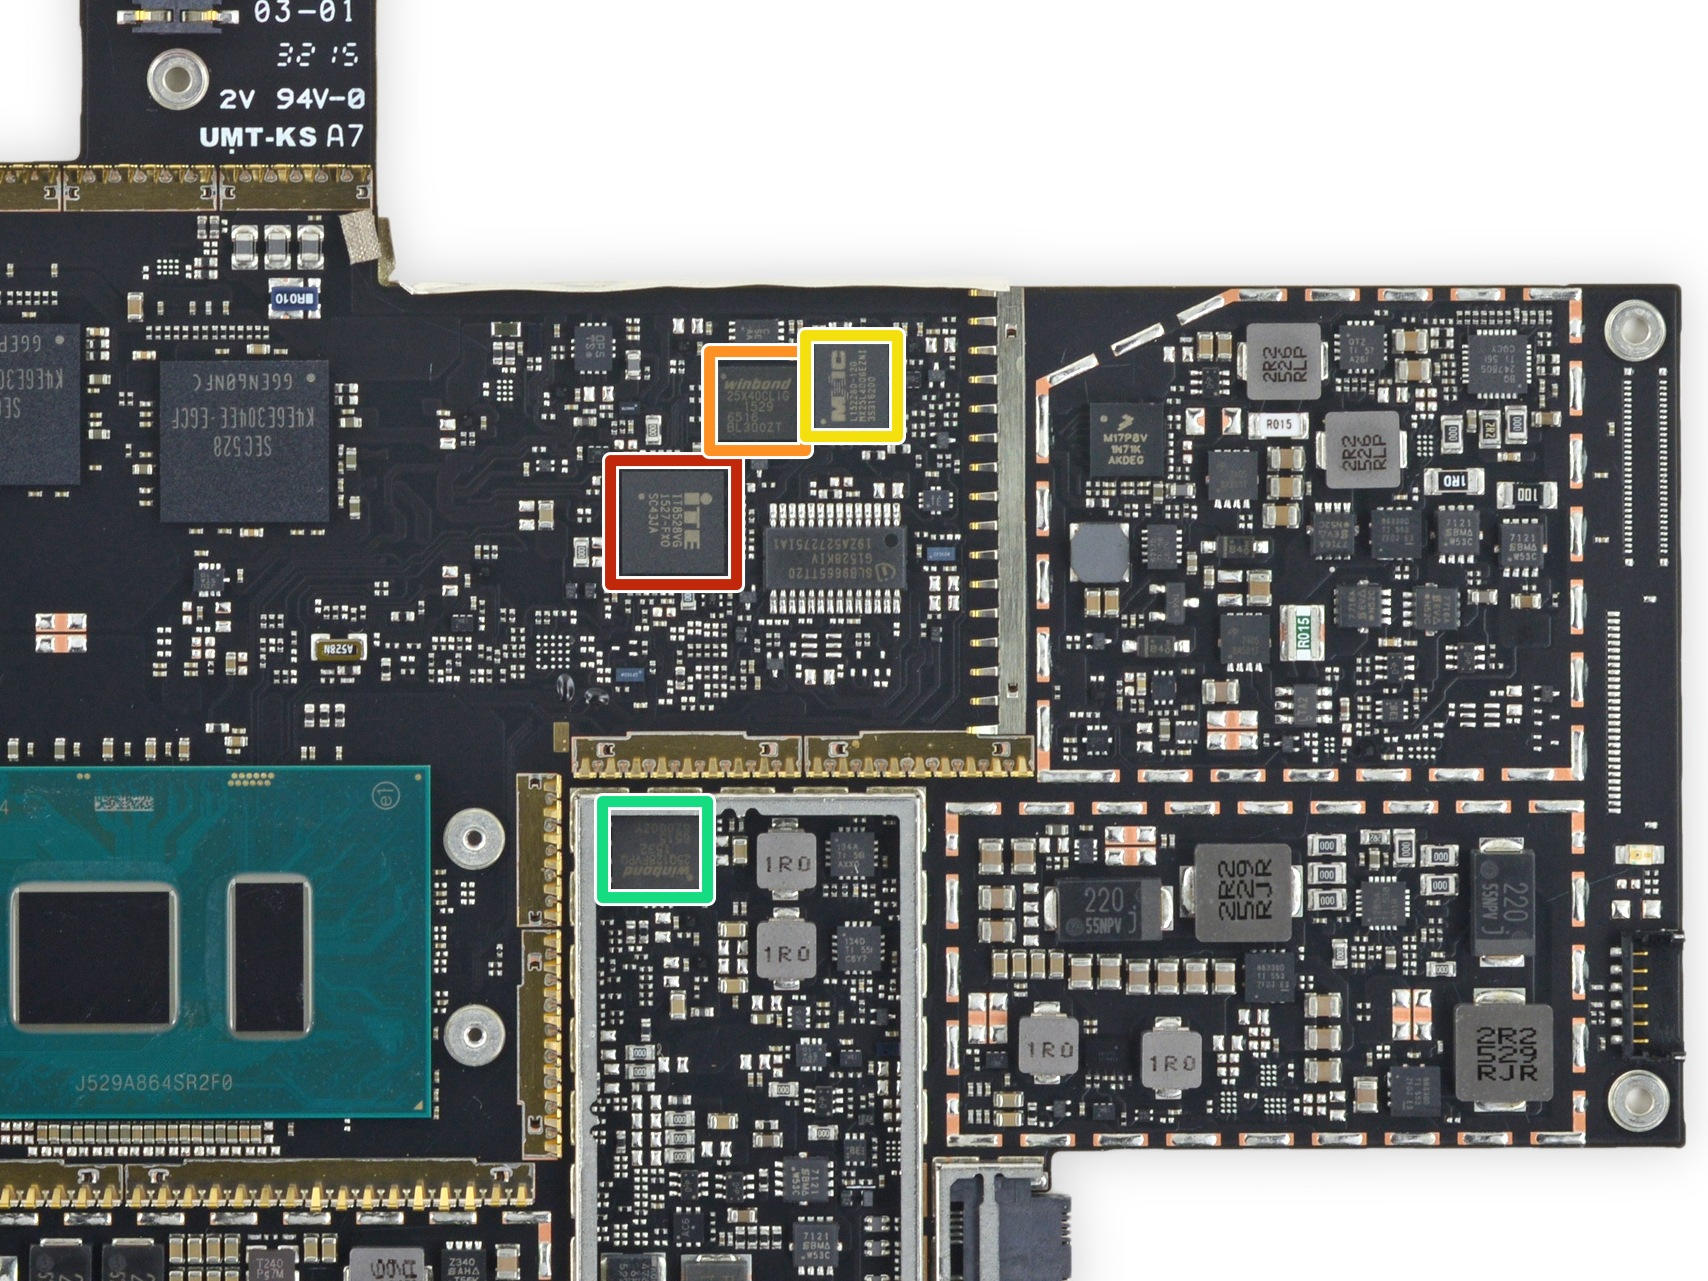
Here are some more:
ITE IT8528VG
Winbond W25X40CL Serial Flash
Wanghong Electronics MX25L4006E 3V, 4 MB [×1 /×2] CMOS Serial Flash Memory
Winbond W25Q128FV 128 MB Serial Flash
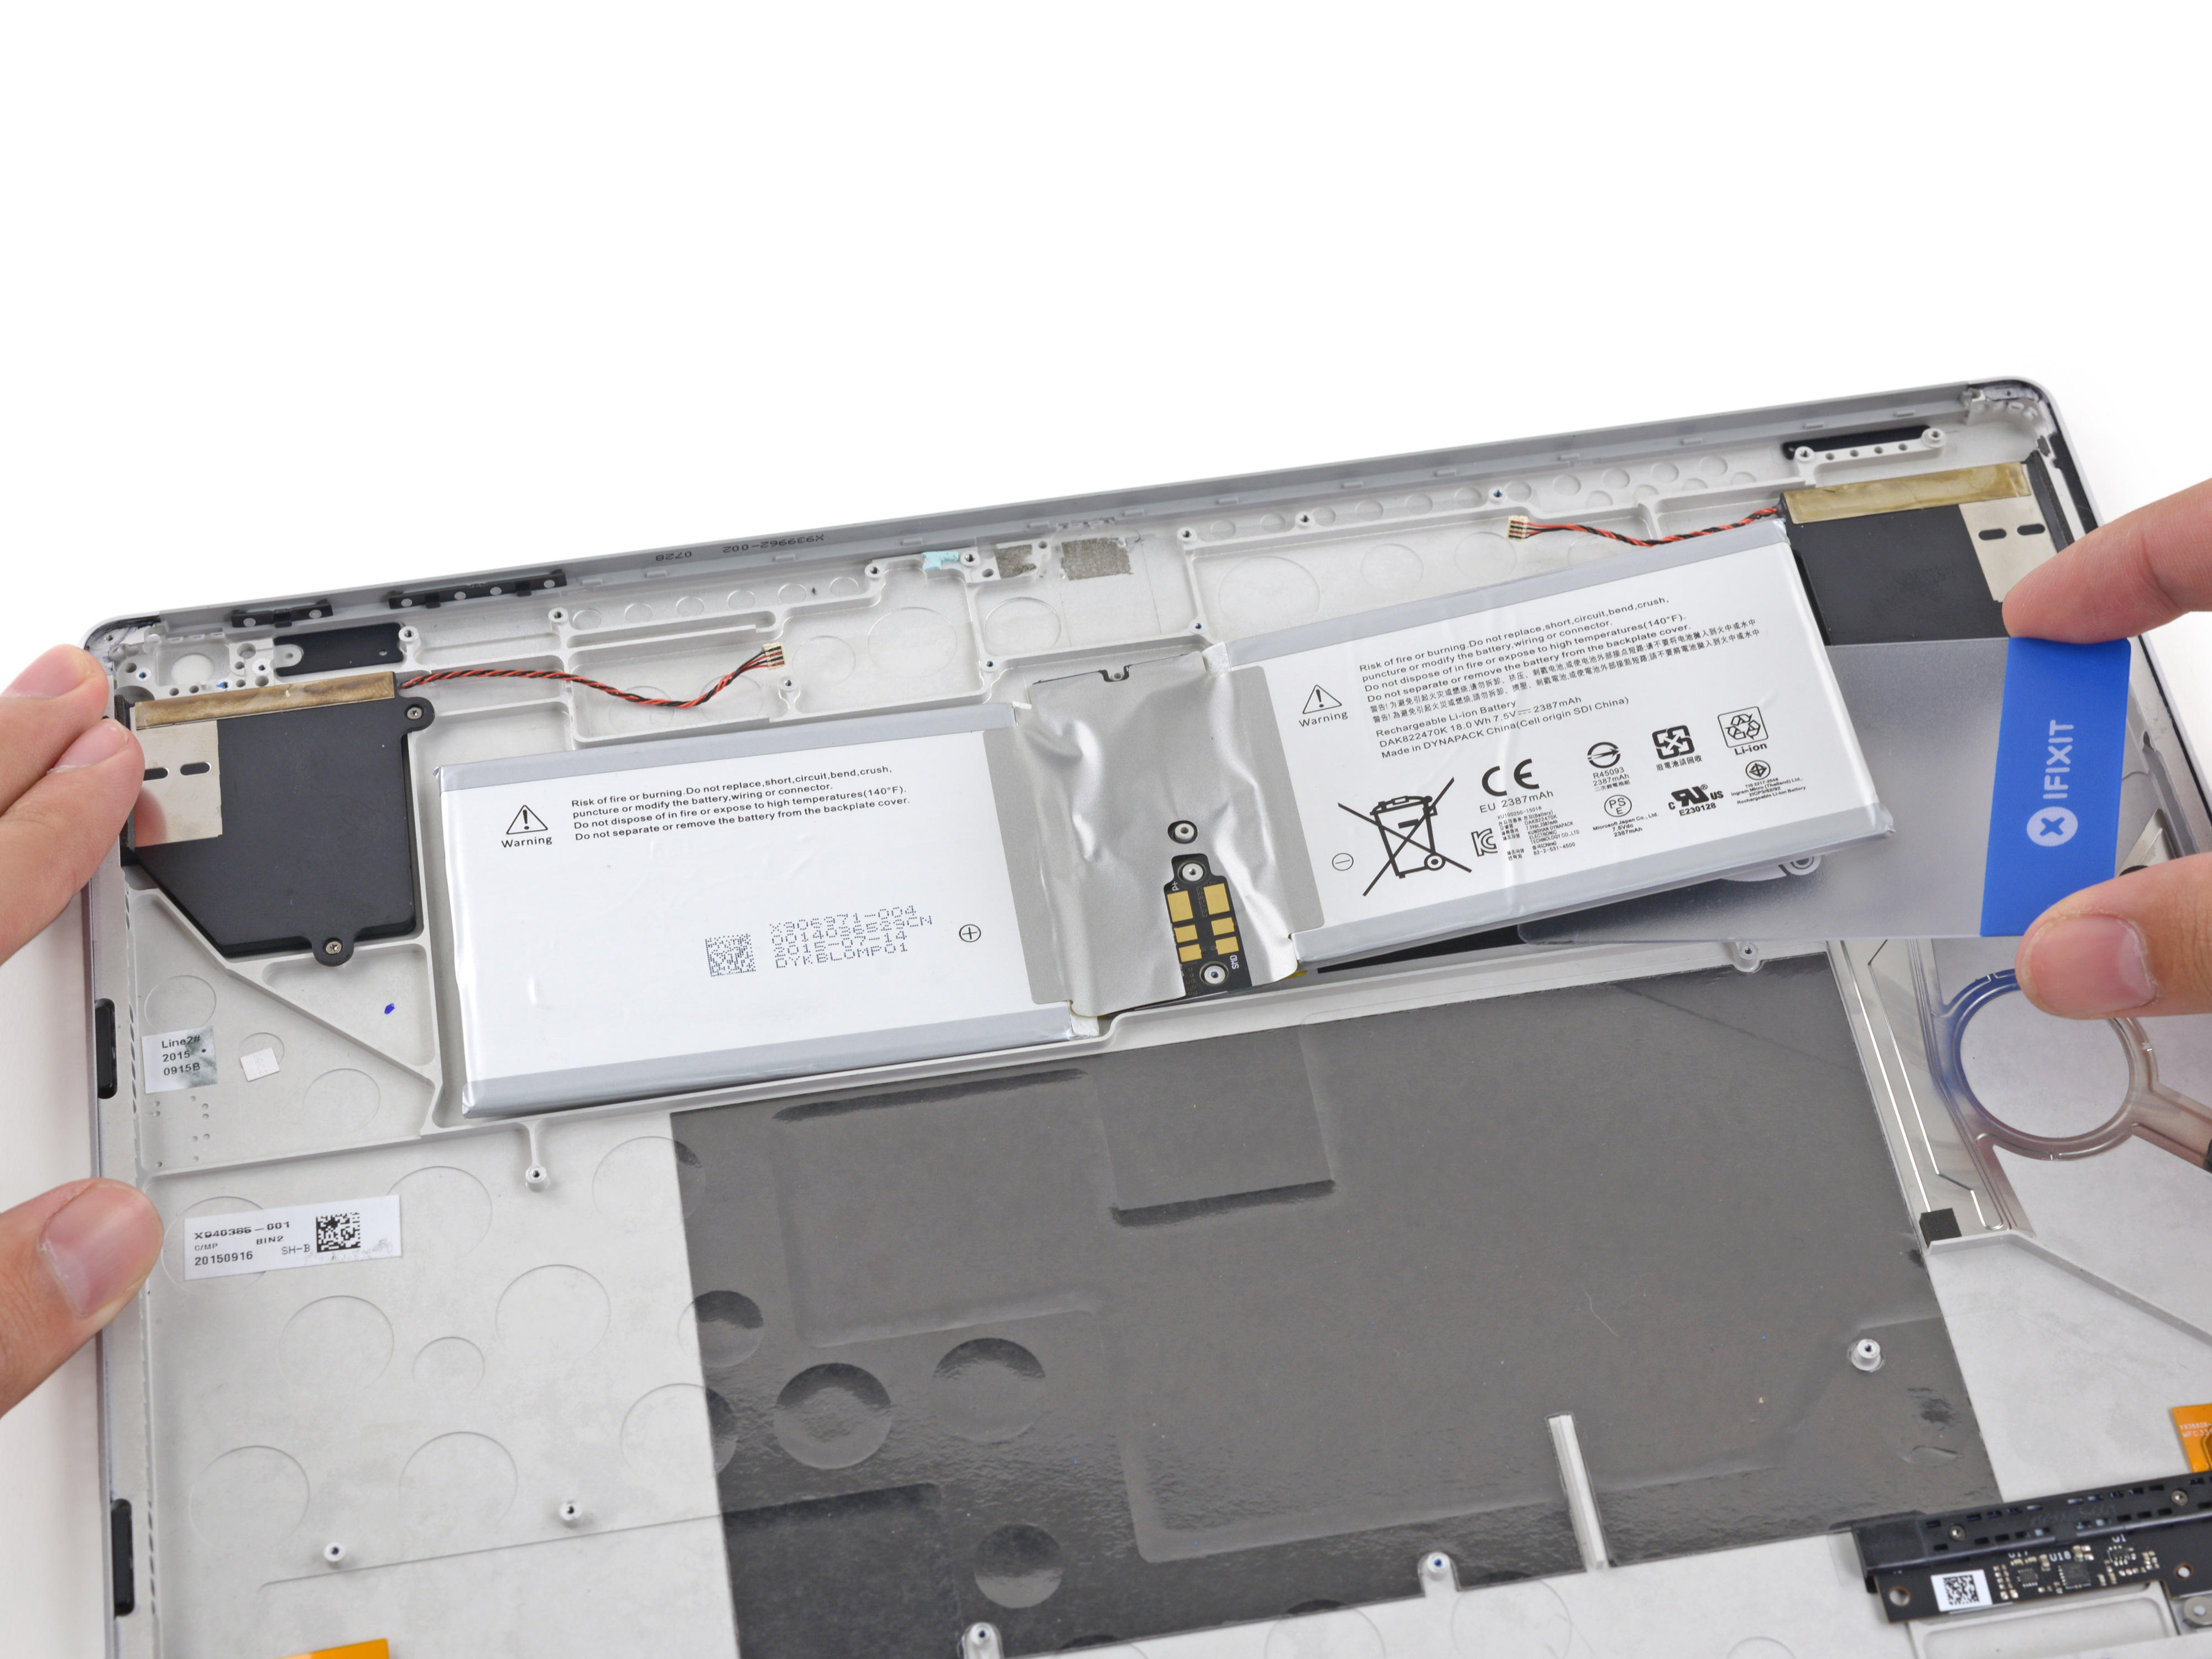
Next we will disassemble the battery. The glue is glued below and we slowly separate it with a card.
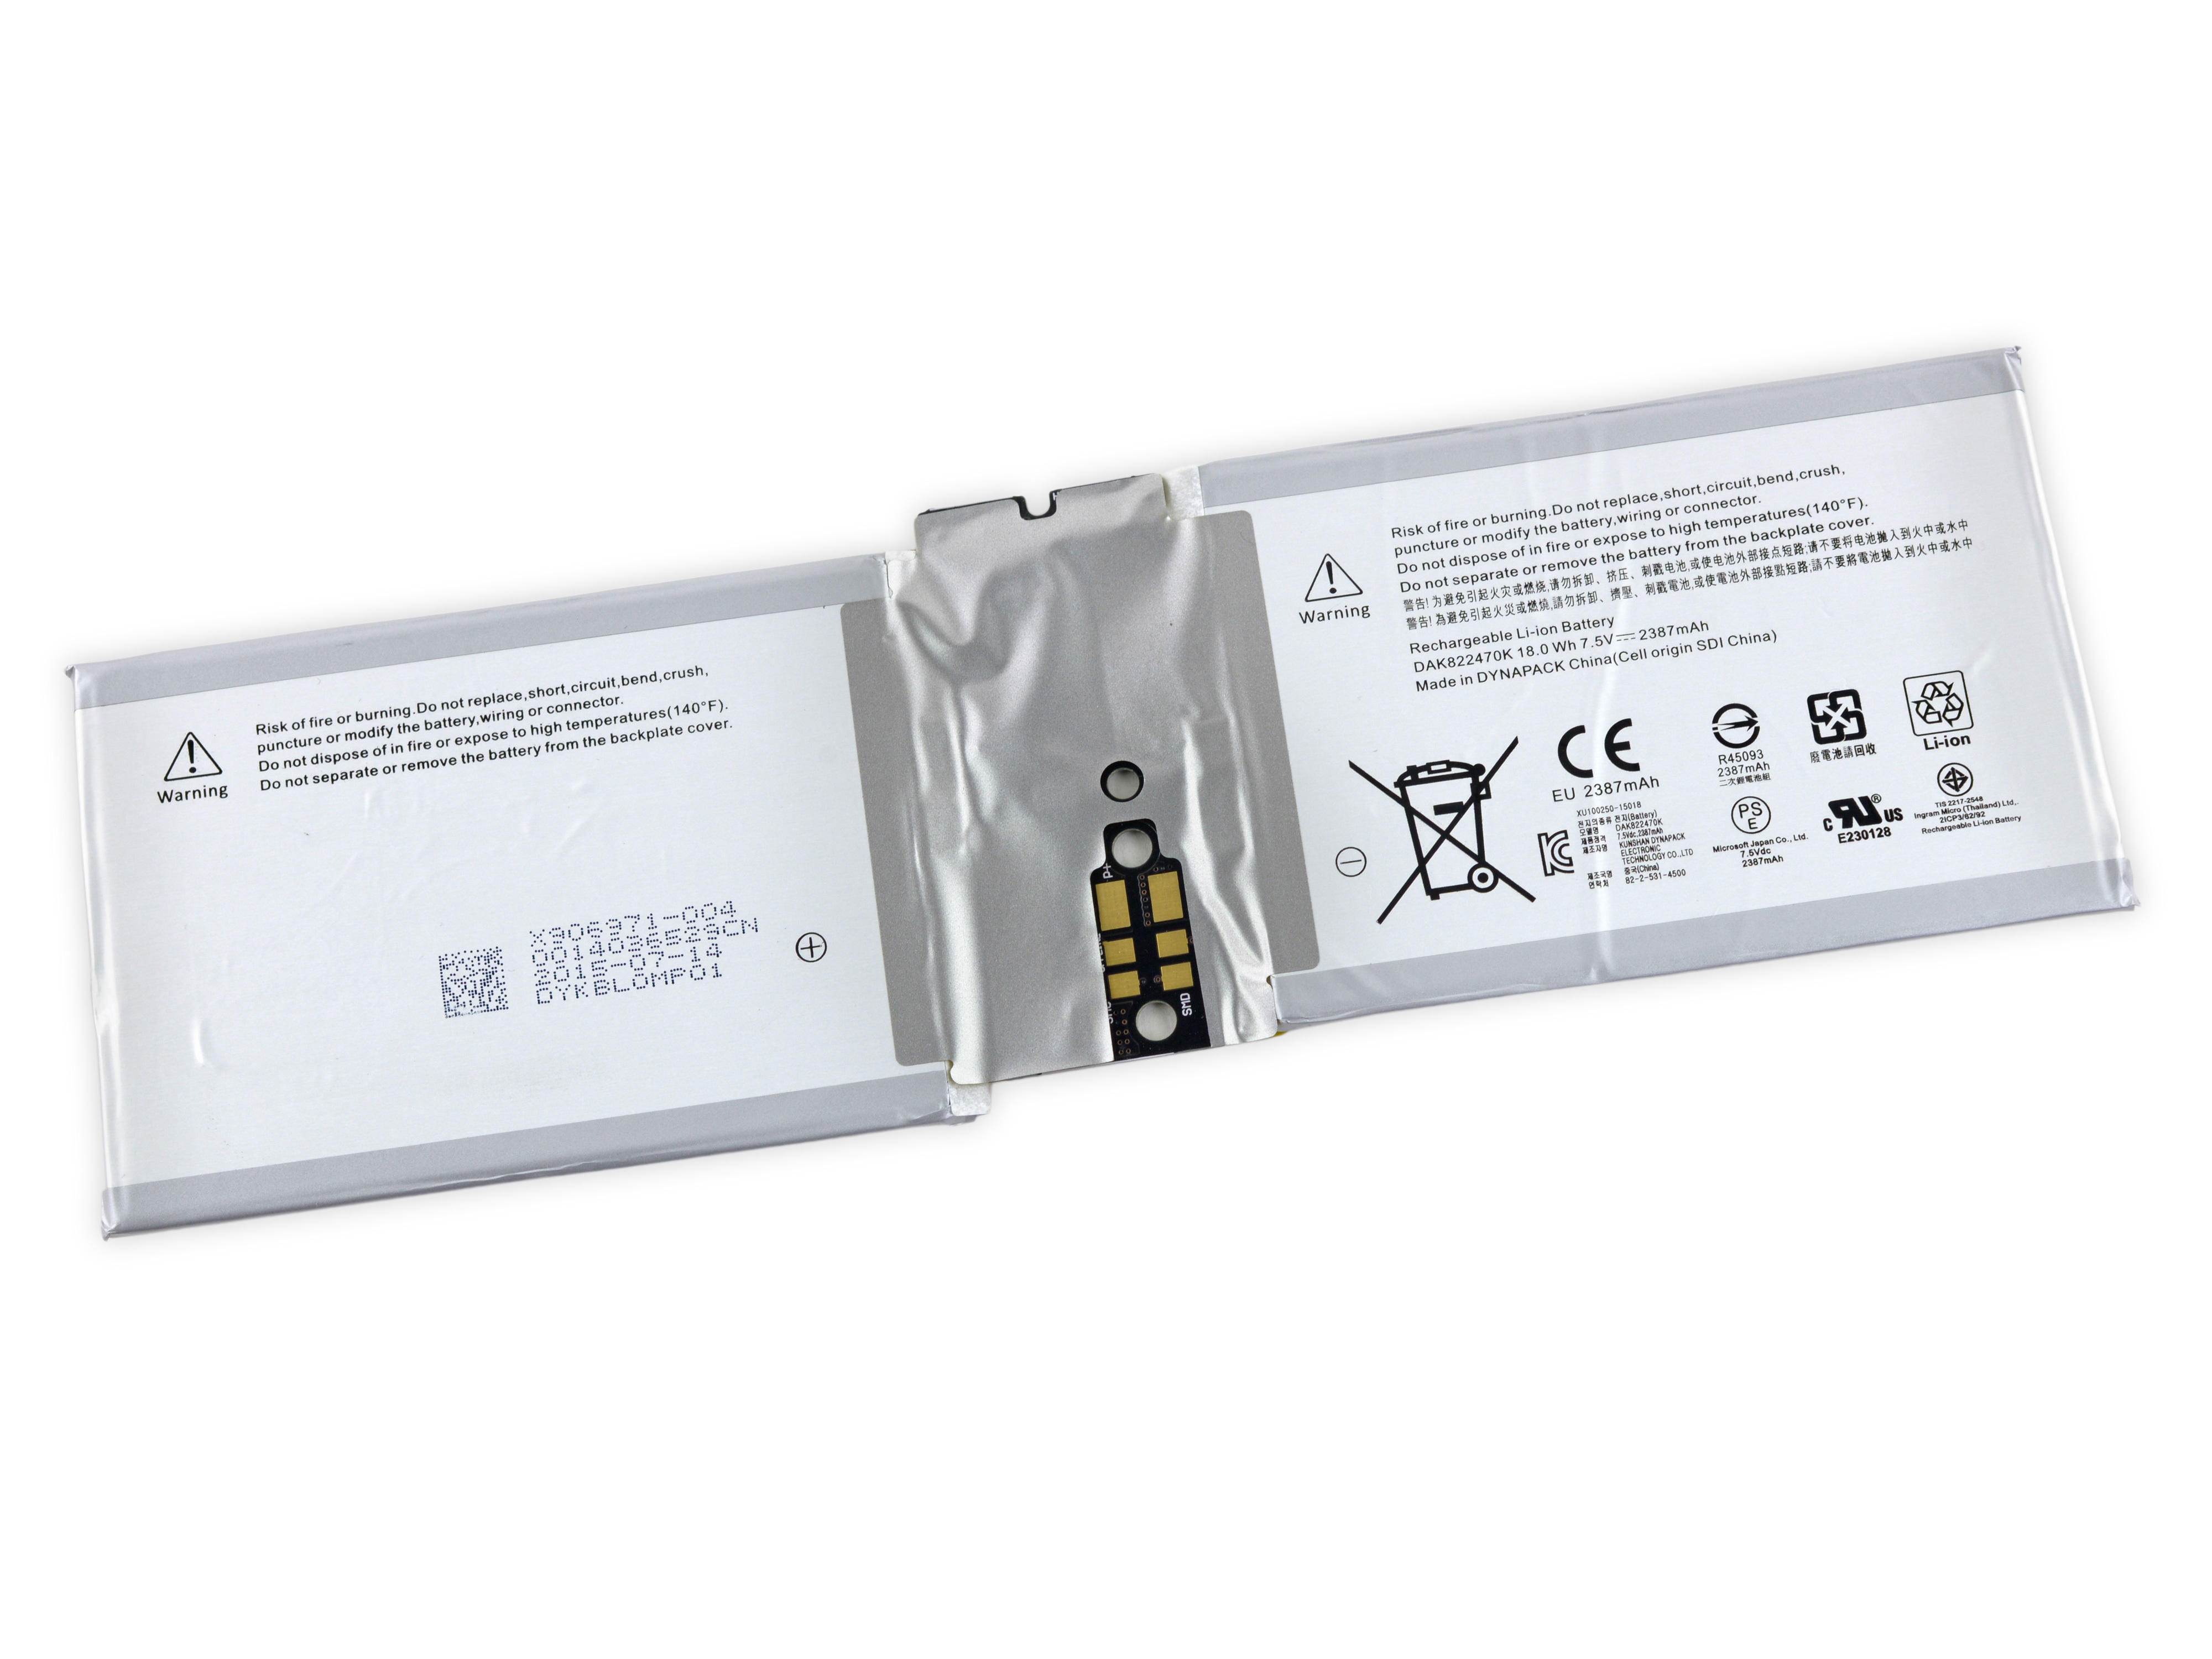
Suiface Pro's screen section is equipped with a 18.0Wh 7.5V battery, capacity of 2387mAh, the official nominal can reach four hours of battery life. The power consumption of this 3000 x 2000 resolution screen is still relatively high.

Then remove the "Muscle WireLock", this lock module can firmly fixed the screen in the base, only press the disassembly button to separate the screen and the base.

The locking module is electrically controlled. The U-shaped metal wire in the figure is a shape memory alloy. The power heating will be rapidly extended. Then the black pulley is pulled by the spring and the buckle slides inward. The lock is released and the screen and the base can be separated.

Muscle WireLock has a retractable metal dome on the buckle. When the buckle slides inwards, the metal dome shrinks and the lock is released. This little thing is the mystery of the keyboard and the screen can be so closely connected, Microsoft also claimed that the Surface Book can be like a normal laptop, free to lift the keyboard or screen part without falling off. This set of locking module design is very sophisticated.

Only the speaker is left on the base, and the two speakers are independent.
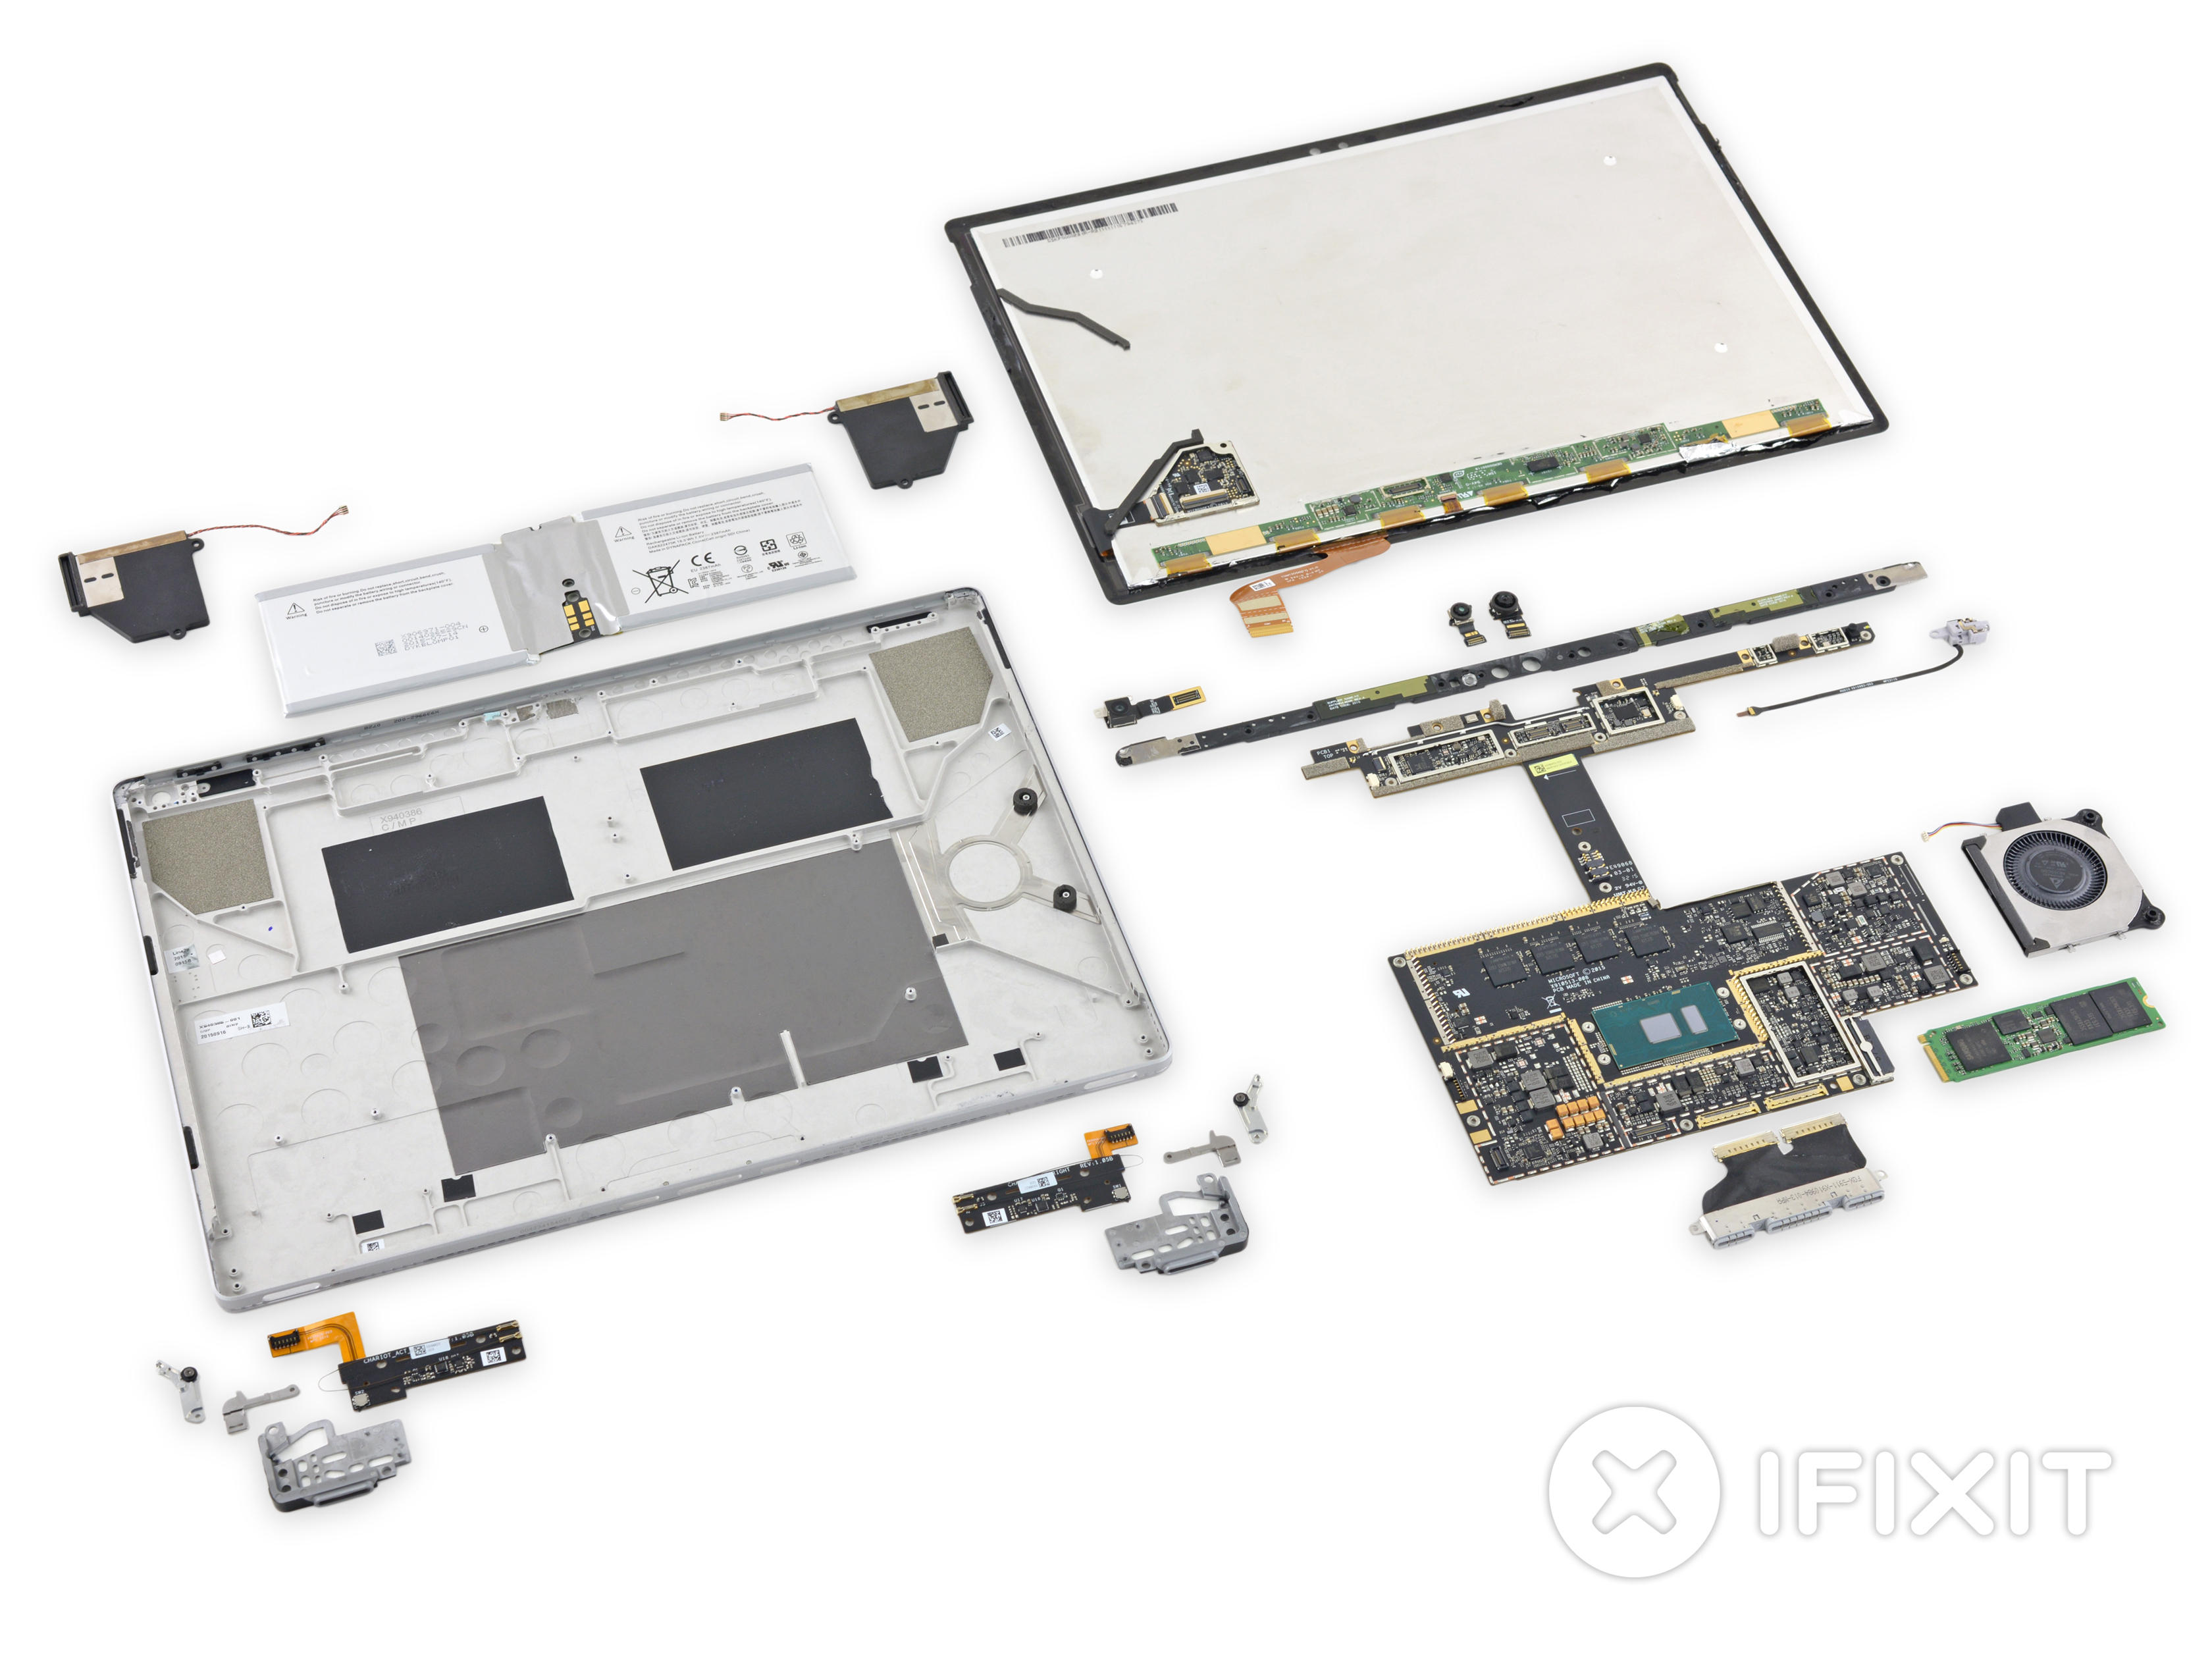
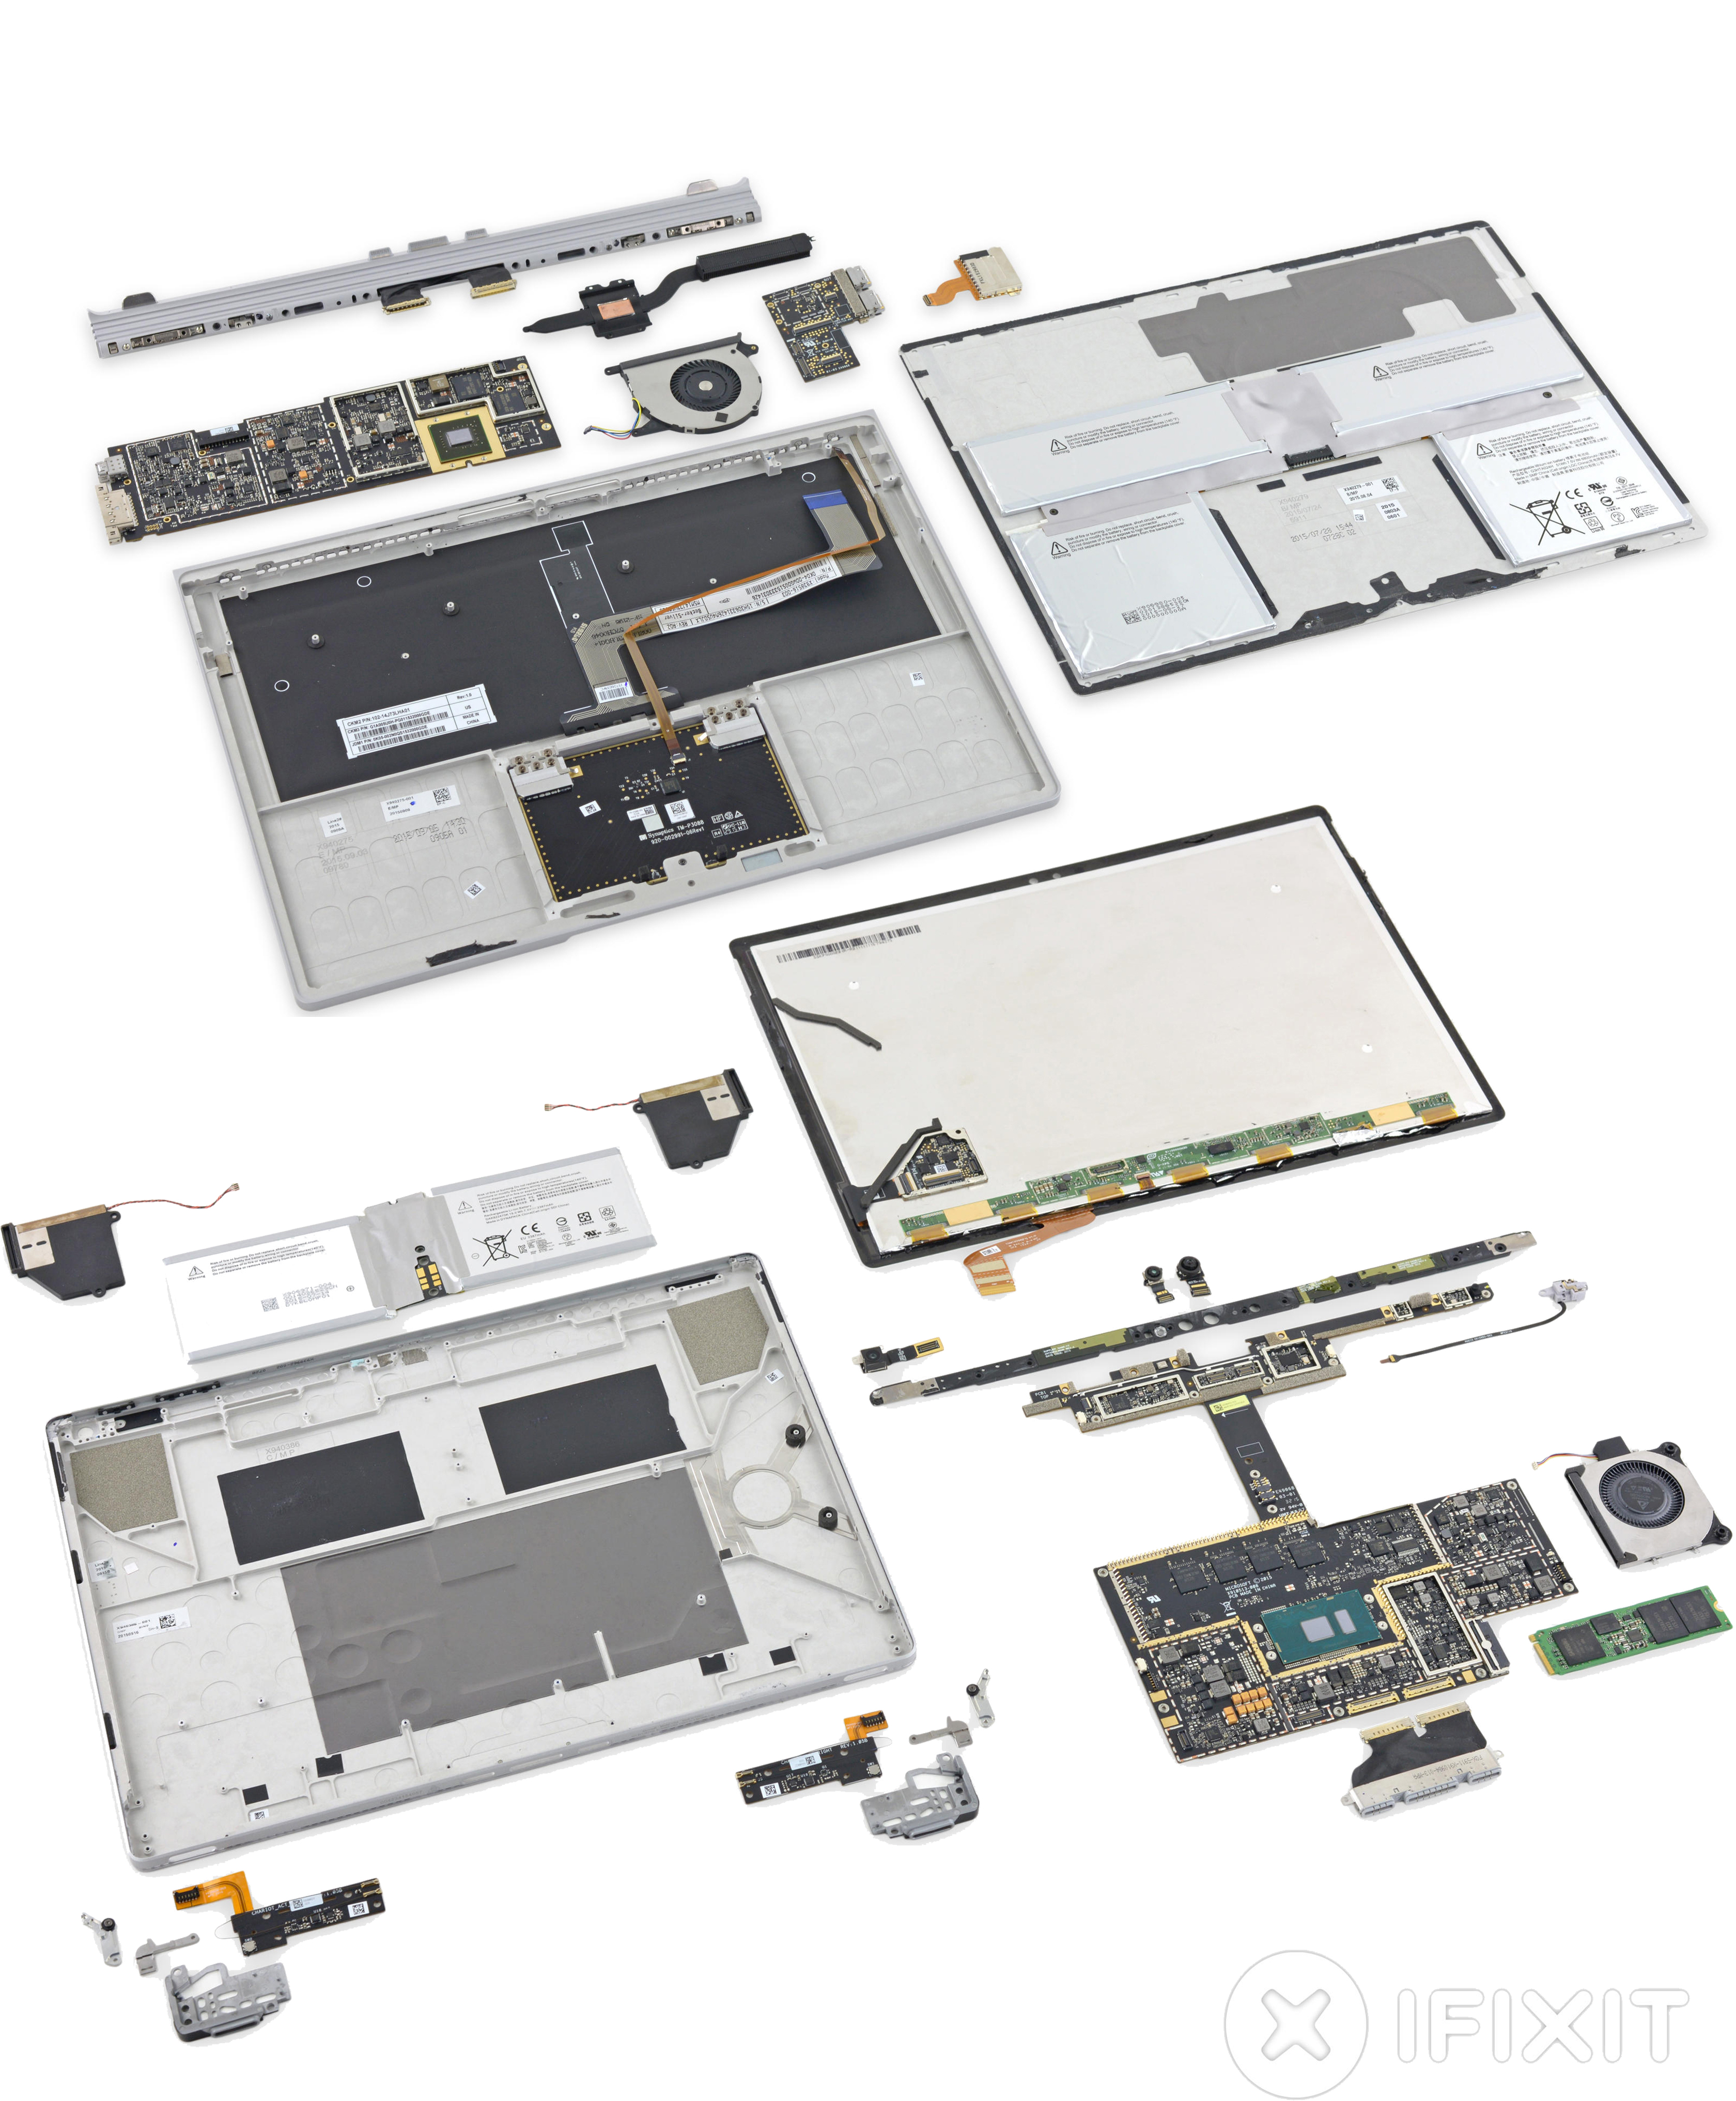
Well, we have completed the dismantling of the Suiface Book by half, and the dismantling of the screen part is over here. Here is a screen part of the family picture. Do not worry, Surface Book is different from Pro 4, its keyboard part hides the biggest highlight of the machine - a separate graphics card. Please continue to follow our dismantling to discover the mystery of the Surface Book.
Now start disassembling the keyboard section. We began dismantling from the back, with two rubber anti-slip strips on the back, which we heated first to facilitate separation.

After removing the two anti-slip rubber strips, the edges of the lower panel are hidden below and there are no screws.
There seems to be a lot of glue underneath. We heated up more with soft glue and slowly pryed along the edges of the back panel with paddles.

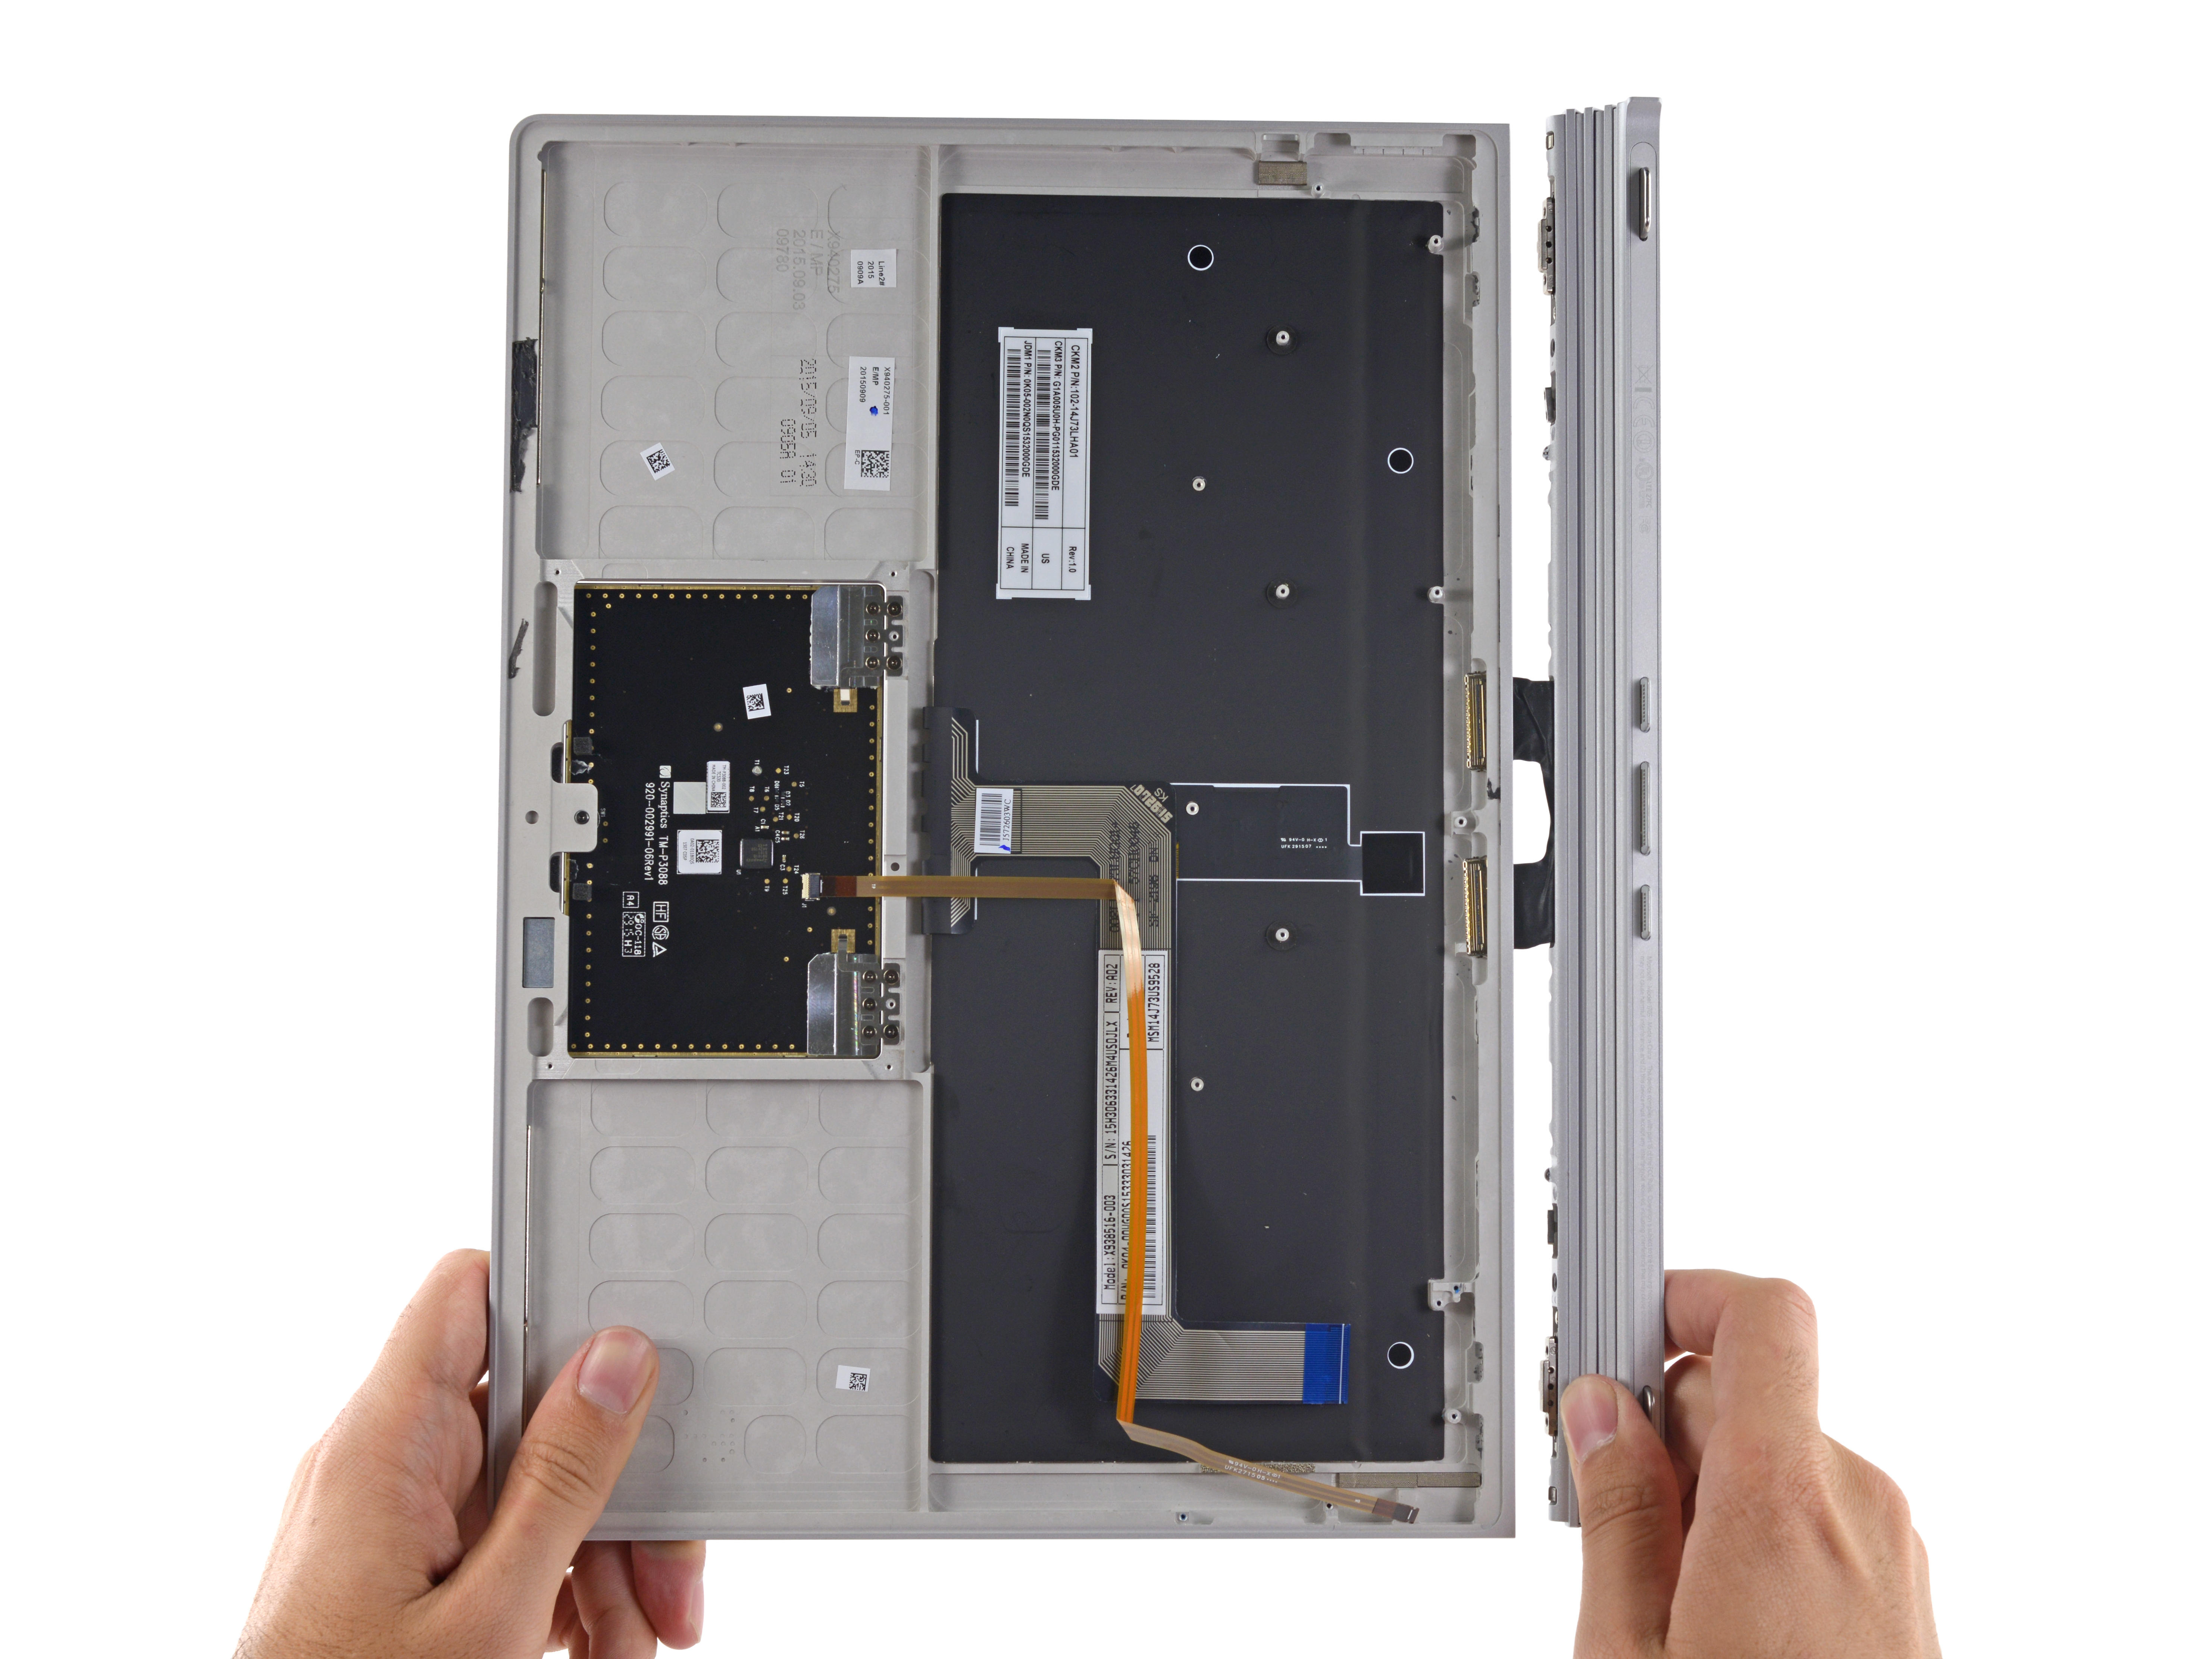
Here we are opening the back panel.

After opening the panel, you can see that a large area of ​​battery has been attached to the back of the panel. This group of batteries adds a total of 51Wh 7.5V total 6800mAh. The battery in the cradle plus the battery in the screen part, a total of 69Wh, ie 9187mAh.
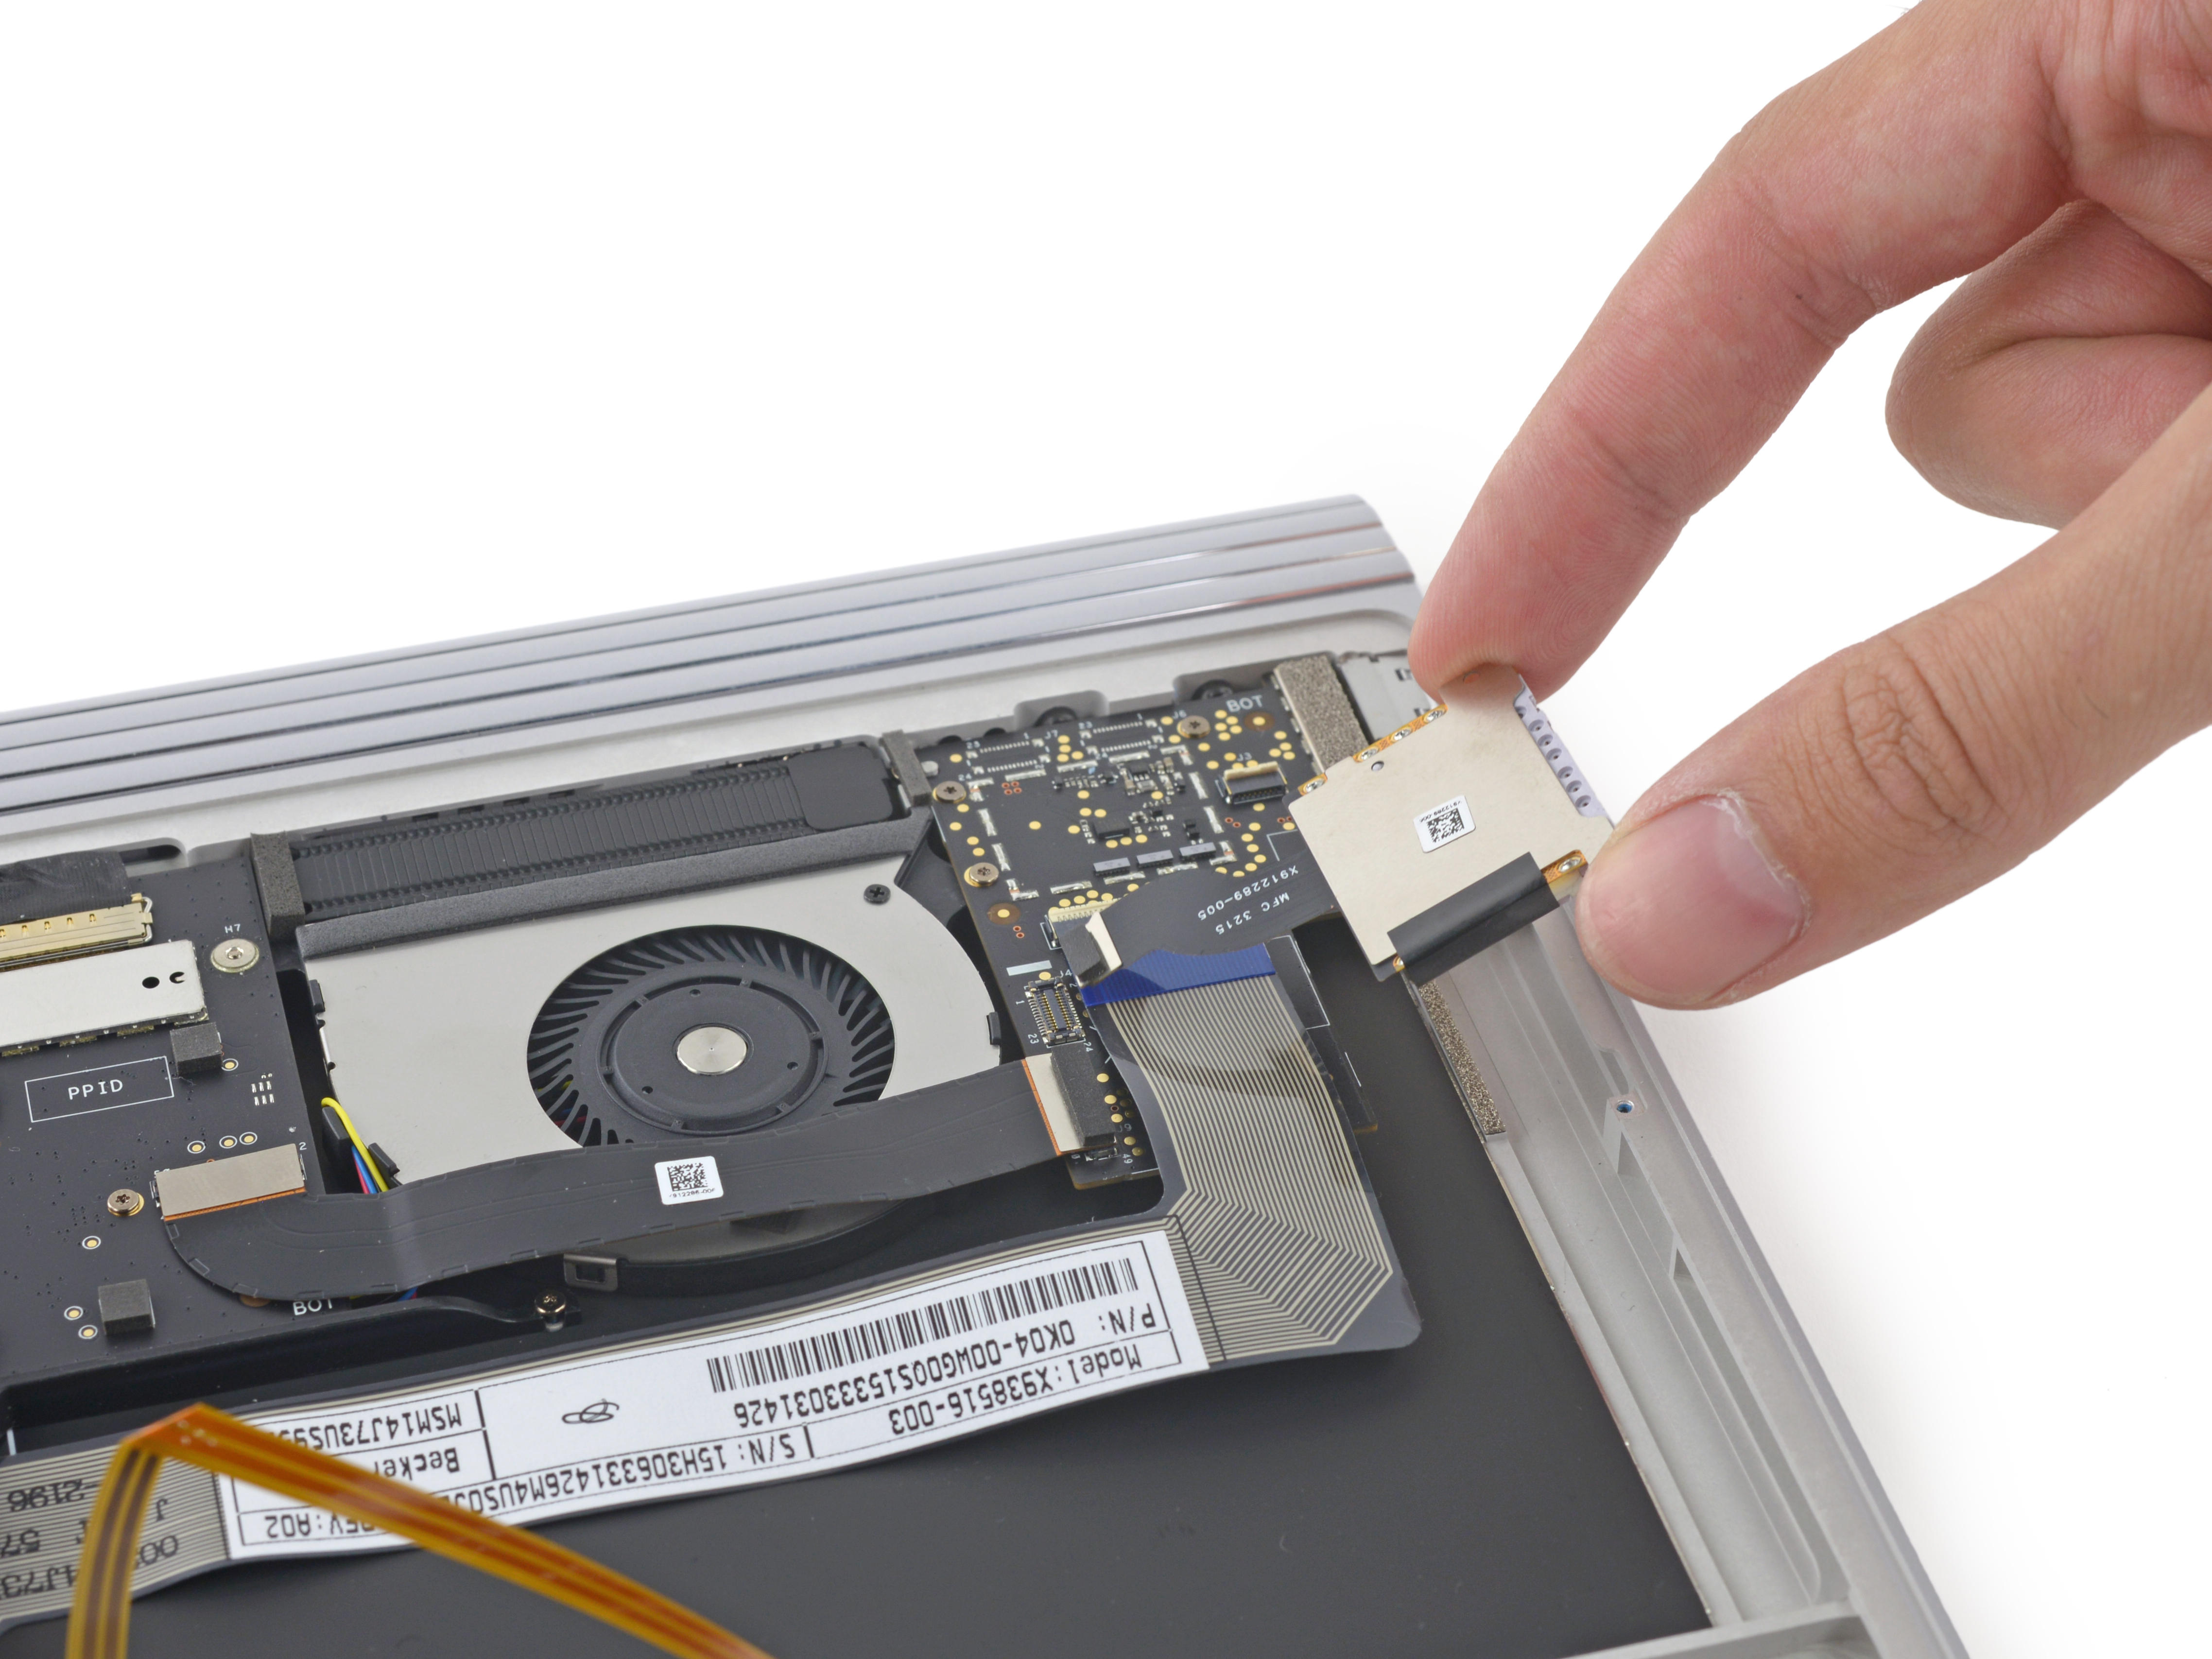
We first removed the SD card reader and removed it to facilitate our further disassembly of the USB control board.
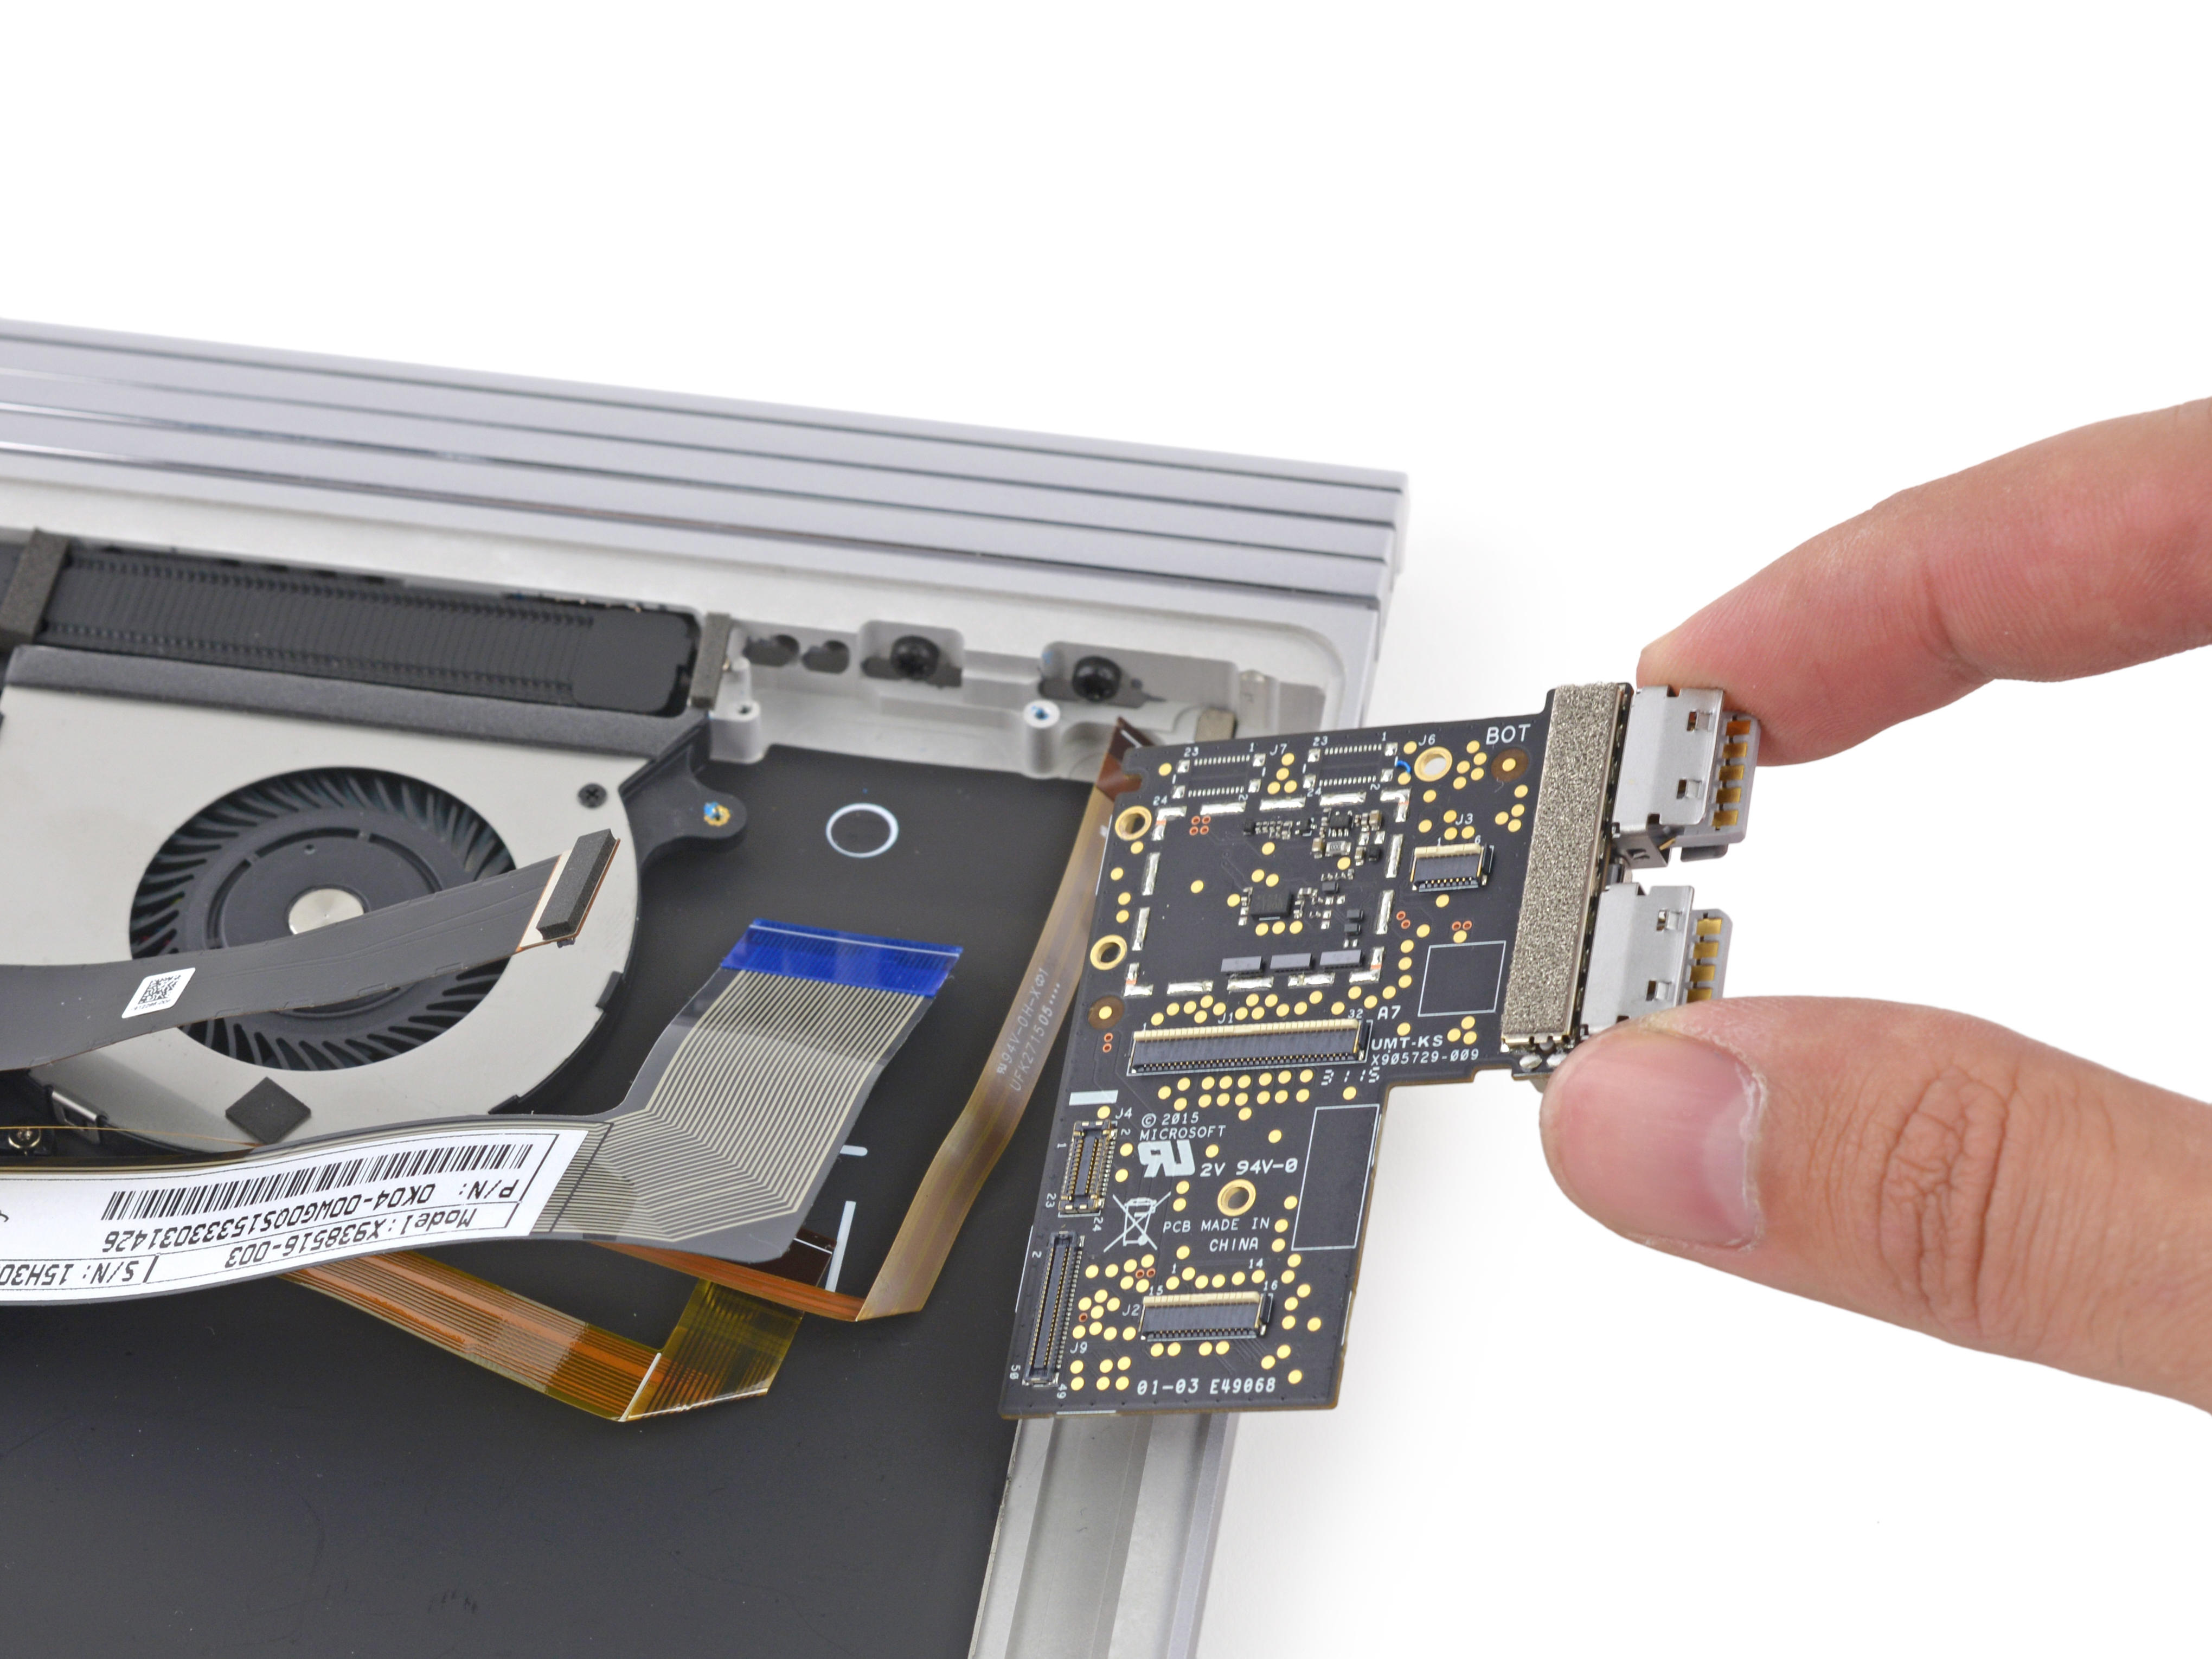
After removing the card reader, we can easily remove the USB control board.
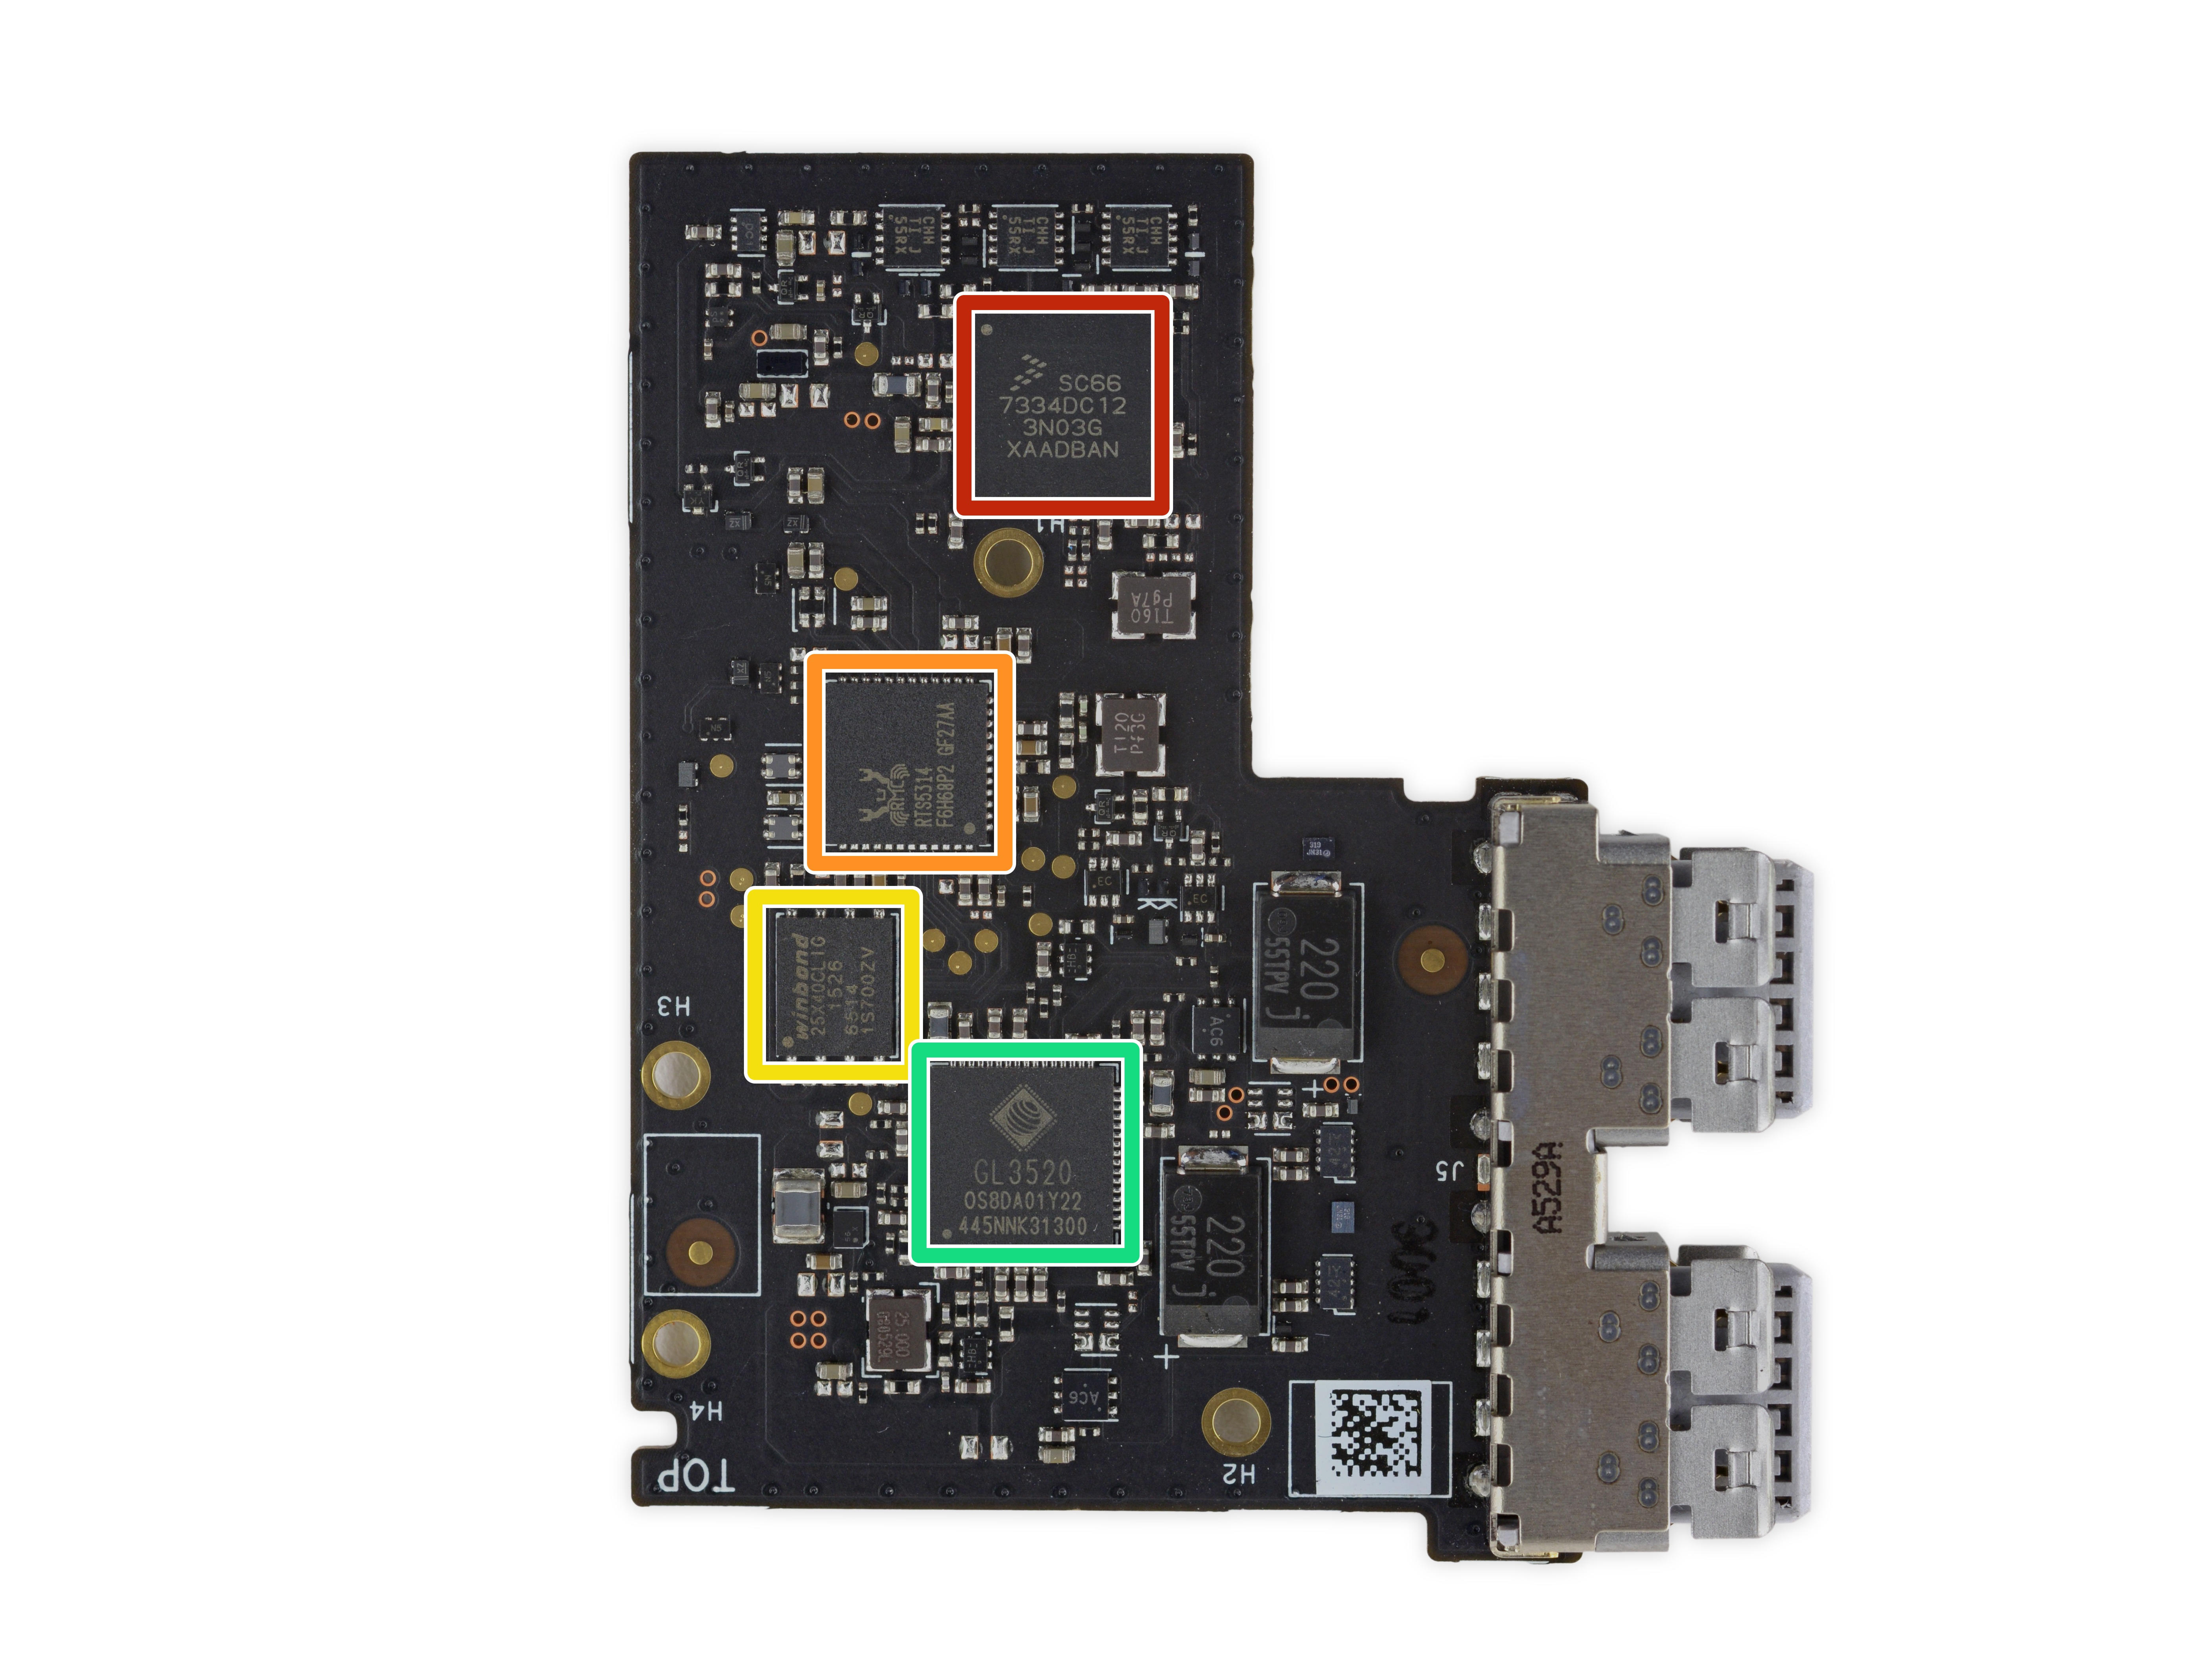
Let's take a look at which chips are assembled above:
Freescale SC66 7334DC12
Ruiqi RTS5314 SD card reader controller
Winbond 25X40CLIG Serial Flash
Genesys Logic GL3520 USB 3.1 Hub Controller

Next we can disassemble the most attractive part of the Surface Book.
After removing the video card, we found that this video card cooler was designed much like a Mac.

The fan on the graphics chip. Different from the passive and active heat dissipation of the processor, the cooling fan on the graphics chip needs a long time to work. It is not known whether the dust will be accumulated after a long time.

After removing the heatsink, let's take a look at this custom Nvidia GeForce GPU. According to the network's reasoning, the GPU's model should be the GeForce 940M. Let's take a look at what chips are on this card:
Red: Nvidia N16S-LG Custom GeForce GPU
Orange: Samsung K4G41325FC 512 MB GDDR5 memory (two 1 GB total)
Yellow: Parade PS8330B Dual Mode DisplayPort V1.2 Repeater
Green: Pericom PI3PCIE PCIe Switch/Multiplexer
Light blue: NXP CBTL06GP213EE six-channel DisplayPort, HDMI and PCI Express multiplexer
Deep Blue: Freescale Kinetis KL17 48MHz ARM Cortex-M0+ Microcontroller

The reverse is very simple and there is no chip.
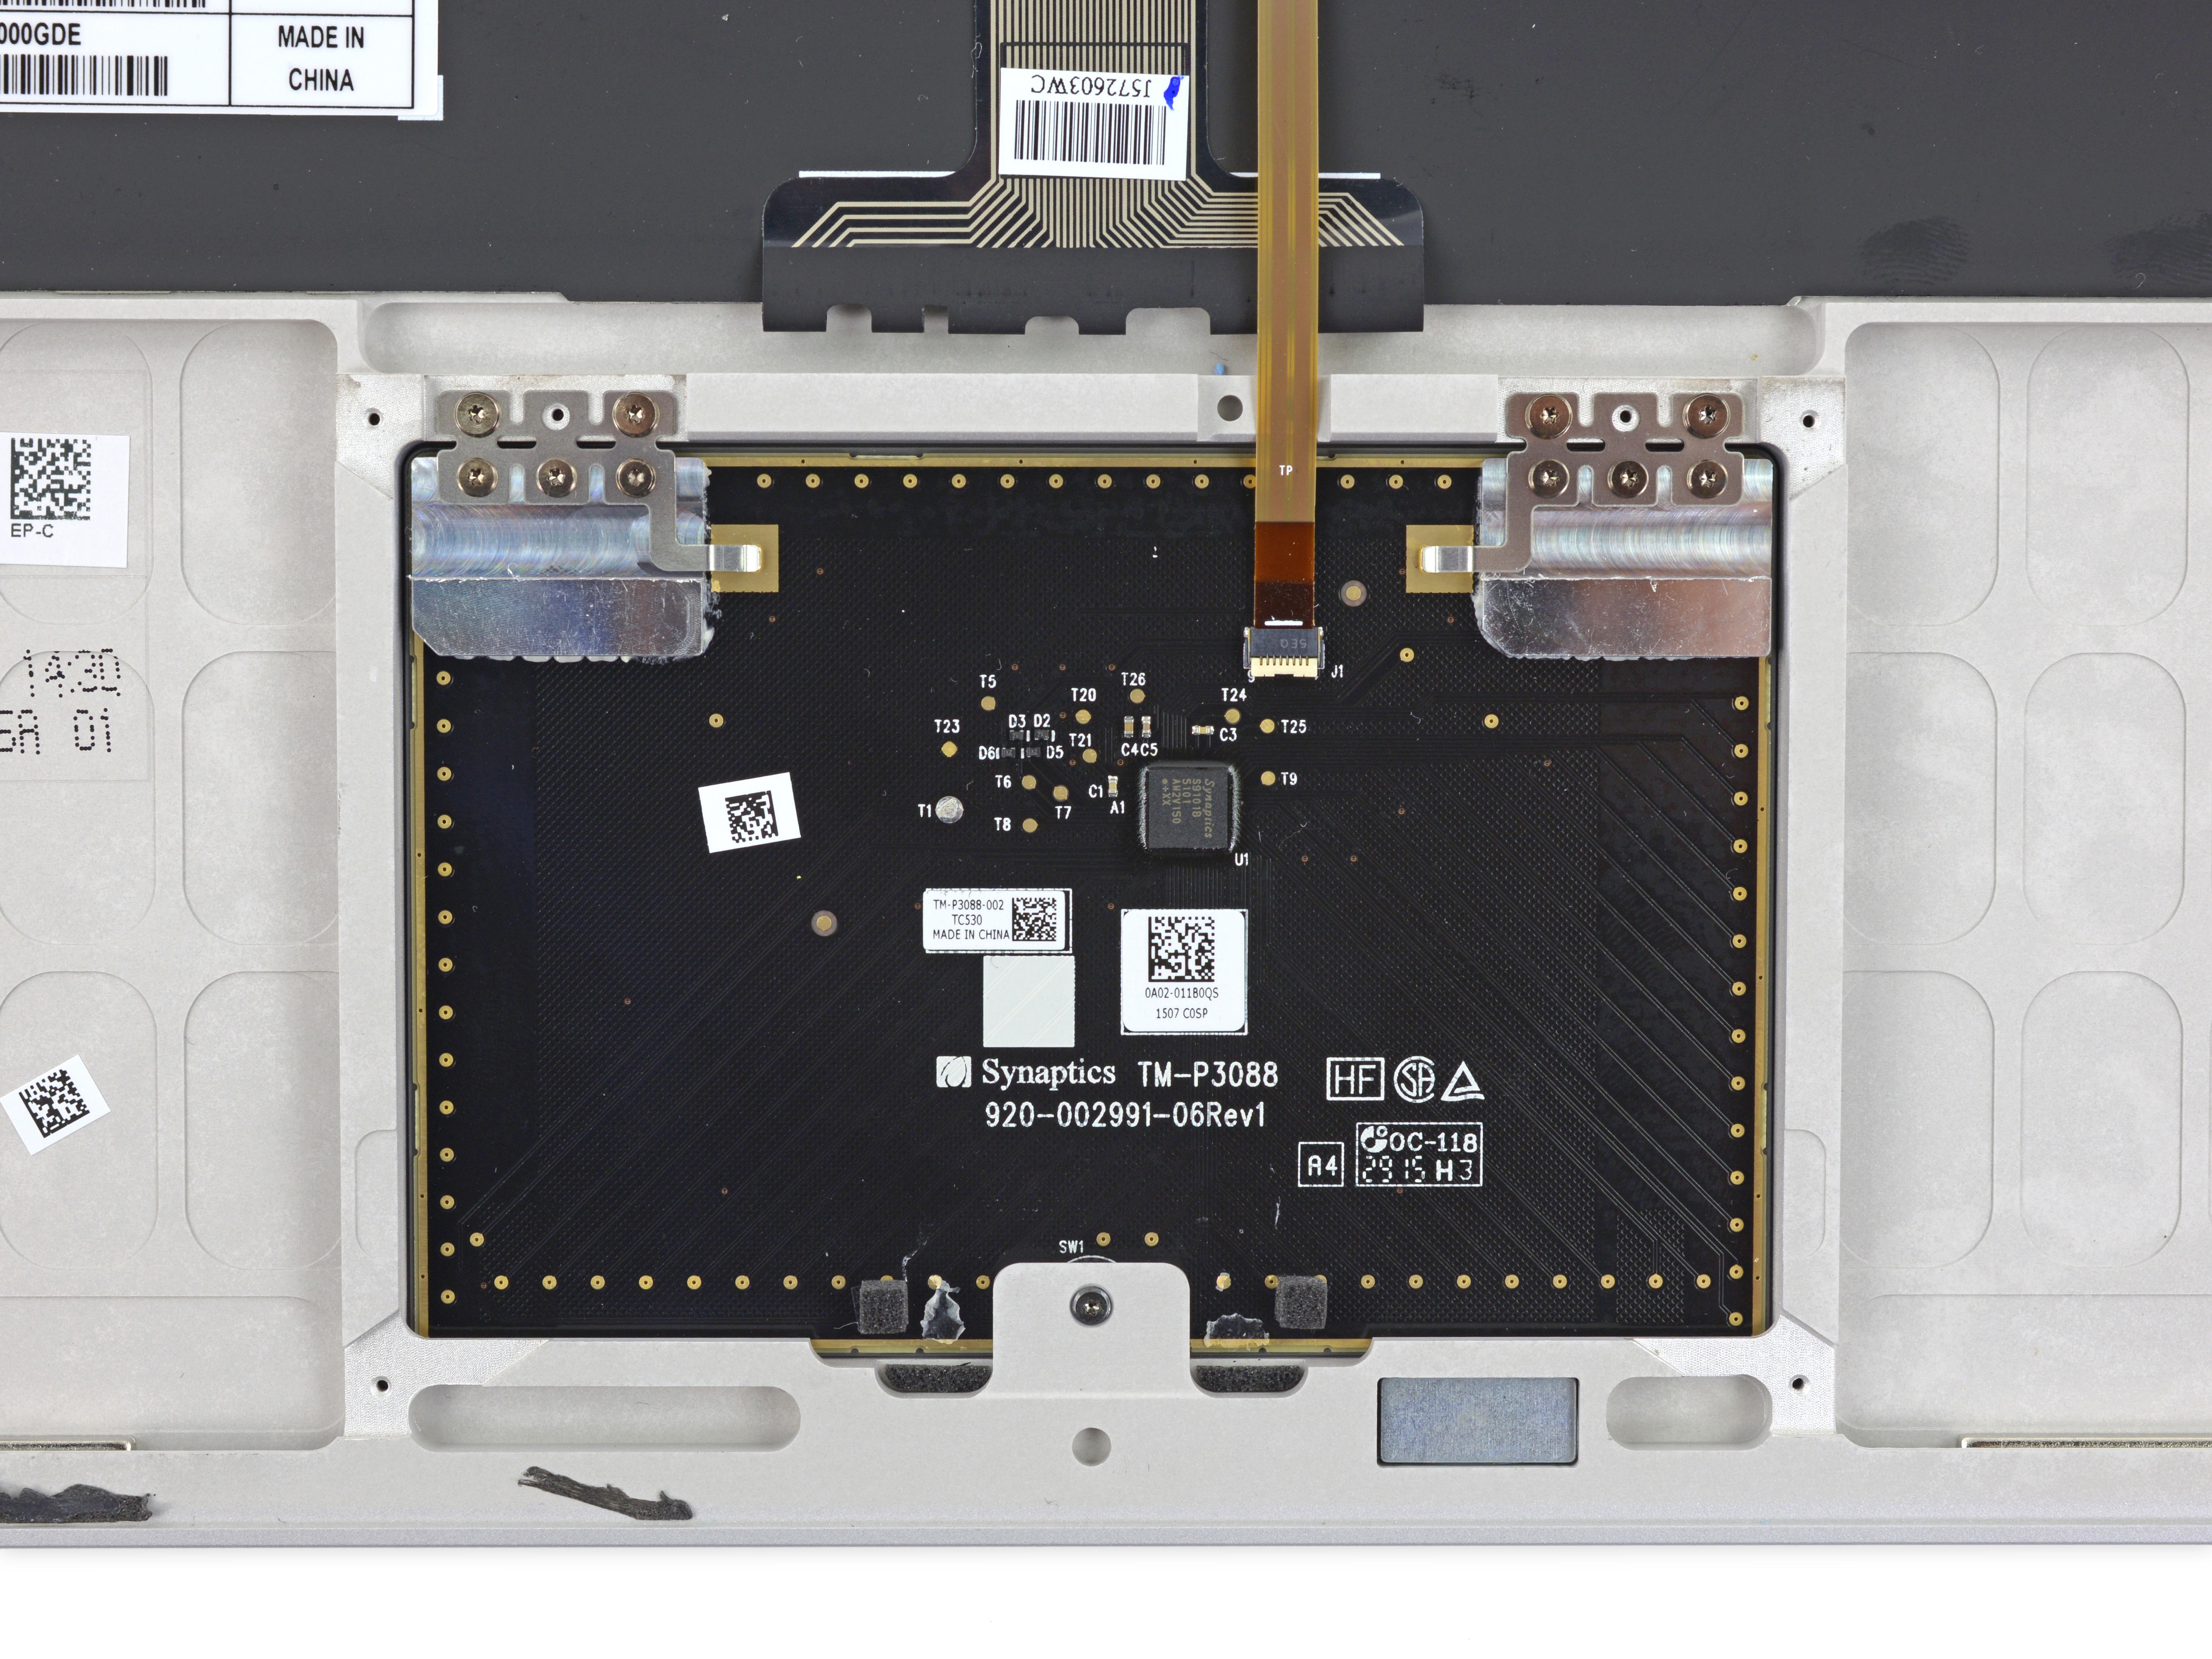
This is the Surface Book's touchpad, provided by Synaptics.
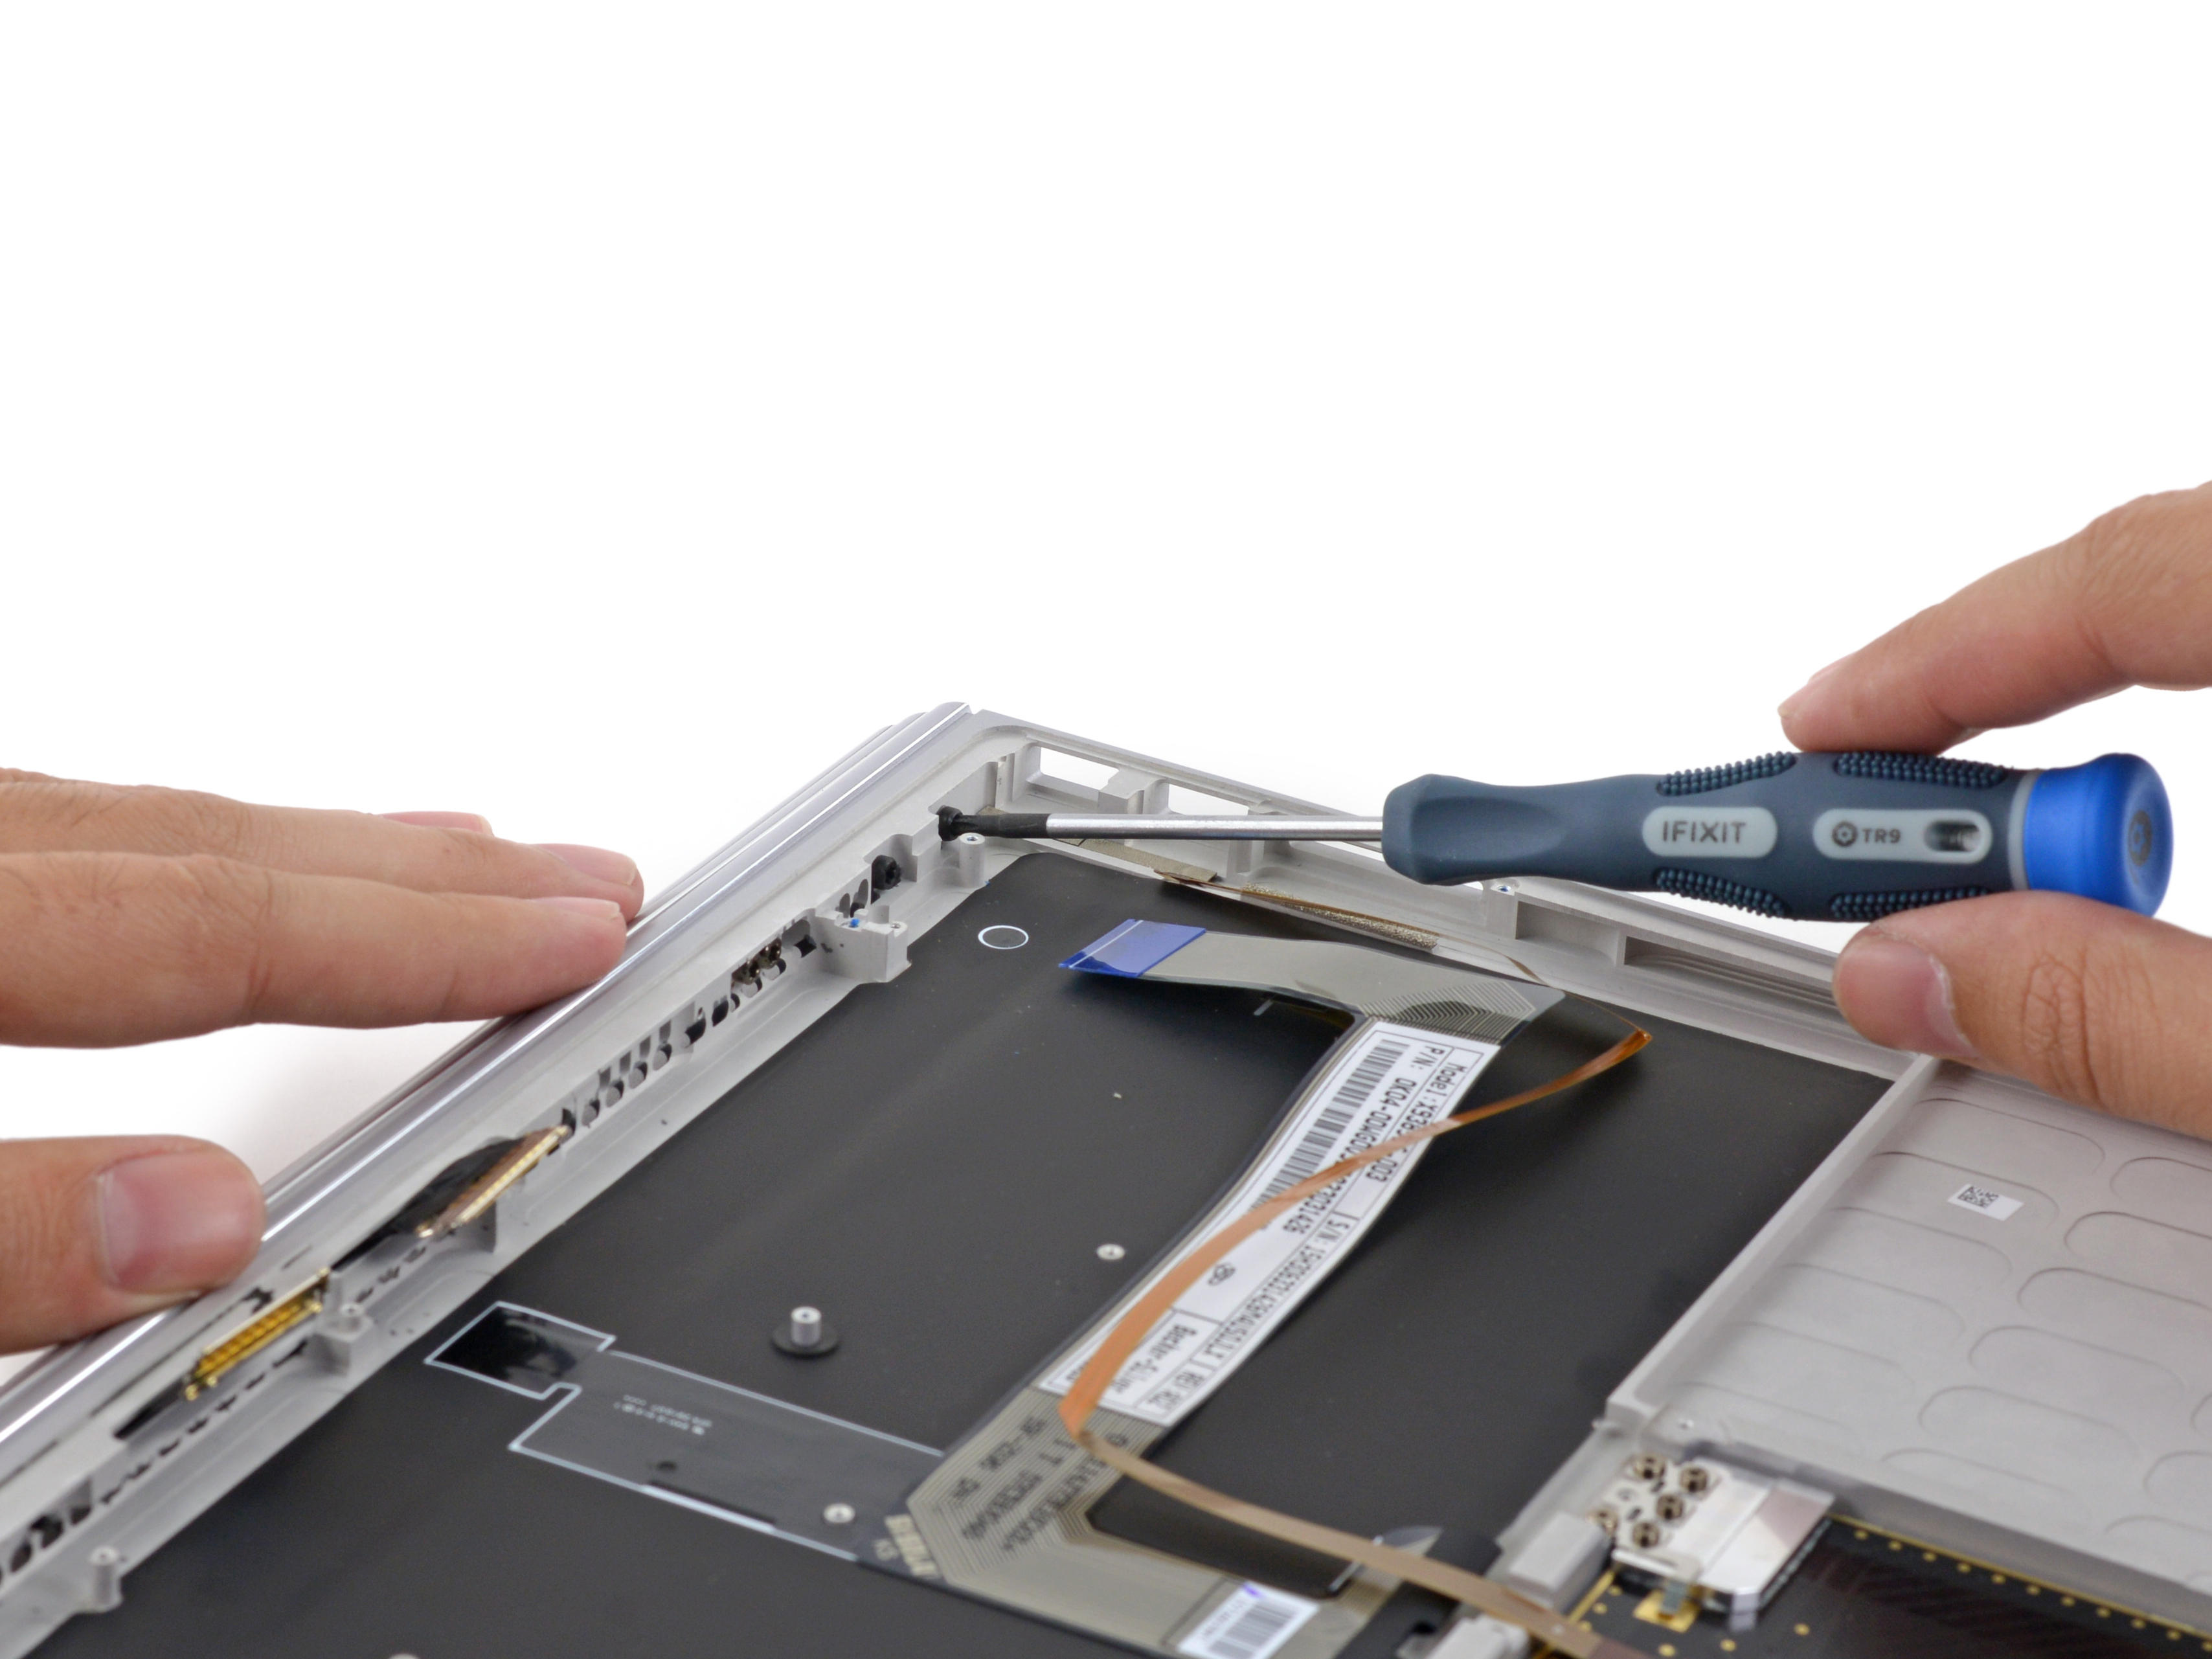
Next we disassembled this controversial segmented hinge hinge and removed it with a screw.
Separate the hinge body of the hinge.
After the fixing screws are separated, there are various interfaces, cables, etc. on the hinge shaft that can be replaced, and it is easy to repair if a failure occurs.
Well, our dismantling is over here, and we'll come back to dismantle the family. iFixit scored 1 point on the maintenance of the Surface Book (10 is the easiest to repair), this score is lower than the Suiface Pro 4 score, maintenance is very difficult, usually such a low score we can only see in the Apple device To. In addition to SSDs that can be replaced, all components including the CPU, GPU, and memory are soldered to the motherboard. They are glued together with a large amount of glue, making it difficult to disassemble the housing. Users are not advised to remove the replacement parts themselves.
(Source: iFixit, Translation: Love Machine)
