
Creating an Arduino project can give you great satisfaction, but many times beginners don't know where to start. There are a lot of things to consider when starting to create a project, and if you don't have the experience to make it, it can be confusing. It is for this reason that we have collected 10 Arduino projects for beginners that anyone can do!
To get you started, it's best to use the Arduino Starter Kit, which includes: Arduino Development Boards, Jumpers, Resistors, Breadboards, LEDs, and Buttons. Some items require additional parts, and we will list the links that can be purchased.
In all of the following projects, we use circuito.io as the BoM (Bill of Materials), wiring guide, and code examples.
Are you ready to start?
Swinging thermometer
For this project, you need an Arduino Uno development board, DS18B20 - single-wire digital temperature sensor and 7-segment serial display.

This thermometer is very simple and requires only basic wiring and code. The logic is very simple: The DS18B20 temperature sensor data is displayed on the 7-segment serial display using Segment.write and ds18b20.readTempC(), then the 7-segment display shows the temperature reading:
sevenSegment.write(ds18b20.readTempC());
Swing settings now: We use Sugru to glue parts together. It is a lot of color and it is very strong. You can also see that in the final version, we replaced the standard breadboard with a perforation, but this is not required.
In our Hackster.io project: https://, you can find all the details on how to build the project yourself.
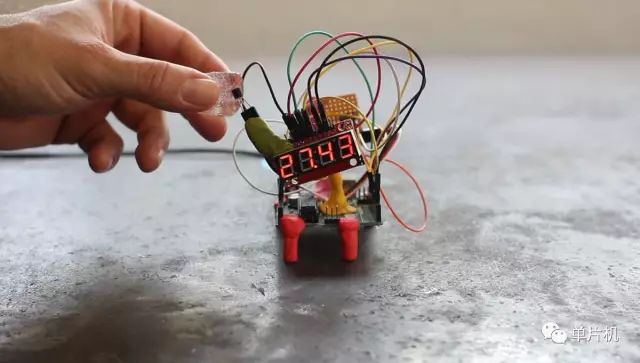
2. How fast can you drink?
The components we use in this project are the Arduino Uno, FSR (Pressure Sensing Resistor), push buttons, piezoelectric speakers, and 7-segment display.
This is a nice little project we did for St. Patrick's Day. As you can see, we use the same serial 7-segment display, but this time it is not the temperature but the display time. The pressure sensor detects the weight of the cup on the coaster. Once it is removed, the sensor will detect the change in weight and start timing on the 7-segment digital tube. When it detects that the cup is back on the coaster, the counter stops and the piezoelectric speaker is triggered to play the tune. With the button reset time, you can do the second item.
We have all the details of the project in the Hackster.io project. Hackster.io Project Link: Chug Meter for St. Patrick's Day: https://
3. Monitoring air pollution
For this project, you will need an Arduino Uno development board, MQ7 carbon monoxide sensor, and common anode RGB LED indicators.
The carbon monoxide sensor detects the level of CO gas concentration in the air by changing the color of the RGB LED from green to red (red = poor air quality, green = good air quality), and indicates the air quality. This project is a bit complicated because it needs to weld the MQ7 sensor to the packet board, but this is really no big deal, so you don't have to worry. Once you are over this small obstacle, you will encounter the map function in your code, which is very useful in different Arduino projects because it remaps numbers from one range to another. In this case, the range from the MQ7 sensor to the RGB LED is 0-255. If you're ready to get started, check out our Hackster Tutorial: https:// for full details.
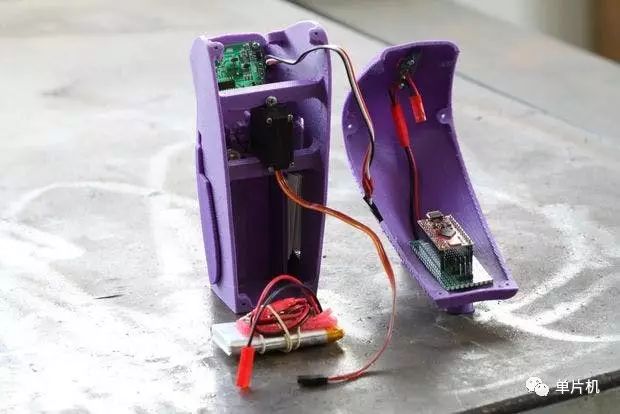
Thirsty flamingos
Thirsty flamingos are great items on another journey. It will help you monitor the plant's moisture content using the Sparkfun soil moisture sensor.
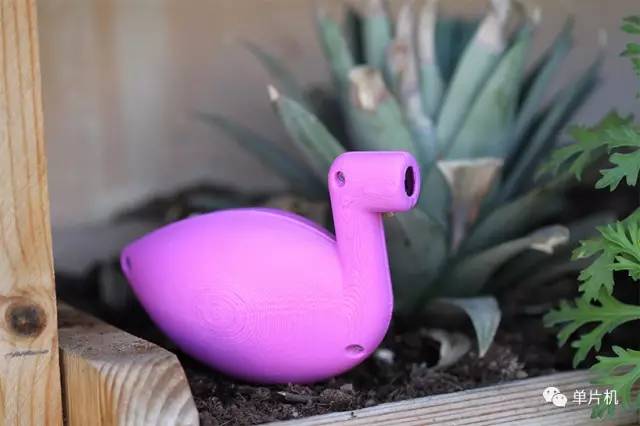
To start the project, you can generate a request at circuito.io, using the SparkFun soil moisture sensor as the input, and the piezoelectric speaker as the output.
As mentioned above, you will also need to add other components to your project that will be automatically added to the BoM section in the circuito.io reply to make your life easier. Use a step-by-step guide to assemble the circuit, then upload and customize the code.
The next step involves printing the body of Thirsty Flamingo using an STL file. You end up assembling everything by putting the PCB and battery in place and twisting the two body parts together. Place thirsty flamingos in your plant tray and make a buzz when the moisture content becomes low.
5. Recycling robot arm
As a maker, you also need to learn to use your own materials and reduce project costs.
In the electronics sector, it is time to introduce servo metal gears. The servo system integrates gears and axes that can be controlled within 180 degrees. We will introduce this topic in a future article. In this specific project, we used three universal metal gear servo systems:
1 for moving the arm left and right
1 for moving the arm up and down
1 for arm clamp
To control the steering gear, we used a 2-axis joystick consisting of two potentiometers and a button. We mapped the joystick value (using the map function again) so that the joystick x axis moves one of the servos from right to left (0-180 degrees). The y-axis of the joystick moves different servos up and down (0-180 degrees). The fixture server has two positions: 180 degrees - indicates that the fixture is closed and 0 indicates that the fixture is open. The joystick button toggles between these predetermined positions. For more details see: Robotic Arm from Recycled Materials: https://?ref=channel&ref_id=27041_trending___&offset=17
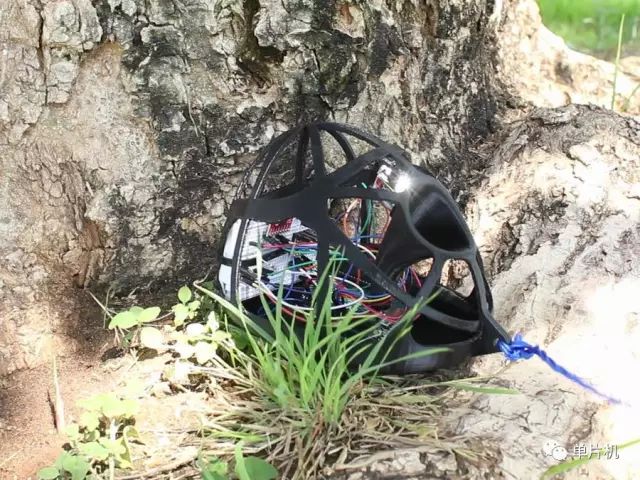
6. Flying manatees
A very interesting area of ​​technology is the motion detector. This Arduino project will enable you to create a manatee that shakes its wings as a response to the action.
In the planning phase, you only need a power supply, a microcontroller like the Arduino Pro micro 5v, and two components: PIR motion sensors and servo motors. After finishing the circuit and adjusting the code, you can print this beautiful shell for your Manatee 3D by following the provided steps and instructions or using the STL archive in the Hackster.io project.
All you need to do now is place the battery and development board in place and twist the body parts together. Bring your flying manatee to your door or any other place. When any movement is detected, it will open the wings.
7. 34Five Arduino Pets
Another thing you can make when you enter the microcontroller and code world is this kind of electronic pet that reacts to acceleration. We admit that this is a strange and weird project, but it has a lot of buzz. What's the matter with some fun?
You need to select an accelerometer for input, an Arduino Uno controller, a battery for the power supply, and a piezoelectric speaker for output. After you click Generate and put the circuits together, you can use the STL file 3D to print the pet's body. Before you know, you will have a stunning 34five Arduino pet, you can go for a walk and you will be amazed at how much you have done. The complete tutorial is at Hackster.io: https:// so you can access more details.
8. Drone air door
Drones have become very popular recently and you can use drones to take your game time to a new level and use this interactive air door. For this project, you need to include the HC-SRO4 ultrasonic sensor, 9v battery, Sparkfun Arduino Pro mini controller and common anode RGB diffuse light.

Drones are great for practicing your flying technique. The ultrasonic sensor detects the proximity of the drone and changes the light from red to green. Create as many air doors as possible, and build a barrier through them to meet your friends. It's really fun. Trust us. As always, you have complete instructions at the community center on Hackster.io.
9. A useless Arduino gift box
If you have reached this goal, you should reward a Giftduino!
Having fun is also an important part of the Arduino Maker World, and there is no problem creating a project without purpose.
The interesting component you can use is the A1302 Hall sensor. The sensor works on the principle of the Hall effect, which means it responds to differences in the magnetic field. Therefore, in order to activate the Hall sensor in this project, we place the magnet on the lid of the box. When the box is open, the piezo speaker starts playing the track and the screen shows the gift box (or whatever you like). In this project, you can see that instead of using a breadboard, we use an Arduino Prototype Expansion Board. We will not introduce this topic in this article, but we will definitely explain it in a future post. At the same time, you can create your own Giftduino according to this tutorial. Link address: Giftduino - The Perfect Arduino Gift Box: https://
10. Nespresso capsule coffee detector
The love for coffee is universal, and the Nespresso capsule coffee detector can be an amazing gadget to help you choose capsule coffee.
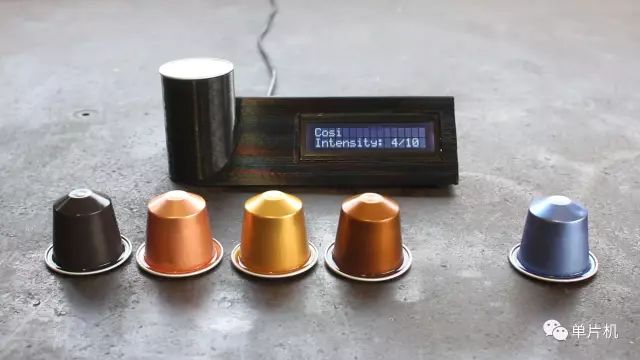
The operating mechanism of this project is that the RGB light sensor reads the brightness levels of the red, green, and blue channels and sends it to the Arduino, which will recognize your capsules based on a predefined code value. In this case, circuito.io is still important in helping you get every step you need from each step. The required components include RGB light sensor, Arduino pro mini, wall adapter, power supply and serial LCD. The Circuitito material, schematics and code are automatically generated and you will be able to put them together. Follow the instructions in our Hackster.io tutorial to add the circuit and encode it before the 3D printing capsule container. Assembled together, hey, you have a Nespresso capsule detector.
So now that you have more information about how this whole Arduino thing works, it's time to start! Take a moment to prepare your work environment and make sure you have everything you need before sitting down to work. The first few projects may be challenging but it opens up a world of creative possibilities! It's amazing!
Full range speaker:
Speakers with working frequency response range from 150~15000Hz are called full range speakers.


FAQ
Q1. What is the MOQ?
XDEC: 2000pcs for one model.
Q2. What is the delivery lead time?
XDEC: 15 days for normal orders, 10 days for urgent orders.
Q3. What are the payment methods?
XDEC: T/T, PayPal, Western Union, Money Gram.
Q4. Can you offer samples for testing?
XDEC: Yes, we offer free samples.
Q5. How soon can you send samples?
XDEC: We can send samples in 3-5 days.
Full Range Speaker,Full Range Loudspeakers,Range Speaker,Small Full Range Speakers
Shenzhen Xuanda Electronics Co., Ltd. , https://www.xdecspeaker.com