
There was a time when upgrading the Linux kernel was frightening for many users. At that time, upgrading the kernel contained many steps and it also required a lot of time. Kernel installation can now be easily handled by a package manager such as apt. By adding a specific repository, you can easily install experimental or specified versions of the kernel (such as the real-time kernel for audio products).
Considering that since upgrading a kernel is so easy, why don't you want to compile one yourself? Here are some possible reasons:
You want to simply understand the process of compiling the kernel
You need to enable or disable specific options in the kernel because they do not appear in the standard options
You want to enable hardware support that may not have been added in the standard kernel
The distribution you are using requires you to compile the kernel
You are a student, and compiling the kernel is your task
For whatever reason, knowing how to compile the kernel is very useful and can be considered as a right of way. When I first compiled a new Linux kernel (which was a long time ago) and then tried to boot from it, I felt a certain excitement from it (the system immediately crashed and then constantly tried and failed).
In this case, let's experiment with the process of compiling the kernel. I will use Ubuntu 16.04 Server to demonstrate. After running a regular sudo apt upgrade, the currently installed kernel version is 4.4.0-121. I want to upgrade the kernel version to 4.17. Let's start with caution.
There is a warning: It is highly recommended that you experiment with this process in a virtual machine. Based on the virtual machine, you can always create a snapshot and then easily exit from any problem. Do not use this method to upgrade the kernel on the production machine unless you know what you are doing.
Download the kernel
The first thing we need to do is download the kernel source code. Find the URL of the desired kernel you want to download at Kernel.org. After finding the URL, use the following command (I use the 4.17 RC2 kernel as an example) to download the source file:
Wget https://git.kernel.org/torvalds/t/linux-4.17-rc2.tar.gz
There are some things to consider during the download.
Installation required environment
In order to compile the kernel, we must first install some necessary environment. This can be done with one command:
Sudo apt-get install git fakeroot build-essential ncurses-dev xz-utils libssl-dev bc flex libelf-dev bison
It's important to note that you will need at least 128GB of local free disk space to complete the kernel compilation process. So you must ensure that there is enough space.
Decompression source code
In the folder where the newly downloaded kernel is located, use this command to decompress the kernel:
Tar xvzf linux-4.17-rc2.tar.gz
Use the command cd linux-4.17-rc2 to enter the newly generated folder.
Configure the kernel
Before we officially compile the kernel, we must first configure which modules need to be included. In fact, there are some very simple ways to configure. With one command, you can copy the current kernel configuration file and use the reliable menuconfig command to make any necessary changes. Use the following command to complete:
Cp /boot/config-$(uname -r).config
Now that you have a configuration file, enter the command make menuconfig. This command will open a configuration tool (Figure 1) that allows you to loop through each available module and then enable or disable the modules you need or do not need.
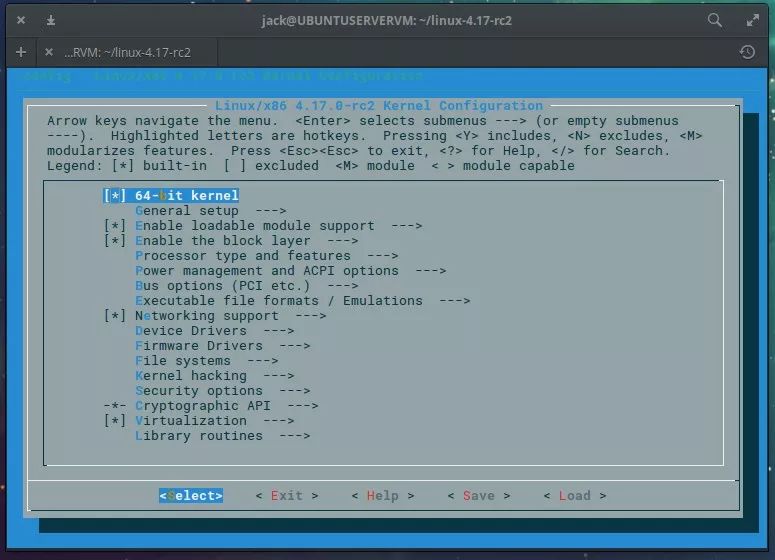
Figure 1: Make menuconfig in action
It is very likely that you will disable an important part of the kernel, so step through it carefully during menuconfig. If you are not sure about an option, don't worry about it. Or a better way is to use the configuration file of our currently running kernel (because we know it works). Once you have traversed the entire configuration list (it is very long), you are ready to start compiling.
Compiling and installing
It is time to actually compile the kernel. The first step is to use the make command to compile. Call the make command and answer the necessary questions (Figure 2). These issues depend on the existing kernel you are upgrading and the upgraded kernel. Believe me, there will be a lot of questions to answer, so you have to set aside a lot of time.
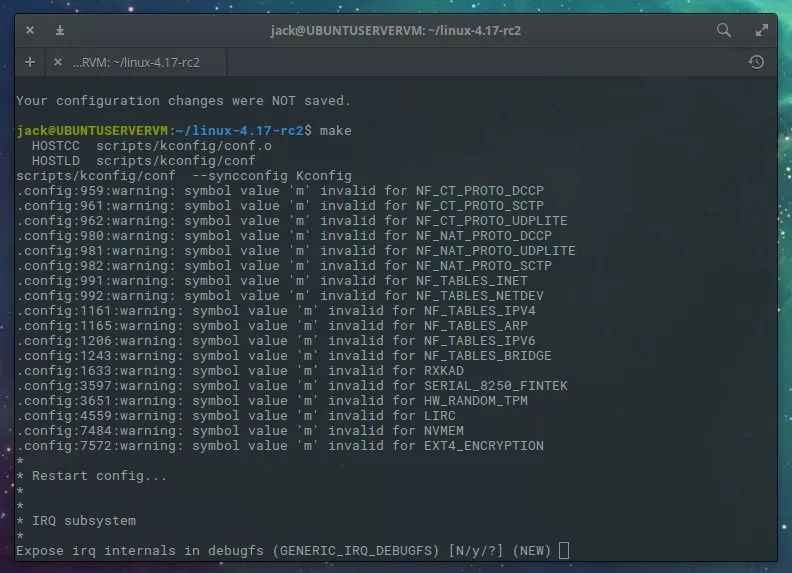
Figure 2: The answer to the make command
After answering the lengthy questions, you can install the previously enabled modules with the following command:
Make modules_install
Again, this command will take some time, so either sit down and watch the compiled output, or do something else (because your input is not needed during compilation). It may be that you want to perform other tasks (unless you really like to watch the output on the terminal interface).
Now we use this command to install the kernel:
Sudo make install
Once again, another command will cost a considerable amount of time. In fact, the make install command will take more time than the make modules_install command. Go for lunch, configure a router, install Linux on some servers, or take a nap.
Enable kernel as boot
Once the make install command completes, it is time to enable the kernel as the boot. Use this command to achieve:
Sudo update-initramfs -c -k4.17-rc2
Of course, you need to replace the above kernel version number with your compiled one. After the command is executed, use the following command to update grub:
Sudo update-grub
Now you can restart the system and select the newly installed kernel.
Congratulations!
You have compiled a Linux kernel! It is a time-consuming activity; however, in the end your Linux distribution will have a custom kernel, and you will also have an important skill that many Linux administrators tend to ignore.
After reading this article have a harvest? Please share with more people
Bag Making Machine,Two-Channel Bag Making Machine,Pearl Cotton Bag Making Machine,Flat Pocket Bag Making Machine
Dongguan Yuantong Technology Co., Ltd. , https://www.ytbagmachine.com